


INSTRUCTION SHEET NO.
A0300 Page 2of 2
READ AND UNDERSTAND THESE INSTRUCTIONS BEFORE INSTALLING FIXTURE.
This fixture is intended for installation in accordance with the National Electrical Code and local or Federal
code specifications. To assure full compliance with codes and regulations, check with your local electrical
inspector before installation. To prevent electric shock, turn off electricity at fuse box before proceeding.
Retain these instructions for maintenance reference.
D. TRANSFORMER REPLACEMENT 50W UNIT NO. 8613, 75W UNIT NO.8603:
CAUTION: TURN POWER OFF AT THE FUSE BOX BEFORE PROCEEDING.
8. Snap CANOPY cover off and loosen the two long SCREWS to
disengage the BOTTOM PLATE (Fig.3. 4 & 5).
9. Insert the JACK ASSEMBLY into the ceiling or wall clear of the
transformer.
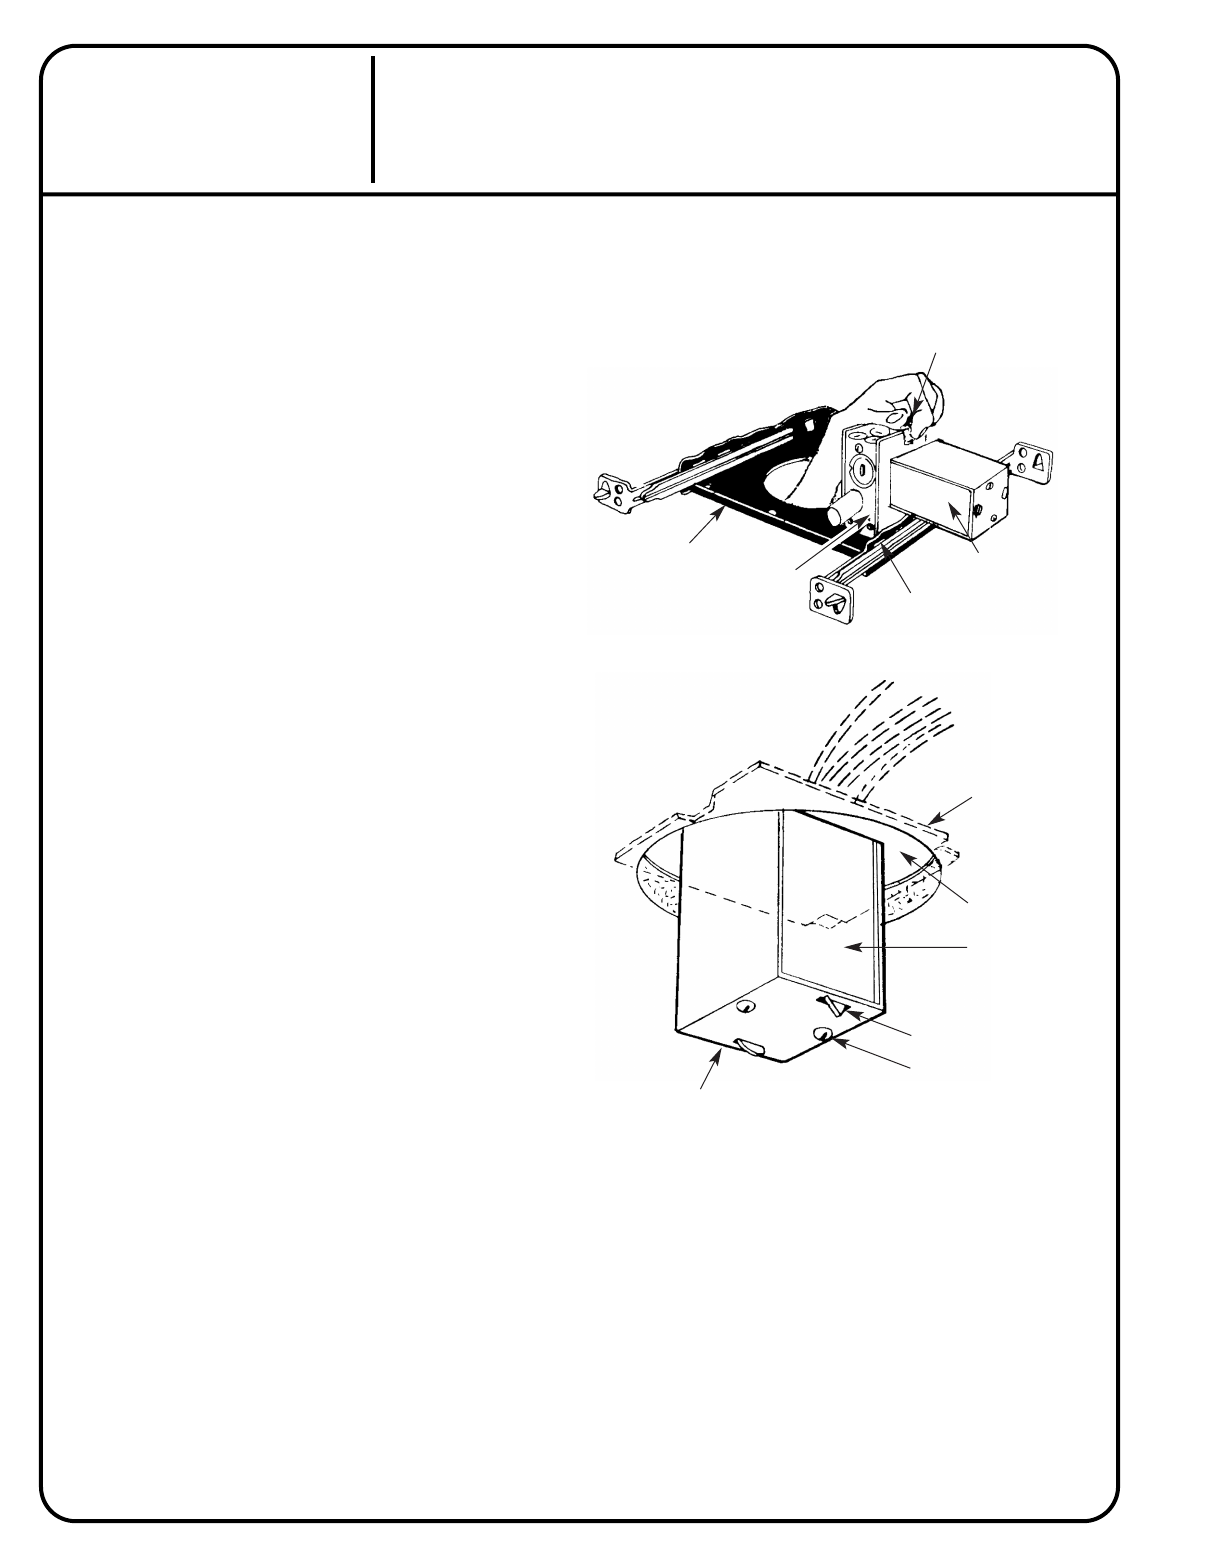
10. Remove the nearest J-BOX COVER by lifting the SPRING LATCH (Fig.6)
11. Disconnect the wiring in the J-BOX.
12. Disengage the TRANSFORMER ASSEMBLY from the J-BOX by pulling
up on the SPRING LATCH.
13. Pull the TRANSFORMER ASSEMBLY out through the opening (Fig. 7).
14. Separate the TRANSFORMER from the J-BOX COVER by straightening
the bent TABS and removing the SCREWS from the U-BRACKET.
15. Install the new transformer in the U-BRACKET and J-BOX COVER and
rebend the TABS.
16. Move the TRANSFORMER ASSEMBLY back to the far side of the
J-BOX and snap in place.
17. Re-connect the wires:
A. Splice the transformer leads (75W-RED, 50W. YELLOW) to the leads
from the JACK ASSEMBLY.
B. Splice the transformer BLACK lead to the thermal protector BLUE lead.
C. Splice the transformer and the thermal protector WHITE leads to the
supply common lead.
D. Splice the thermal protector BLACK lead to the supply BLACK lead.
18. Replace J-BOX COVER.
19. Re-assemble per steps 5, 6, & 7.
IS:8603
TRANSFORMER
ASSEMBLY
J-BOX COVER TAB (2)
AND SLOT
J-BOX COVER
CEILING OR WALL
OPENING
TRANSFORMER
ASSEMBLY COVER
TABS (2)
SCREWS (2)
U-BRACKET
J-BOX
FRAME
SPRING LATCH
Fig. 6
Fig. 7