LIGHTOLIER a GENLYTE company.
631 Airport Road, Fall River, MA 02720
(508) 679-8131 FAX (508) 647-4710 © 1995
7. Position Backplate over Crossbar allowing Crossbar Mounting
Screws to come through Holes in Backplate. Secure Backplate
in position by installing (2) Battery Nuts over Crossbar Mounting
Screws and tighten.
8. If using Auxiliary Mounting Knockout, install the appropriate
hardware determined in step 3.
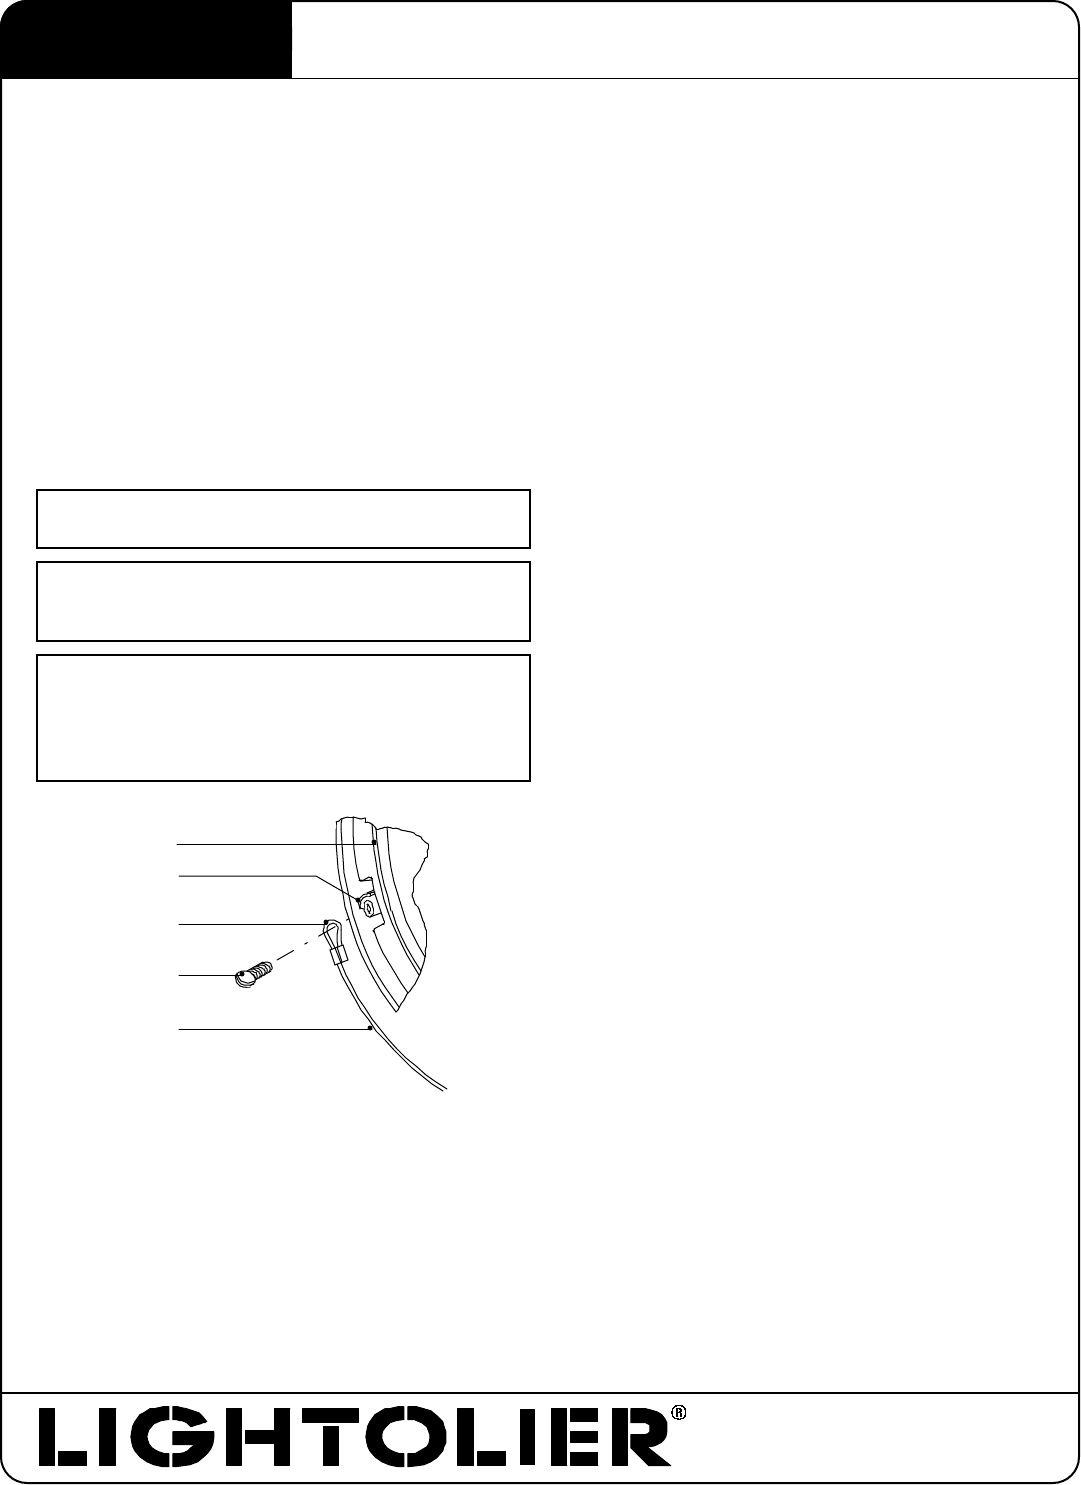
9. Position Screw through Loop in Safety Cable and thread Screw
into Mounting Boss on inside of Lens Assembly (Fig. 2).
10. Install recommended lamp(s).
11. Position Lens Assembly over Backplate making certain the
Safety Cable does not interfere with the Gasket (fig. 1).
12. Secure Lens Assembly in place by tightening the (2) Mounting
Screws on the face of Lens Assembly.
CAUTION: Maximum wattage as marked on fixture must not
be exceeded.
WARNING(Risk of Fire) most dwellings built before 1985
have supply wire rated for 60° C. Consult a qualified
electrician before installing.
CAUTION: For wet locations, in accordance with
Underwriters Laboratories requirements, a line of caulking
compound such as acrylic latex or silicone must be placed
around the perimeter of Backplate to seal water away from
the outlet box and back openings.
IS:4531
0995 Page 2 of 2
FIG. 2
Inside Lens Assembly
Instructions for Installation of Arco
4531, 4532, 4533,
4551, and 4552 Series Fixtures.
Glass
Mounting Boss
Loop
Mounting Screw
Safety Cable


