


Printed in U.S.A. © LENNOX HEARTH PRODUCTS 2003
P/N 775,169M REV. B 06/2006
Lennox Hearth Products reserves the right to make changes at any time, without notice, in design,
materials, specifi cations, prices and the discontinuance of colors, styles and products. Consult your
local distributor for fi replace code information.
NOTE: DIAGRAMS & ILLUSTRATIONS NOT TO SCALE.
Page 2 of 2
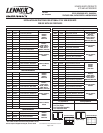
Figure 1
INSTALLATION INSTRUCTIONS:
1. Remove top louver or radiant panel/hood assembly (if possible), by pulling
the assembly up and out (see Figure1). In instances where the radiant
panel is used but it is framed in with tile or other approved material, the
hood must still be removed by fi rmly pulling it forward until it releases
from the receiving brackets. If installing Style View doors on Elite units,
remove top and bottom bustle by lifting them up and out. Merit Plus
models are not equipped with bustles.
2. Ensure the glass door assembly on the fi replace is properly aligned as
follows:
a. Open the bottom louver (hinges down).
b. (For Elite-2 and EDV Models only)
i. Remove the bottom compartment door by sliding the hinge pin,
located at the door’s left side, to the right un-til it disengages
from the left corner post hole. Pull the door diagonally to the
left, away from the fi replace.
ii. Remove the modesty panel as follows: Lift the modesty panel
by the tab on the panel’s right end, pull the right end of the
panel away from cabinet and then pull the panel diagonally out
of the corner post slots on the left side of the unit. Remove the
modesty panel carefully, so that none of the wires become loose
or discon-nected.
c. Open both latches at the bottom of the glass door assembly (refer
to Homeowners Manual).
d. Adjust glass door so that it is evenly spaced and aligned to the
fi replace chassis on both sides.
e. Fasten the 2 latches (ensure that both latches are engaged with the
door’s vee-fl ange and fully closed).
3. Remove Style View doorframe from packaging. Install the door-frame
as follows:
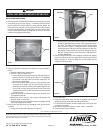
a. Locate slots on each side of fi replace (see Figure 2).
5. Close both doors.
6. Ensure that both latches below the door are engaged with the door’s
vee-fl ange and fully closed before operating the fi replace.
7. For Elite-2 and EDV models, reinstall modesty panel, ensuring all wires
are securely connected.
8. Re-install the top louver assembly, hood or bustles, if applicable.
9. Close the bottom louver assembly.
CAUTION
INSTALL ONLY WHEN THE FIREPLACE IS OFF AND COLD!
Louvers
Bustles
b. Position the top of the doorframe above the top of the glass door
assembly (centered and approximately 1” above glass door assem-
bly). Note: The bottom of the doorframe should be held slightly
away as shown in Figure 2. Swing the bottom of the doorframe
inward aligning the sides of the doorframe between the glass door
and fi replace chassis and tabs on doorframe aligning into slots on
fi replace. Swing the bottom of the doorframe in, then push down
to ensure engagement.
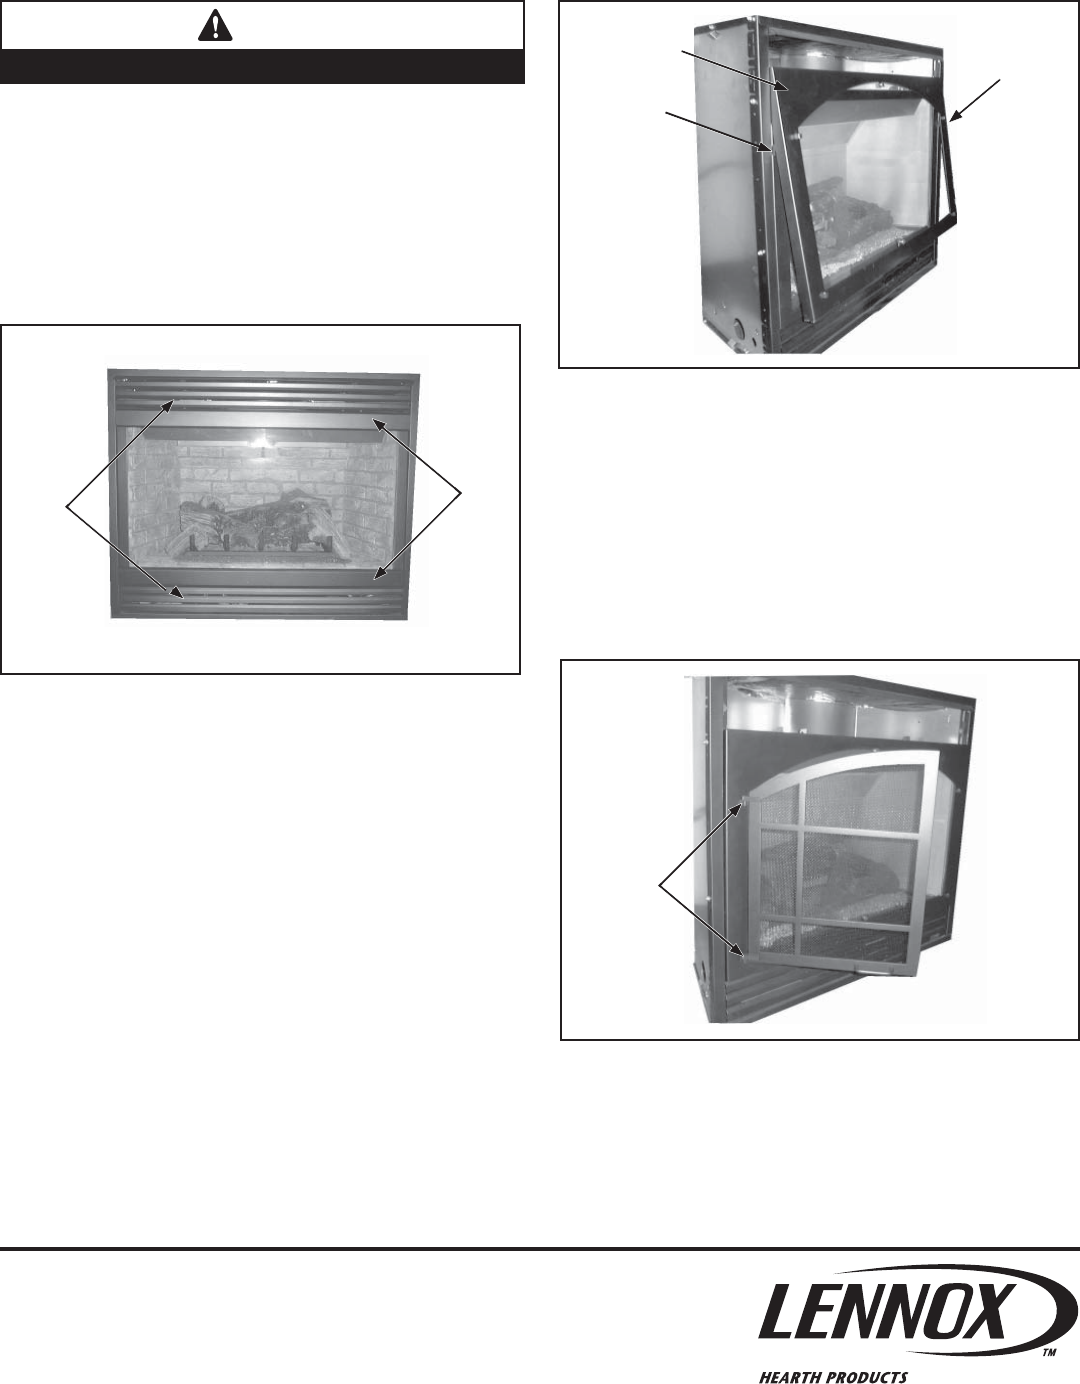
4. Remove the Style View doors from packaging. Install them by aligning
hinge pins on the doors with the hinge holes on the doorframe and slide
down (see Figure 3). Ensure the hinge pins are fully seated onto the
shoulders of the hinge holes.
Figure 3
Figure 2
Doorframe
Slot
Hinge Pins
Slot
1110 West Taft Avenue • Orange, CA 92865