


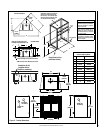

NOTE: DIAGRAMS & ILLUSTRATIONS ARE NOT TO SCALE.
14
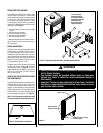
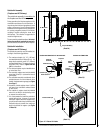
INSTALLATION OF THE BLOWER KIT MODEL UZY5
NOTE: This blower kit can easily be installed when the fireplace has a
pre-installed junction box. You just have to plug them in.
Rating: 120 Volts, 60Hz, .63A.
The blowers have magnetic blower mounts. The junction box (factory
installed on approved fireplaces for the use of this blower kit) must be
connected to 120 VAC service before permanently enclosing the fireplace.
The access hole for connecting the 120 VAC is located on the lower right
exterior side of the fireplace.
Installation instructions:
1. Open the bottom louver of the fireplace.
2. Place each blower kit into the fireplace side opening 1" from the
back of the fireplace.
3. Install the automatic blower activator on the side of the firebox (the
blower activator has a magnetic mount).
4. Plug the blower kit into the junction box.
5. Ground both blowers to the back panel using the green screws (see
Figure 13).
NOTE: The fireplace must be electrically connected and grounded in
accordance with local codes or in the absence of local codes, with the
current CSA C22.1 Canadian Electrical Code. For U.S.A. installations,
follow local codes and the National Electrical Code ANSI/NFPA No 70.
CAUTION: SHOULD THIS BLOWER REQUIRE SERVICING, THE POWER
SUPPLY MUST BE DISCONNECTED.
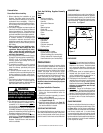
These blowers require periodic maintenance. Check the area in front of the
blowers and wipe or vacuum at least once a month during the burn season.
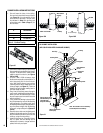
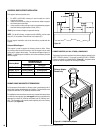
Figure 13
Fan With
Magnet
Fan With
Magnet
Electrical Connection
With Ground Connection
Connector for
Optional Rheostat
Thermodisc, Automatic
Thermal Blower Activator
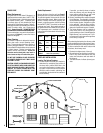
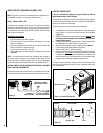
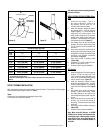
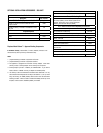
Figure 14 - Central Forced Air Kit
CENTRAL FORCED AIR KIT
If this kit is installed, this appliance no longer qualifies for EPA Low
Mass Wood-burning Fireplace Program.
The knock-outs provided on the sides of the Solana™ fireplace allow the
connection of insulated flexible pipe which enables you to heat adjacent
rooms up to 50 feet from the fireplace.
The ducting system must be installed as described below:
1. Fix the adaptor at the side of the fireplace by twist-locking the adaptor
to the fireplace. You can use more than one outlet on the fireplace
(Figure 14).
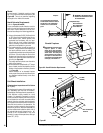
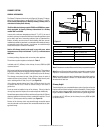
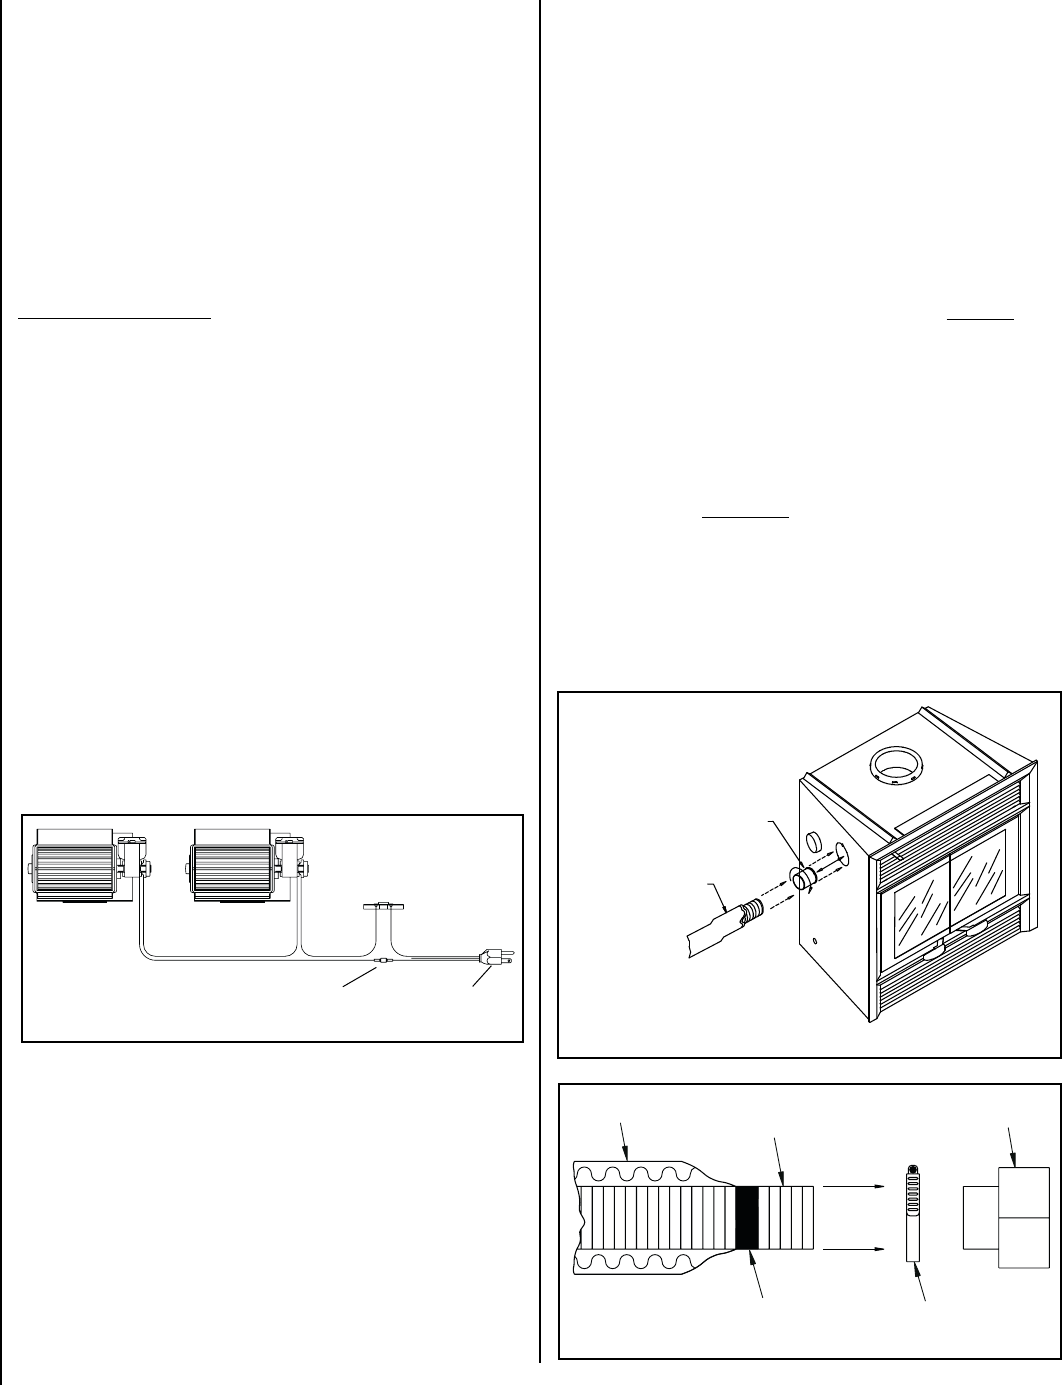
2. Attach the 5" flexible pipe, using the collars provided. Important: Make
sure that the plastic wrapping around the flexible pipe will not be in
contact with the fireplace.
3. Route the flexible pipe to the chosen location. The ducting system can
be installed either in an upper room or in a lower room.
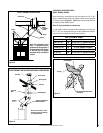
4. Attach the flexible pipe to the blower, using the collars (Figure 15).
5. Fix the decorative grill blower adaptor to the blower.
6. Attach a standard 3" x 10" grill to the adaptor.
7. Install the blower thermostat in that part of the house to be heated by
the hot air duct. Do not install the blower thermostat in the room where
the fireplace is located. A cooling thermostat can be installed in the
same room as the unit. This thermostat will turn on the blower when
the room where the fireplace is located becomes too hot.
This option requires electricity. Make sure that the connections to the
blower have been made according to the local codes and comply with
their requirements.
Adaptor
Insulated Flex Pipe
Figure 15
Aluminum Tape
Insulation
Flex 5" Diameter
Blower
Collar