


9
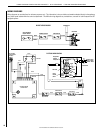
NOTE: DIAGRAMS & ILLUSTRATIONS ARE NOT TO SCALE.
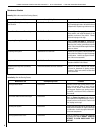
LENNOX CRESTLINE™ SERIES B-VENT GAS FIREPLACES • 36"/42" LSBV MODELS • CARE AND OPERATION INSTRUCTIONS
Proper log placement is critical to prevent soot-
ing. Carefully position the ceramic ber logs
over the burner as described in the following
steps, and detailed in Figures 10 through 15.
Note: Logs should be placed in the gaps between
the flame peaks and should be positioned so
that at no time they impinge the flames.
The logs are packaged within the rebox. The
Lava Rock (2 bags) and Rockwool (Glowing
Embers) (1 bag) are in the bottom of the
burner tray.
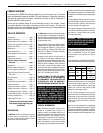
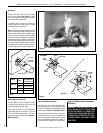
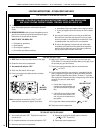
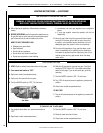
Spread 1-1/2 bags of Lava Rock evenly inside
of the burner tray, as shown in Figure 10. The
rest of the 1/2 bag of Lava Rock should be used
only on LSBV-42 models, placed on the open
spaces on the bottom of the rebox between
the refractory and burner tray.
Logs and Rockwool Placement
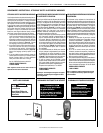
WARNING: LOGS GET VERY HOT AND
WILL REMAIN HOT UP TO ONE HOUR
AFTER GAS SUPPLY IS TURNED OFF.
HANDLE ONLY WHEN LOGS ARE COOL.
TURN OFF ALL ELECTRICITY TO THE AP-
PLIANCE BEFORE YOU INSTALL GRATE
AND LOGS.
WARNING: THIS APPLIANCE IS NOT
MEANT TO BURN WOOD. ANY ATTEMPT
TO DO SO COULD CAUSE IRREPARABLE
DAMAGE TO YOUR APPLIANCE AND
PROVE HAZARDOUS TO YOUR SAFETY.
WARNING: THE SIZE AND POSITION ON
THE LOG SET WAS ENGINEERED TO GIVE
YOUR APPLIANCE A SAFE, RELIABLE
AND ATTRACTIVE FLAME PATTERN.
ANY ATTEMPT TO USE A DIFFERENT
LOG SET IN THE FIREPLACE WILL VOID
THE WARRANTY AND WILL RESULT IN
INCOMPLETE COMBUSTION, SOOTING,
AND POOR FLAME QUALITY.
Figure 10
These appliances are equipped with a beautifully
crafted six (6) piece ceramic ber log set. The
logs, shown in Figure 8 on page 8, are to be
positioned precisely as shown. Any modica-
tion to the lay of the logs may result in sooting,
property damage and injury or death.
The rear log has mating holes for pin engage-
ment on its bottom side. DO NOT force a hole
into a log by engaging the pins where they are
not intended to go.
Apparent minor mis-alignment of the pins and
holes or landings can be eliminated by gently
adjusting the position of the logs until the pins,
holes or landings easily mate.
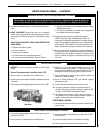
Step 1. To position the logs, begin by placing
the rear log in position over the two pins located
at the left rear and right rear of the log grate,
see Figure 10 and Figure 11.
Lava Rock
Rear Log Pin
Figure 11
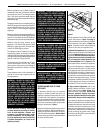
Rear Log Pin
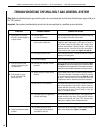
Figure 12
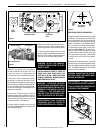
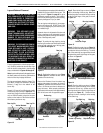
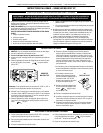
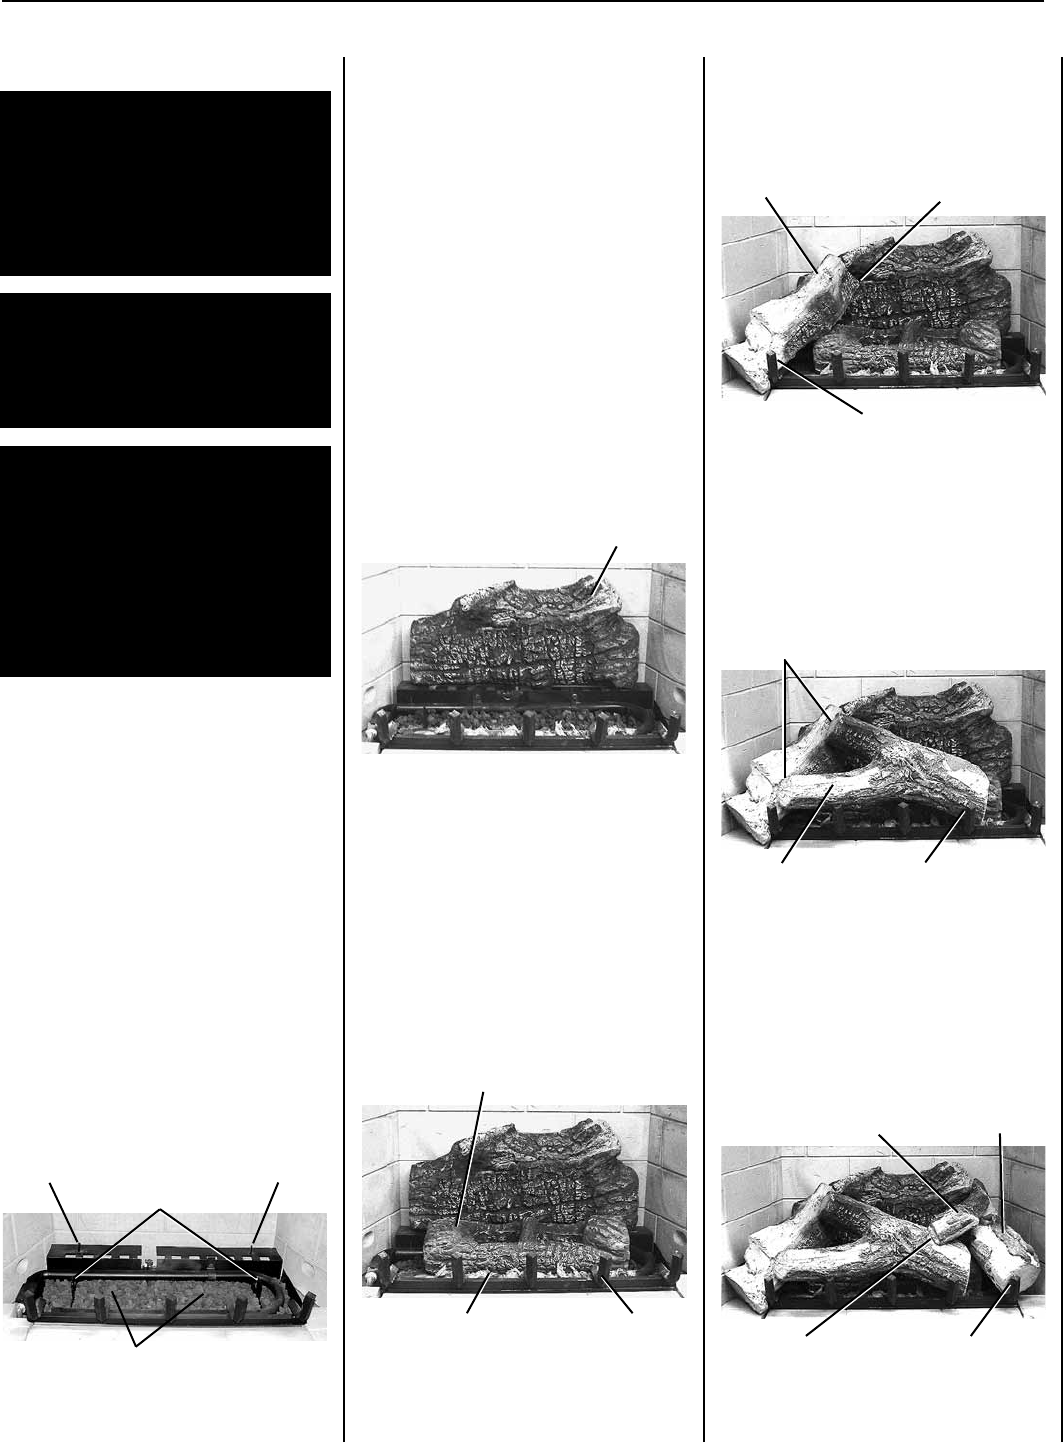
Figure 13
Vertical Brackets
Figure 14
Step 2. Position the bottom log, (see Figure
10 and Figure 12 ) between the two vertical
brackets of the burner tray.
Remove the Rockwool from the plastic bag
and tear into quarter size pieces, as shown in
Figure 12. Spread across the front part of the
burner. Do Not use more than is necessary to
cover the burner. When properly positioned,
the Rockwool will unevenly cover approximately
85% of the burner with no appreciable gaps.
Step 3. Place the left log as shown in Figure
13, on the landing of the rear log. Make sure
the landing on the front end of the log is resting
on the rst left nger of the grate, as shown
in Figure 13.
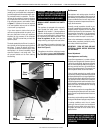
Step 5. Place the right log as shown in Figure
15, with the upper end sitting on the landing
provided on the rear log. Another end of the
right log should rest on the rst right nger of
the grate (see Figure 15 ). Position the top
right log as shown, locating it on the landing
of the center log.
Step 4. Position the center log, see Figure 14,
with the two branches sitting on the two landings
provided on the top of the left log. The other
end of the center log has a groove that should
t against the second right nger of the grate,
as shown in Figure 14.
Figure 15
Rear Log
Bottom Log
Log Grate
Rockwool
Left Log
Center Log
Right Log
Right Grate Finger
Top Right Log
Center Log Landing
Left Grate Finger
Second Right Grate Finger
Left Log Landings
Rear Log Landing