


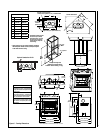

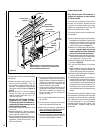
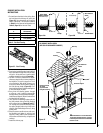
REFRACTORY REPLACEMENT
The intense heat of the fire will normally cause
hairline cracks in the refractory. These cracks
can be minimized by proper curing as described
in “First Fires”. They will not normally dimin-
ish the effectiveness of the refractory. If large
cracks develop, then the refractory should be
replaced. To replace the refractory bricks, follow
these steps (see Figure 3):
1. Remove the bottom refractory
2. Remove the front refractories
3. Remove the left side refractory
4. Remove the right side refractory
5. Remove the back refractory
6. Remove the front ceramic baffle
7. Remove the rear ceramic baffle
To install the new refractories, follow the above
steps in reverse.
Figure 3
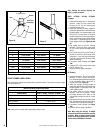
Figure 4
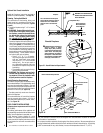
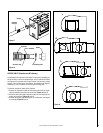
DOOR REMOVAL
To remove the door, simply pull the door up from the hinges (see Figure 4). The door adjustment
has been set at the factory. If the fit is still not perfect, you can adjust the door using the hinge
screws.
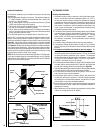
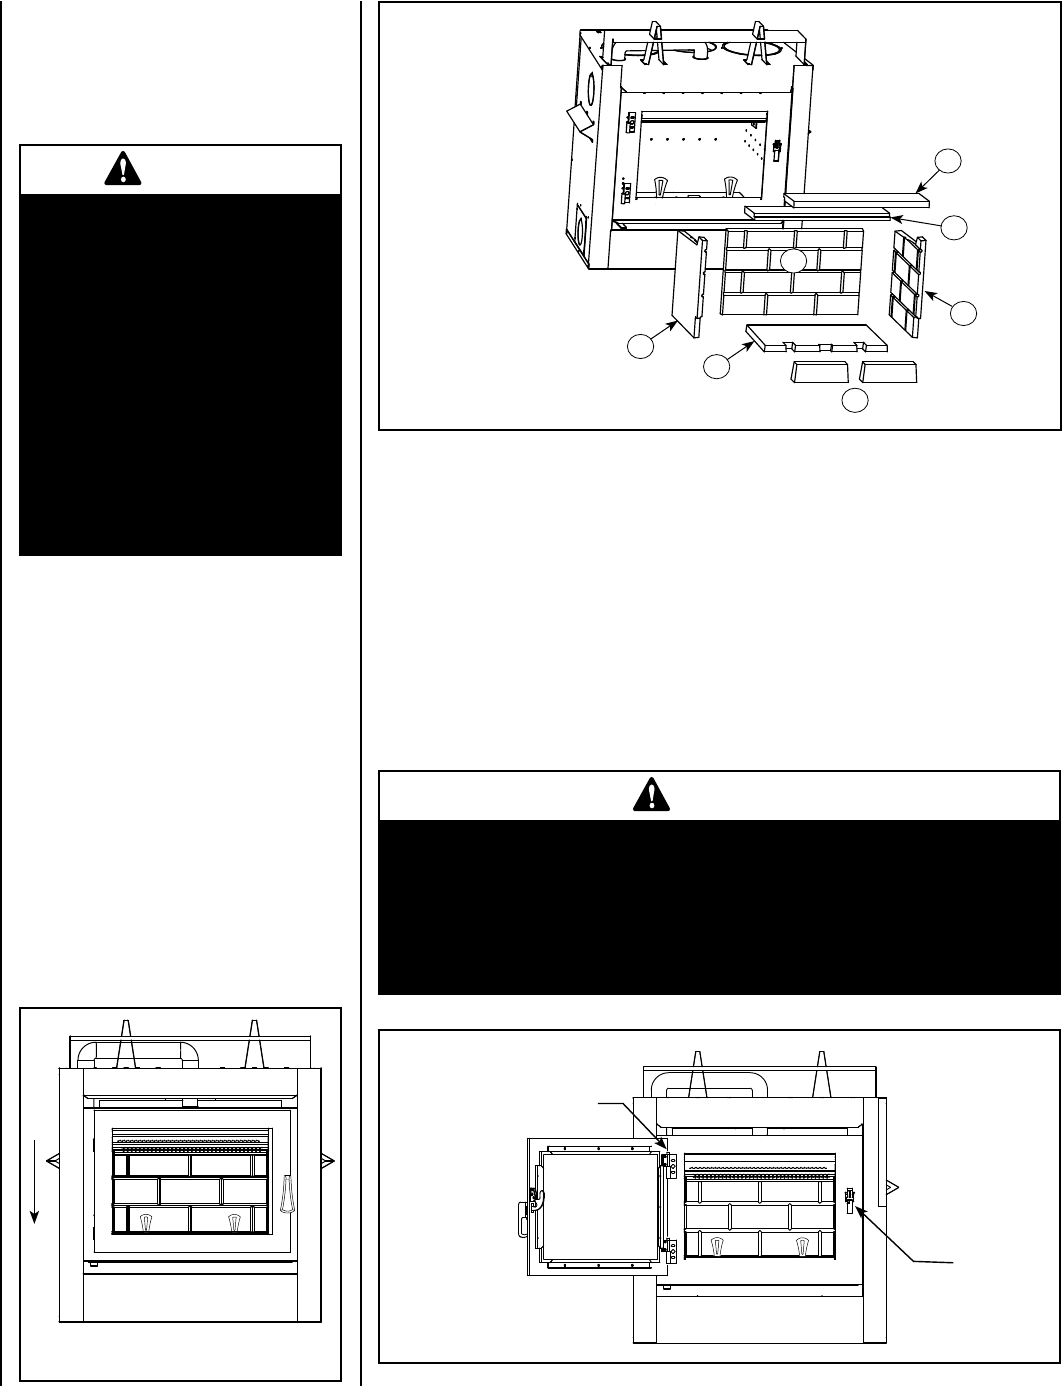
DOOR ADJUSTMENT
The door may need to be adjusted to be completely airtight. The gaskets’ air-tightness can be
adjusted using two adjustment screws located on the right side of the fireplace facade (An Allen
key #1/8 – not supplied - will be necessary for this adjustment).
Checking Door Seal
A one-inch strip of paper may be used to perform a test of the integrity of the door seal. Close
the door on the paper in at least eight points. It is normal to feel only a slight amount of friction.
The door gasket does not need to be “tight” in all areas, since a small amount of leakage is not
hazardous or detrimental to the performance of your fireplace.
Figure 5
Door Installation
WARNINGS
•
Use only a Lennox Hearth Products glass doors, specifically designed
for the Ladera™ fireplace.
•
The fireplace cannot be operated without a door. Consult your dealer
if you need a replacement door.
•
Important! To assure proper alignment of glass doors: Install this
fireplace in a square and plumb condition, using shims as necessary
at sides and/or bottom.
1
6
FPO
Hinges Adjustment
Gasket
Adjustment
Screw
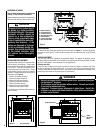
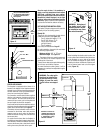
DISPOSING OF ASHES
Note: For better performances, we recommend
leaving 1/2 inch of ashes in the firebox.
Remove ashes only when the fire is out and the
ashes are cold (48 hours after the fire is out).
WARNING
Disposal of Ashes: Ashes should
be placed in a metal container
with a tight fitting lid. The closed
container of ashes should be
placed on a non-combustible
floor or on the ground well away
from all combustible materials,
pending final disposal. If the
ashes are disposed of by burial
in soil or otherwise locally dis-
persed, they should be retained
in the closed container until
all cinders have thoroughly
cooled.
1. Bottom Refractory
2. Front Refractories
3. Left Side Refractory
4. Right Side Refractory
5. Back Refractory
6. Front Ceramic Baffle
7. Rear Ceramic Baffle
2
3
5
4
7
6
NOTE: DIAGRAMS & ILLUSTRATIONS ARE NOT TO SCALE.