


Printed in U.S.A. © 2006 by LHP
P/N 750,235M REV. NC 08/2006
LHP reserves the right to make changes at any time, without notice, in design, materials, specifi cations, prices and the discontinuance of colors, styles and products. Consult your local
distributor for fi replace code information.
LHP
1110 West Taft Avenue
Orange, CA 92865
NOTE: DIAGRAMS & ILLUSTRATIONS ARE NOT TO SCALE.
Step 2. Using a 5/16" socket or nutdriver, remove the existing lintel as
shown in Figure 3. Retain the screws for Step 3.
Lintel
Figure 3 - Removing Lintel
Step 3.Install the new lintel provided using the screws that were removed
in step 2 (reversing instructions in step 2 and see Figure 3).
Step 4. Install the eyebrow as follows:
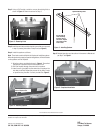
Note: Three holes must be drilled in the fi replace to install the eyebrow.
When the eyebrow is properly aligned to the appliance, drill into the holes
on the eyebrow and into fi replace.
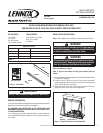
1. Align the eyebrow provided as shown in Figure 4. Ensure that
the eyebrow is pushed in fl ush to the fi replace front.
2. Drill into fi replace through the center hole on eyebrow.
3. Install a screw (provided) into the center hole on eyebrow into
hole that you drilled. Repeat this process for the other 2 holes
on eyebrow using the other 2 screws provided. See Figure 5.
Eyebrow
Ensure Eyebrow is pushed in
fl ush to fi replace front.
Drill through the
center mounting
hole fi rst, then in-
stall screw. Repeat
this process for the
other 2 holes.
Eyebrow Mounting Holes
Figure 4 - Installing Eyebrow
Figure 5 - Installing Eyebrow
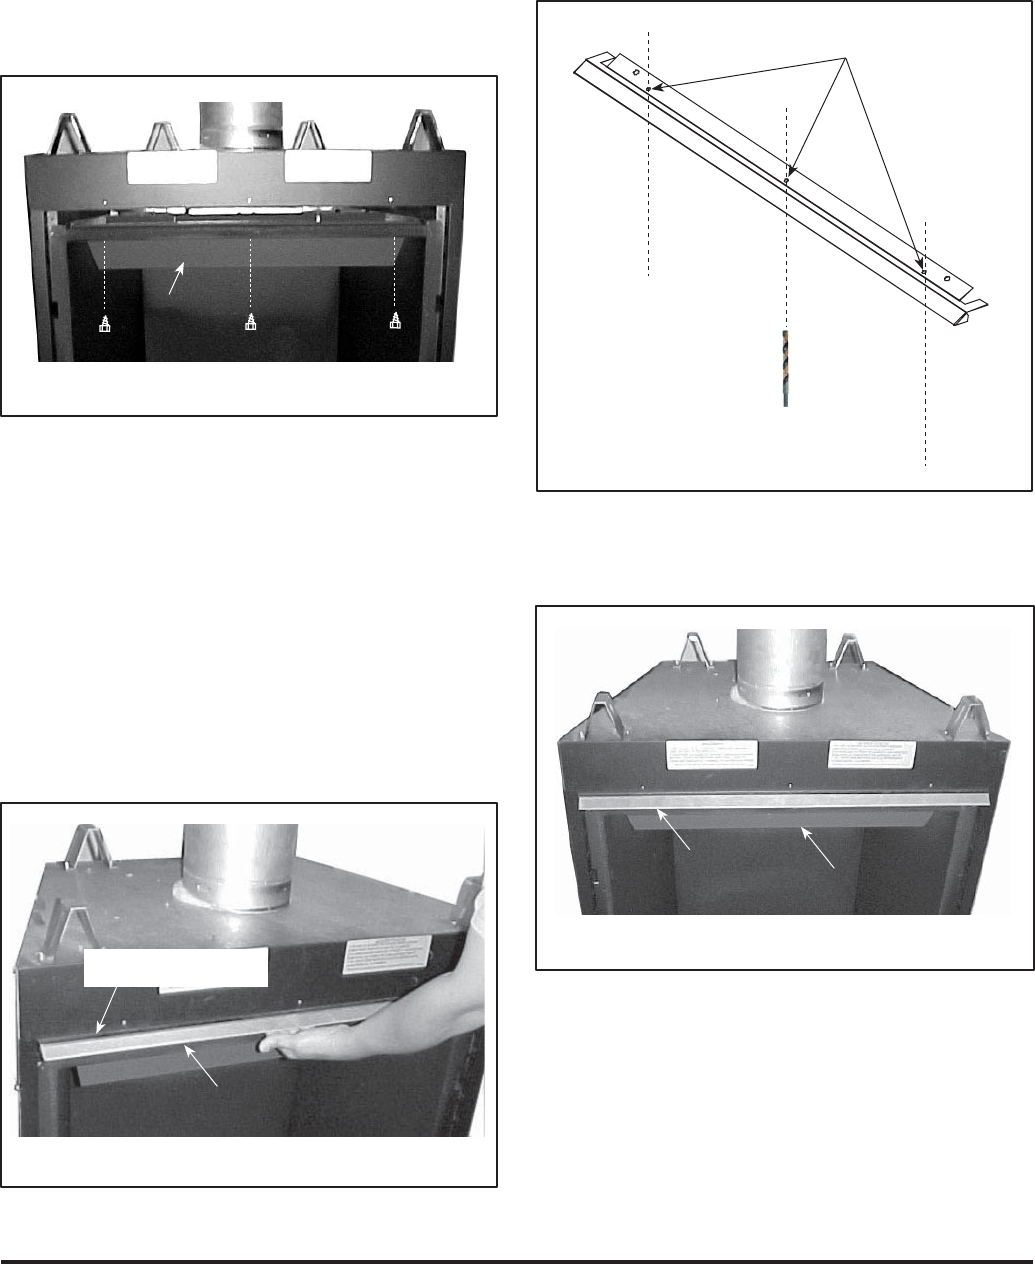
Step 5. Reinstall glass door per instructions in Homeowner's Manual and
per Step 1 and Figure 1.
Figure 6 - Completed Installation
Eyebrow
Lintel