NOTE: DIAGRAMS & ILLUSTRATIONS NOT TO SCALE
2
Figure 1
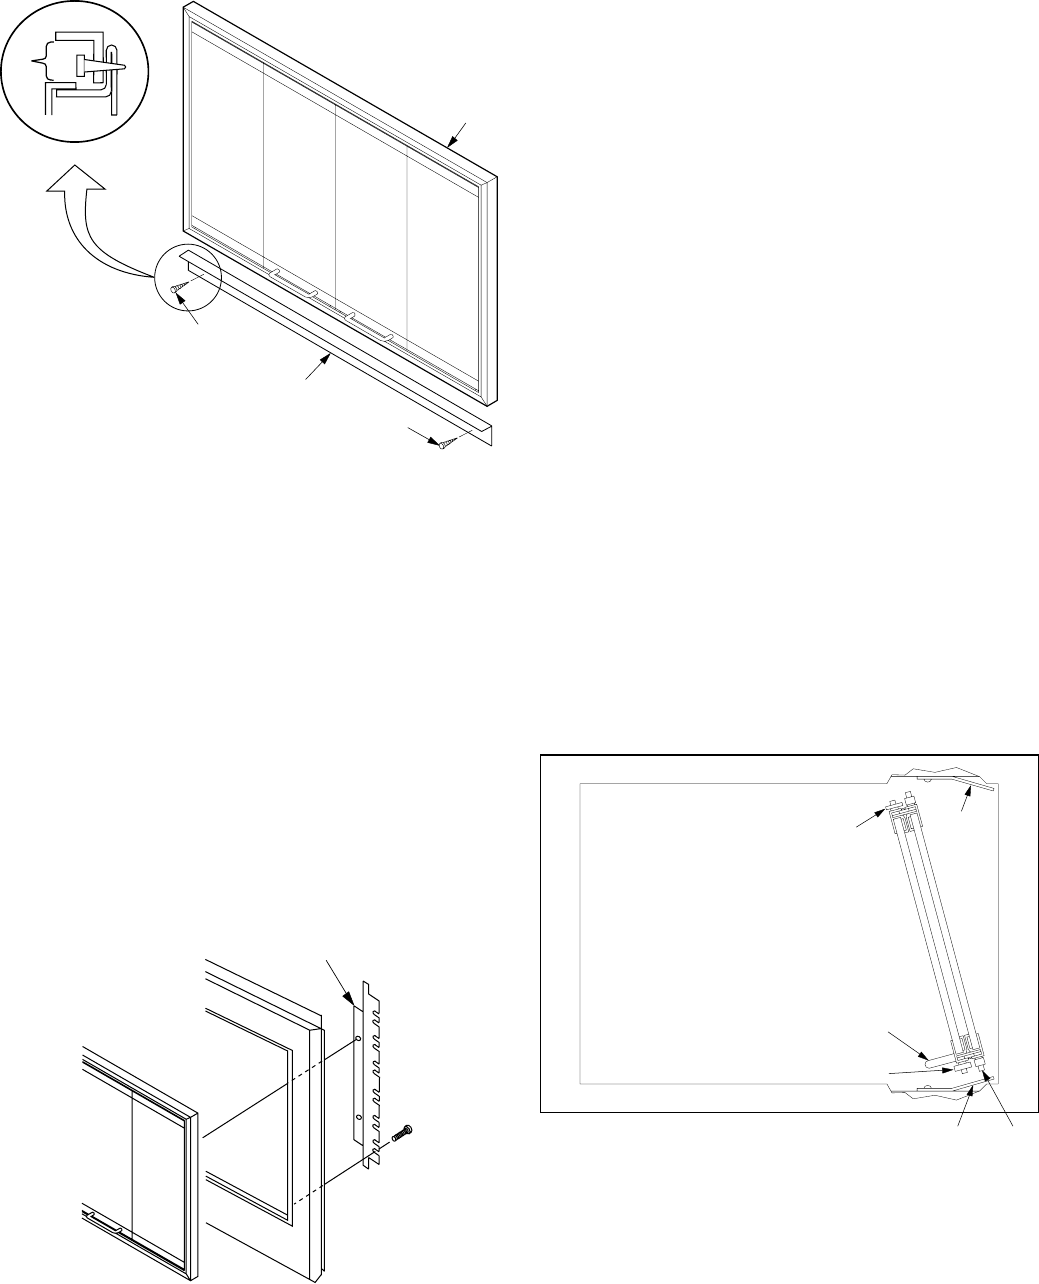
Step 3. Remove the frame from the fireplace and drill a pilot hole 5/64"
diameter at each of the four marks. Re-position the frame into the
fireplace centering left and right. Insert the screws through the side
panel holes and screw them into the pilot holes just drilled.
Model Estate 48 Fireplaces
Note: The Center Wedge Clip located inside the track in the center of the
door frame indicates the bottom of the frame. It is important that the
frame be installed with the correct side up to insure smooth operation
of the doors.
Step 1. Lay the frame face down on a clean, soft surface to avoid
scratching the brass. Note the two Phillips Screws mounted to Tinnerman
nuts on each of the side panels, loosen these screws to allow adjustment
of the position of these Tinnerman nuts. Position the nuts to align with
the round holes on the Estate 48 attachment brackets (see
Figure 2
). Do
Not attach brackets to the door at this time.
Figure 2
Step 2. Locate the Phillips heads of the screws just around the back of
the firebox opening at both the right and left sides. The slots of the Estate
48 attachment brackets will engage these screws and be secured in
place by their heads. Back these screws out about an 1/8 of an inch.
Step 3. Position the Estate 48 attachment bracket within the fireplace
opening with their black faces forward and their slots engaged around
the screws backed out in the previous step. Snug up two (2) screws on
each side, DO NOT TIGHTEN. The attachment brackets must be allowed
to move in the following step.
Step 4. Remove the Phillips screw from the Tinnerman nuts in the door
frame assembly. Position the frame within the opening and align the
Tinnerman nuts with the four round holes of the attachment brackets,
two (2) on each side. Secure the frame to the brackets with the four (4)
screws, DO NOT TIGHTEN.
Step 5. Center the door frame within the opening, left to right and push
door frame up to the top of the opening as far as it will go. Carefully
tighten all screws, making sure they are not overtightened. Do Not
obstruct the gaps to the left and right of the frame. These spaces are
designed for inlet air to enter the fire box.
Installing the Doors
Install all doors as follows:
Fold panes of right door back to back with handle down as shown in
Figure 3
. Tilt door so that it fits inside frame as shown. Next, insert
Bottom Pin into Bottom Retainer Slot. Then tilt top of door toward
vertical position making sure that all Pins and Door Guides are inside
Track. Finally, slide Top Pin along Top Retainer Clip until Top Pin snaps
into Top Retainer Slot. Repeat procedure for left door.
Figure 3
Screw
Support
Bracket
Door
Screw
*
Note: This is an air inlet.
DO NOT cover this space
with any materials.
*
Detail
Top
(Narrow) Door Guide
(Wide) Door Guide
Retainer
Clip
Bottom
Bottom
Pin
Retainer
Clip
Handle
Attachment
Bracket


