


NOTE: DIAGRAMS & ILLUSTRATIONS NOT TO SCALE.
Printed in U.S.A. © 2007 by LHP
P/N 750,246M REV. B 04/2008
The manufacturer reserves the right to make changes at any time, without notice, in design, materials, specifications, prices and also to discontinue colors, styles and products.
Consult your local distributor for fireplace code information.
1110 West Taft Avenue
Orange, CA 92865
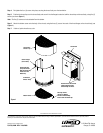
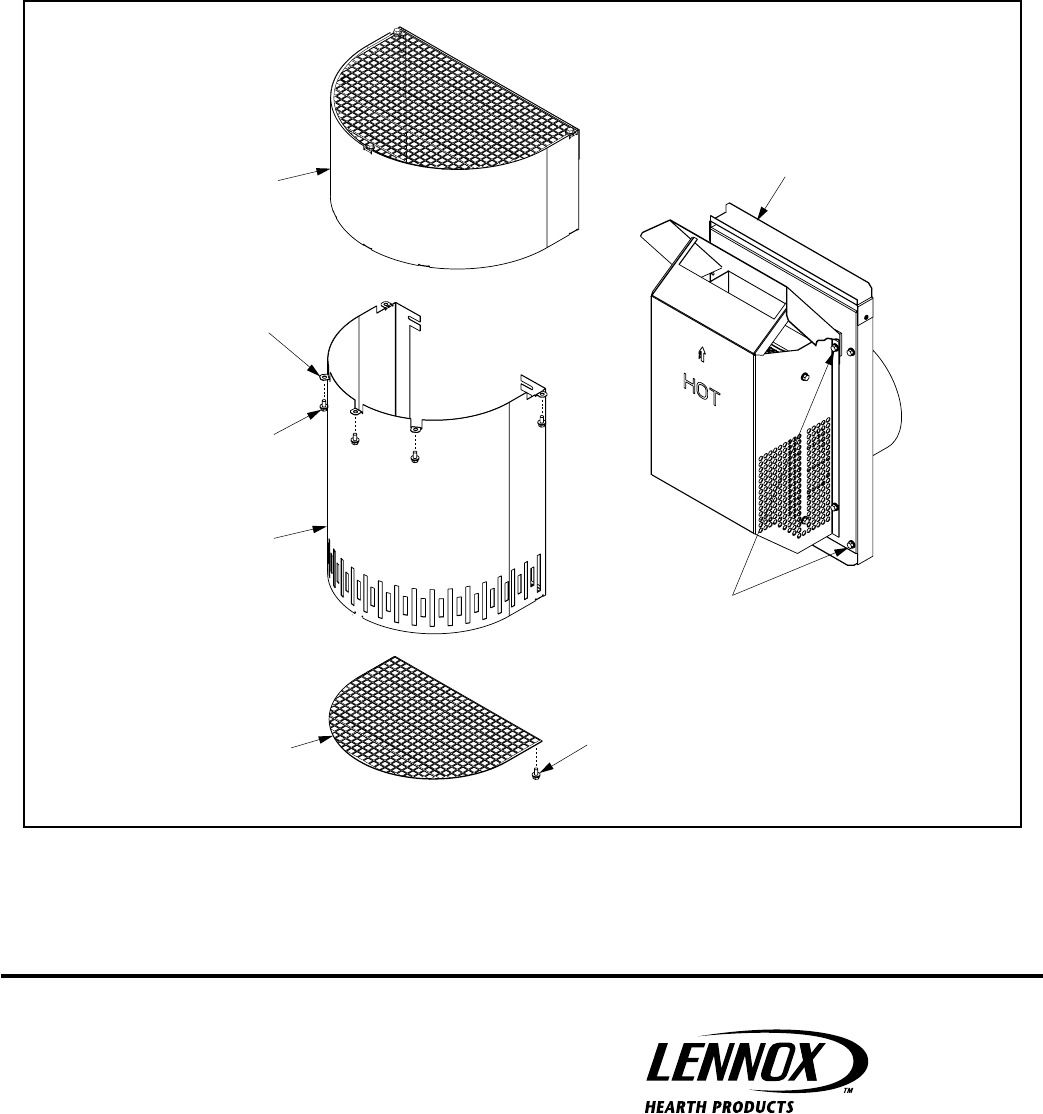
Figure 1
Step 4. Re-tighten the four (4) screws into place, securing the shroud body over the termination.
Step 5.
Position the shroud top over the shroud body and screw it into the flanges located on both the shroud top and shroud body, using five (5)
screws (as shown Figure 1 ).
Note: The five (5) screws are to be attached from the bottom.
Step 6. Attach the bottom screen onto the body of the shroud, using the three (3) screws into each of the three flanges on the shroud body (see
Figure 1 ).
Step 7.
If desired, paint shroud to any color.
Termination
Securing Screws
(Five) For Shroud
Body To Shroud Top.
Install From The
Bottom Up.
Screw Flanges
(Five Places)
Bottom Screen
Termination
Shroud - Top
Termination
Shroud - Body
Back Off These Two Screws
(Both Sides) And Slide
Shroud Body Into Place.
Securing Screws
(Three) For Bottom
Screen To Shroud Body.
Install From The Bottom Up.