


Rev. F 10/09
4
2084537
Rev. F 10/09
5
2084537
WARNING: ALWAYS UNPLUG CORD BEFORE CLEAN-
ING OR DISASSEMBLING.
WARNING: DO NOT IMMERSE FAN IN WATER!
CLEANING: IMPORTANT! DO NOT immerse electrical
parts in water! Disassembled grills may be immersed
to be cleaned with a mild detergent and water. Wipe all
other parts with soft cloth moistened with water and mild
detergent only. DRY ALL PARTS COMPLETELY BEFORE
REASSEMBLING. After any maintenance or servicing,
completely reassemble unit as described in this instruction
manual before reconnecting to the power supply.
CAUTION: Do not use gasoline, benzine, thinner, harsh
cleaners, etc. as they will damage the Fan. NEVER use
ALCOHOL OR SOLVENTS.
SERVICING: All other servicing, with the exception of gen-
eral user maintenance, should be performed by an autho-
rized service representative. Call 1-800-233-0268, Monday
through Friday, between the hours of 8:00 a.m.and 5:00 p.m.
EST for the location of your nearest service center.
LUBRICATION: Motor is permanently lubricated.
MAINTENANCE
OPERATION
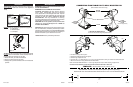
OSCILLATION: Push down oscillation knob on motor hous-
ing to make fan head move from side to side. (Figures 8
and 9)
TILTING: This Fan is equipped with a multi-angle Fan Head
for Whole-Room Air Circulation. Follow the steps below to
properly adjust the "tilt angle" of your Fan.
1. Place one hand just under the Fan Neck.
2. Place your other hand on top of Fan.
3. Gently push or pull the Fan Head until it is in the desired
position.
SPEED: Control fan speed with Speed Knob. (Figure 10)
3 - High Speed
2 - Medium Speed
1 - Low Speed
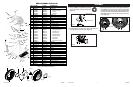
TEMPLATE - DETACH TEMPLATE AND TURN 90° for use...
MOTOR
HOUSING
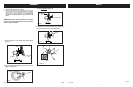
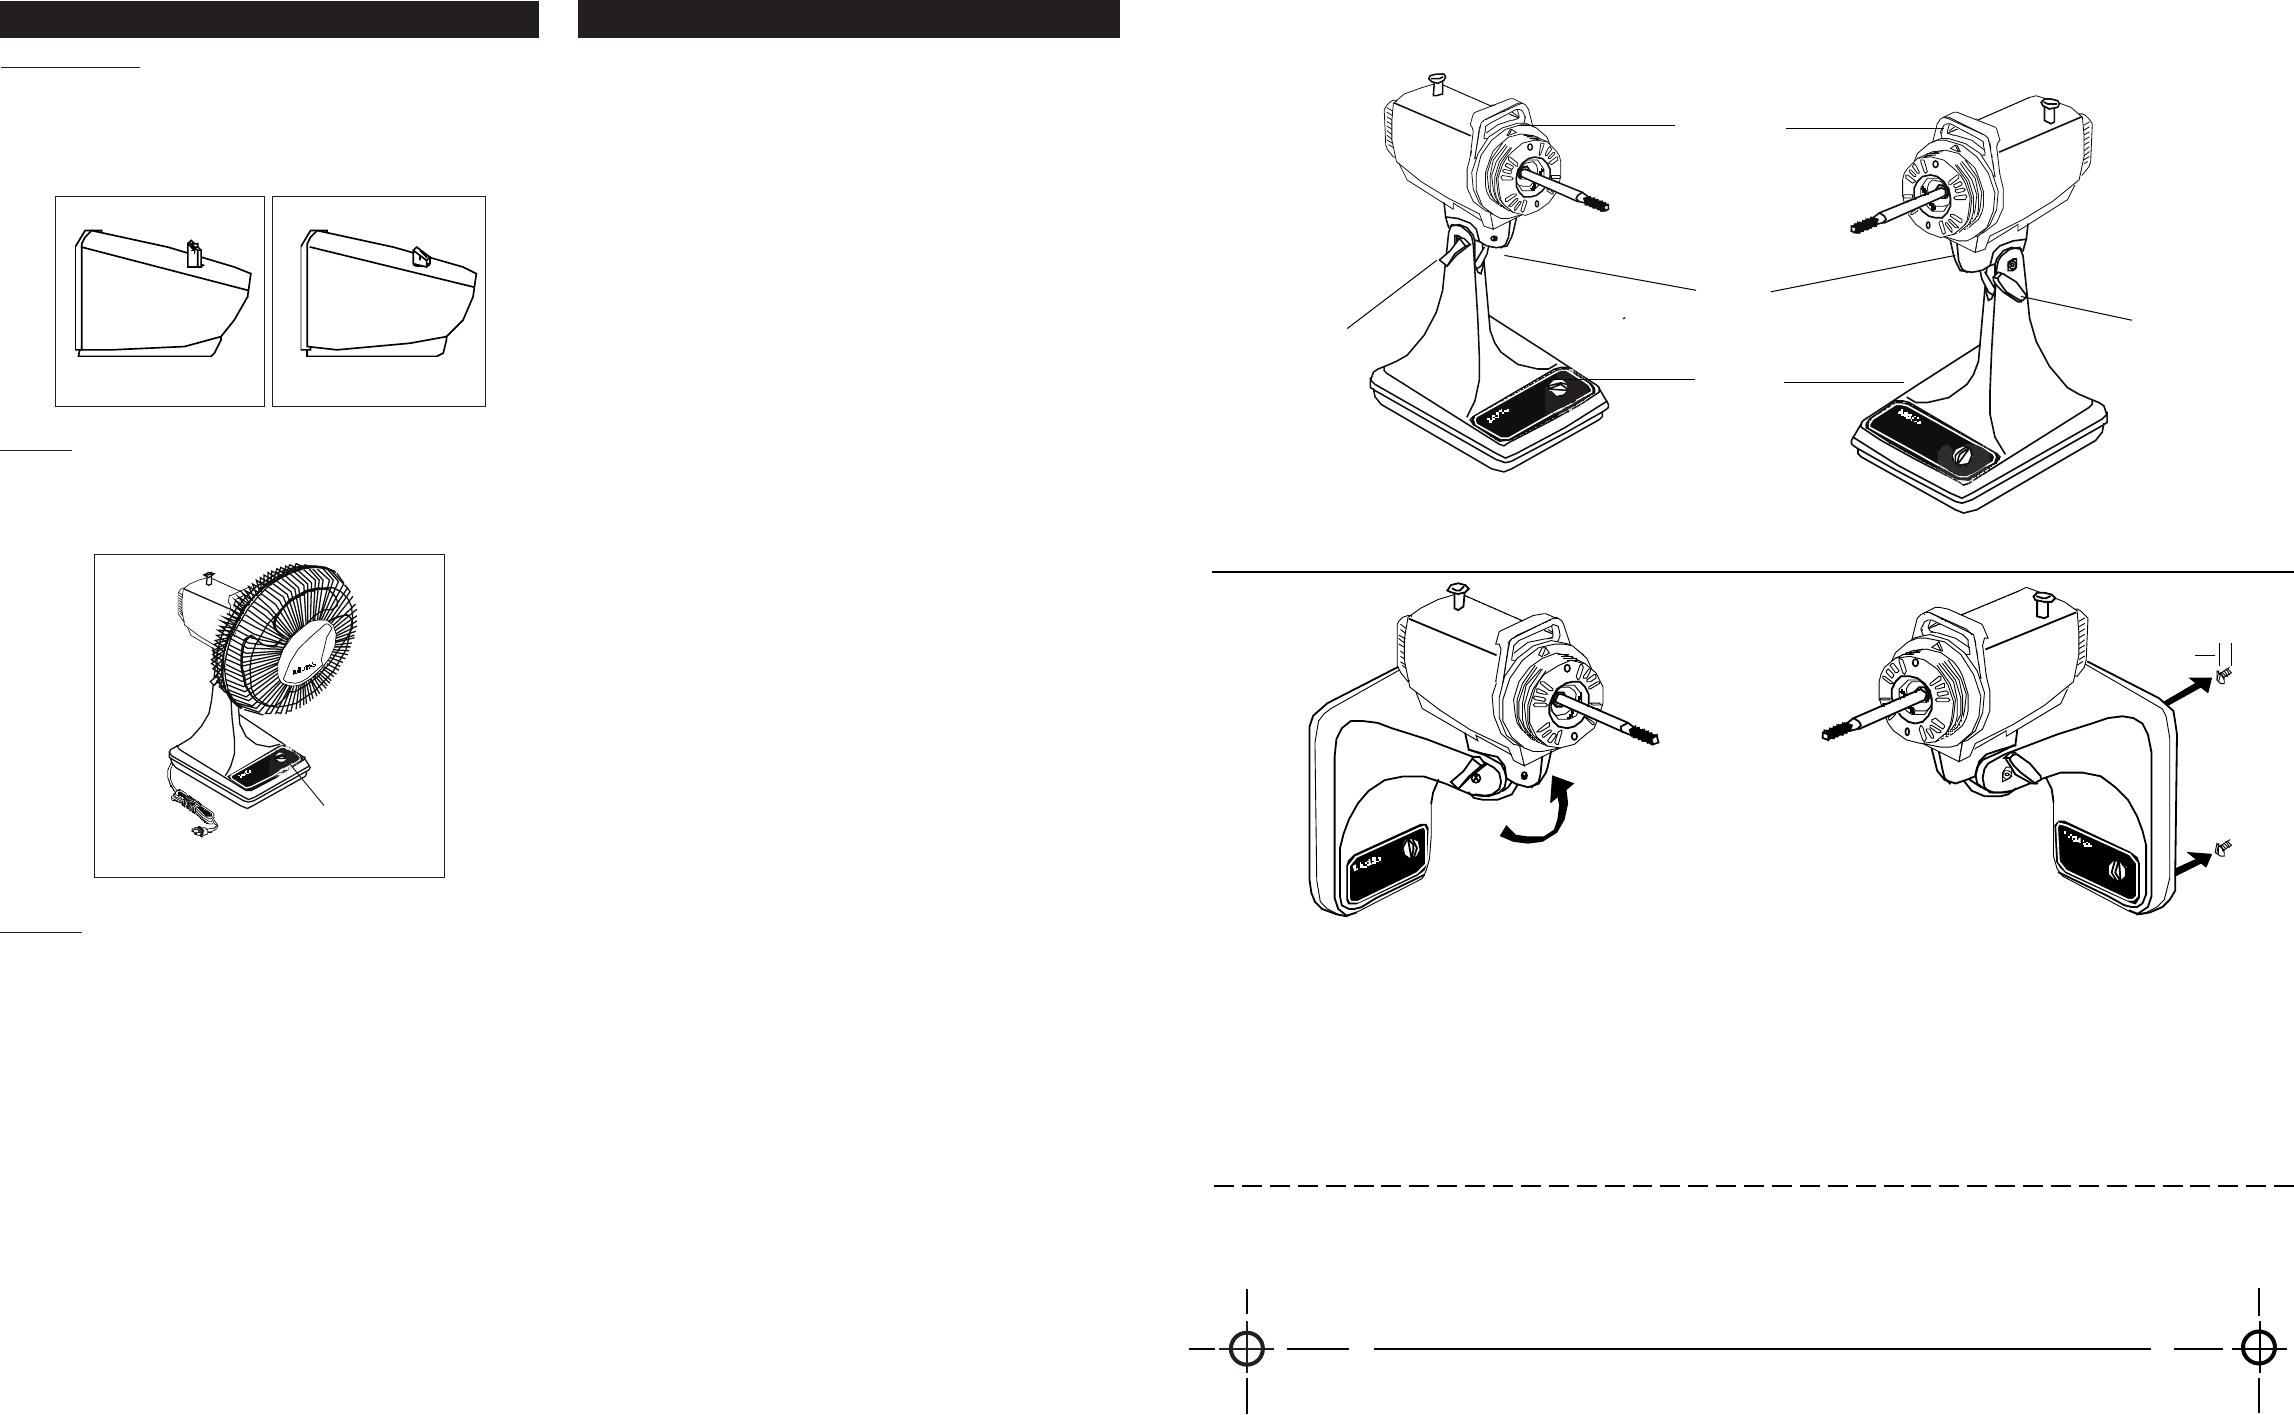
1. UNPLUG FAN FROM OUTLET.
2. Remove the Small and Large Adjustment Knobs.
7"
NOTE: BE SURE THAT THE MOUNTING SCREWS ARE INSTALLED IN A WALL STUD FOR MAXIMUM SUPPORT.
NOT SUPPLIED - Two #8x1-1/4" Wood Screws (Must be purchased separately)
STAND
NECK
SMALL
ADJUSTMENT
KNOB
3. Tilt Motor Housing all the way back.
4. Reinstall Small Adjustment Knob and tighten.
5. Reinstall Large Adjustment Knob.
6. Install two #8 x 1 1/4" Wood Screws (not provided), using Template below, leaving 1/8" between Screwheads and wall.
7. Mount Fan over Screws using Slotted Holes on Bottom Plate.
NOTE: TO ADJUST HEAD VERTICALLY - Loosen Large Adjustment Knob, set Motor Housing, retighten Knob.
CAUTION: FAN IS UNSTABLE IN THIS POSITION AND CANNOT BE USED AS A TABLE FAN.
LARGE
ADJUSTMENT
KNOB
(For minor adjustments)
BOTTOM
TOP
1/8"
CONVERTING FROM TABLE FAN TO WALL MOUNTED FAN
(Grills and blade removed for clarity)
Down: Oscillate
Up: Stationary
Figure 8
Figure 9
Figure 10
Speed
Knob