


3
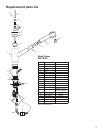
6. Model series KKFV01SP and KKFV01PP only: Connect the
sprayer hose to the supply hose using the check valve
assembly and fiber seals. Be sure the check valve assembly
is positioned correctly; the arrow should be pointing down
away from the faucet. Insert a fiber seal between sprayer
hose and check valve assembly and attach them. Insert a
fiber seal between the check valve assembly and supply hose
and attach them.
7. Connect the red-striped braided hose to the hot water supply
valve. Connect the blue-striped braided hose to the cold
water supply valve. Be sure to hold the supply hoses in place
when tightening the nut to prevent the hoses from twisting.
8. Model series KKFV01SP and KKFV01PP only: Be sure the
sprayer hose is fully inserted into the faucet body. Under the
sink, use the screws provided to attach the weight(s) onto the
sprayer hose on the spout side of the hose loop, just above
the bend in the hose.
For model series KKFV01PP attach one weight.
For model series KKFV01SP attach both weights.
9. Move the faucet lever to the closed (forward) position and
open supply valves. Check connections for leaks.
10. Remove aerator from faucet and flush the hot and cold lines
until water is clear.
The aerator is in the end of the faucet. Loosen with a wrench
to remove.
11. Reinstall the aerator into faucet after flushing the water lines
and tighten with a wrench.
B
C
E
A
D
A
A. Weight
B. Spray hose
B
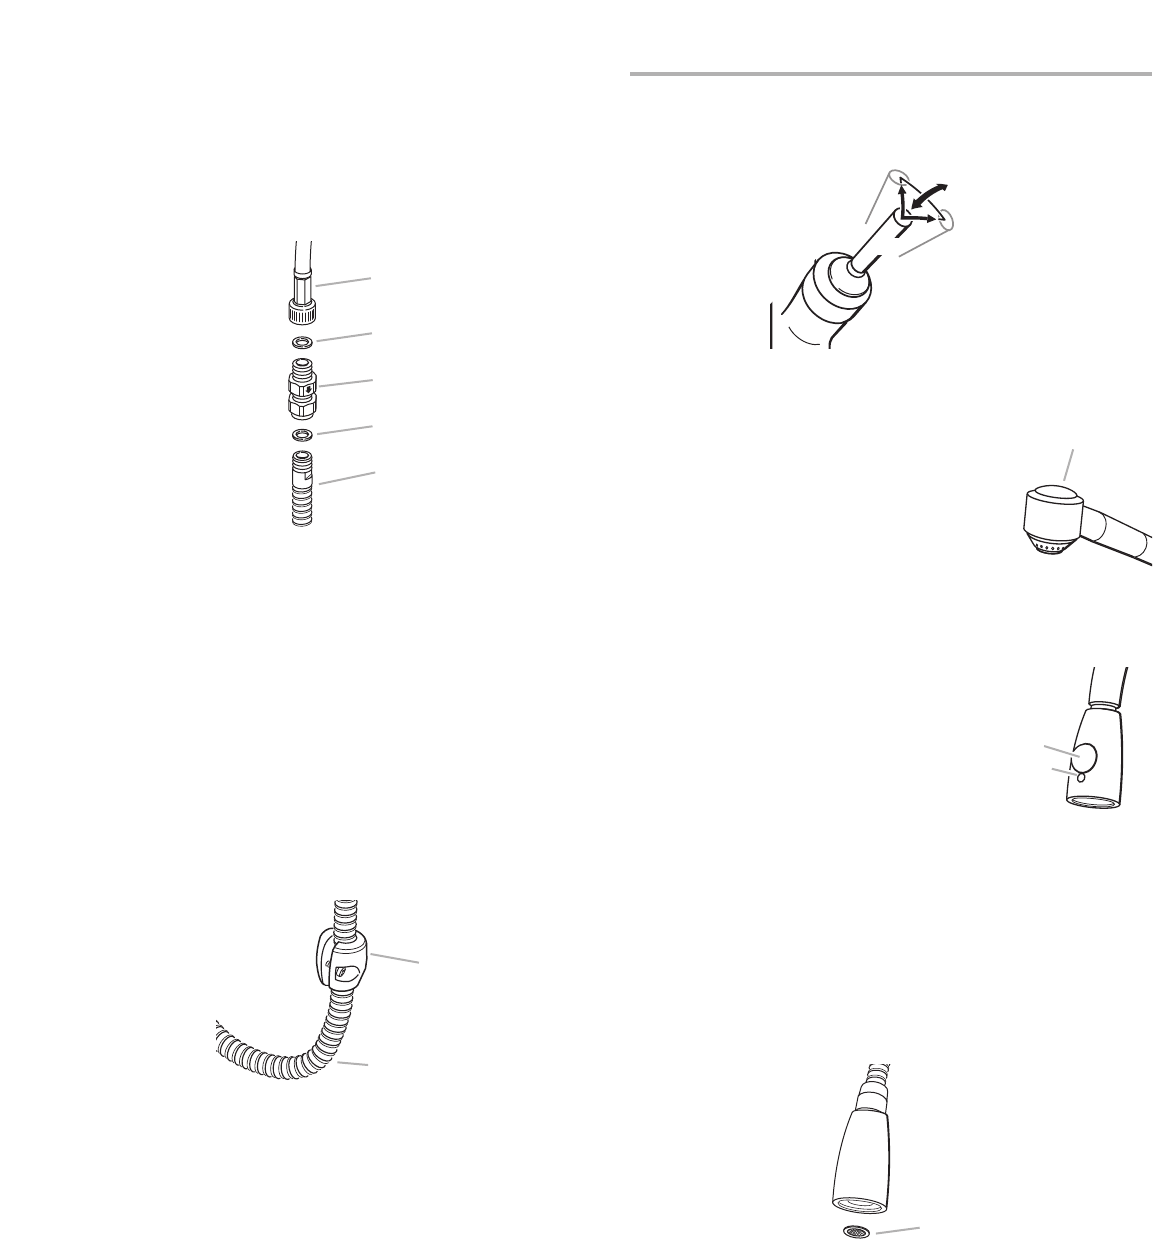
Model series KKFV01PP:
■ The flow of water can be a stream or spray. A stream is the
default water setting.
■ Change to spray by pushing the diverter
button on top of the spray assembly.
■ Change to stream by shutting the faucet off.
The spray assembly automatically resets.
■ The spray assembly can be drawn
approximately 20 inches out of the faucet
spout.
Model series KKFV01SP:
■ The flow of water can be a stream or spray. A stream is the
default water setting.
■ Change to spray by pushing the large
diverter button on top of the spray
assembly.
■ Change to stream by pushing the small
diverter button just below the large
button or by shutting the faucet off.
■ The spray assembly can be drawn approximately 20 inches
out of the faucet spout.
Cleaning
Aerator:
The aerator should be removed periodically and cleaned out
under running water. If it is very dirty it should be put in common
household vinegar and allowed to soak overnight. Reinstall and
tighten with a wrench.
Chrome faucet:
Use liquid cleansers or soapy water. Polish with a soft cloth.
NOTE: Anti-lime or acidic cleansers such as scouring agents or
abrasive sponges are to be avoided.
Stainless Steel faucet:
Use a cloth and clean water or a very diluted washing liquid.
Polish with a soft cloth.
NOTE: Anti-lime or acidic cleansers such as scouring agents or
abrasive sponges are to be avoided.
full on
full cold
full hot
spray
off
A
A. aerator
model series
KKFV01SP
spray
stream
OPERATION
A. Supply hose
B. Fiber seal
C. Check valve
D. Fiber seal
E. Sprayer hose