


Now start...
With pump in room where it
will be installed.
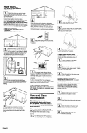
Determine where you wish to locate
water pump and water bottle. The
water bottle and water pump should be installed
on the same level.
The water bottle and water pump must be
located close together since the tubing
connecting the pump to the water bottle is 6 feet
long.
Use existing tubing between water
pump and water bottle. Do Not cut this tubing
or add tubing between pump and water
bottle. Do Not remove clamp on end of tubing
that connects inner tubing to outer tubing.
Suggested locations:
l
Under the sink - especially for faucet
connection.
l
Cabinet next to outlet connection.
Route the tubing to the faucet or refrigerator.
Cut tubing to length needed. Use proper fitting to
attach tubing to faucet or refrigerator. A “T”
fitting, (Part No. 4319152), for routing tubing to
more than one location is available from your
KitchenAid dealer or authorized parts distributor.
121
’
Press the switch on the water
pump to the “0” position.
/31
. Remove bottle cap from water bottle.
Replace empty water bottle. Attach
bottle cap to full water bottle.
El
.
Plug power supply cord into grounded,
electrical outlet. Press the switch to the
“I” position.
14
. Press the switch on the water
pump to the “I” position.
21
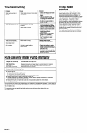
Determine where you will need to run
. water lines and the length of tubing that
will be needed. If more tubing is needed
than what is supplied, tubing (Part No.4319151)
and tubing connectors (Part No. 4319153) can
be obtained from your KitchenAid dealer or
If water bottle empties while
unattended,
the pump will run for 2-i/2
minutes and then automatically shut off.
I
I
authorized parts distributor.
Press the switch on the water
pump to the “0” position.
tub
ctor
collet
121
. Remove bottle cap from water bottle.
Replace empty water bottle. Attach
bottle cap to full water bottle.
u-l
H
Run enough water through faucet
or refrigerator to fill a glass or other
container. Check all connections for leaks. If a
connection leaks, push in collet and remove
tubing. Cut off l/2” of tubing and reinsert into
connector.
/31
. Press the switch on the water pump
to the “I” position.
1
C
1
Attach bottle cap to water bottle.
Push the tubing into the water bottle
until the end of the tubing reaches the bottom of
the bottle.
Do Not remove clamp from end of
tubing.
If water system is ex osed to
temperatures below
tl
2-F,
the system
must be drained.
Remove tube from bottle. Open all outlets and
run pump to inject air through all outlets.
Cleaning and sanitizing system:
System should be cleaned after extended
periods of non-use.
If unit is connected ONLY to a refrigerator
icemaker, the icemaker will have to call for water
before pump can be checked for leaks.
Keep Installation Instructions
for future reference. The instructions
will make it simple to reinstall your
water pump.
El
’
Add one-half teaspoon of chlorine
bleach to one gallon of water.
Use and Care
Information
Insert tube into solution and start pump.
The water pump operates
automatically when outlet (faucet,
etc.) is opened. When the outlet is
closed, the water pump automatically
stops operating.
131
. Open all outlets to fill system with
solution. Let stand five minutes.
141
.
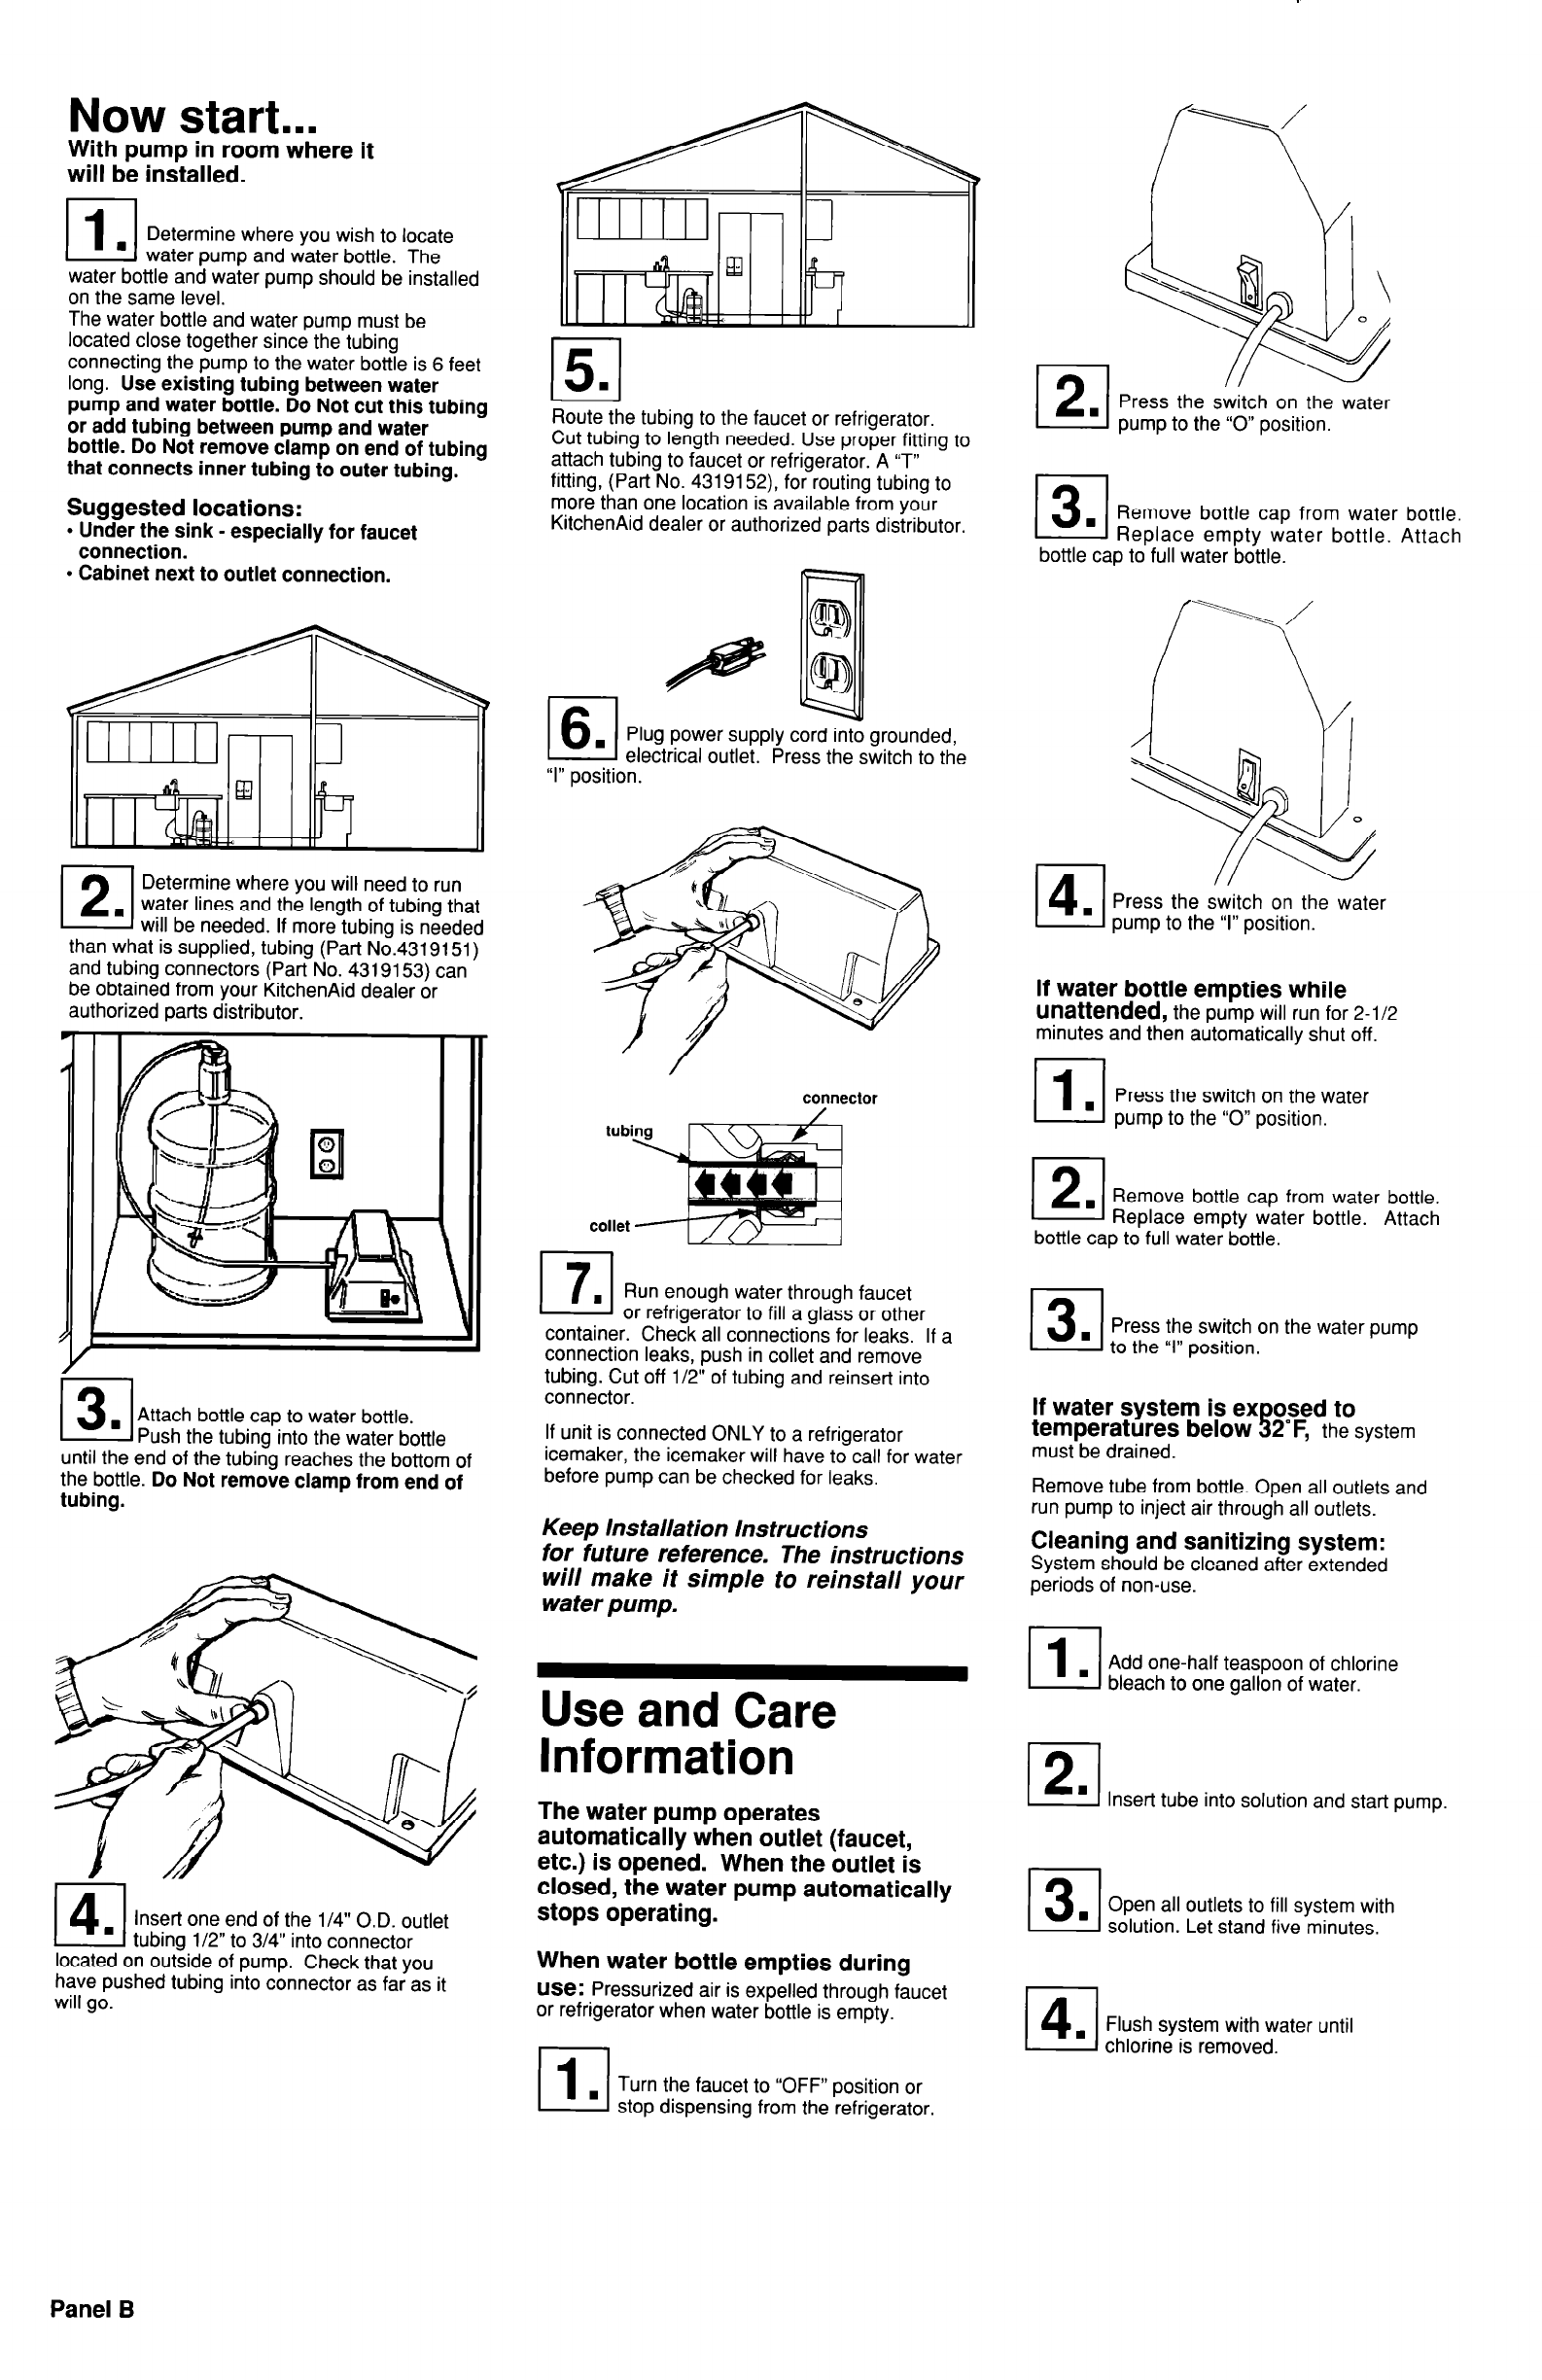
Insert one end of the l/4” O.D. outlet
tubing l/2” to 3/4” into connector
located on outside of pump. Check that you
have pushed tubing into connector as far as it
will go.
When water bottle empties during
Use:
Pressurized air is expelled through faucet
or refrigerator when water bottle is empty.
M-l
. Flush system with water until
chlorine is removed.
Turn the faucet to “OFF” position or
stop dispensing from the refrigerator.
Panel B