


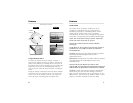

Testing
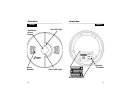
The Test/Reset button has four purposes. It tests the
unit’s electronics, resets the alarm, activates the
HUSH® feature and activates the Peak Level memory
(See page 16-17).
CAUTION: Due to the loudness (85 decibels) of the
alarm, always stand an arms length away from the unit
when testing.
• To test: Press and release the Test/Reset button and
4 seconds of alarm will sound, followed by the
message “Fire! Feu!”, then another four short beeps
and the message “Carbon Monoxide! Monoxyde de
carbone!”, followed by 4 additional short beeps.
• Reset: If the CO alarm pattern is sounding,
pressing the Test/Reset button will silence the
alarm. If the CO condition that caused the alert
continues, the alarm will reactivate. Reactivation
times depend on the amount of smoke or CO
present. See page 18.
• Peak Level Memory: If 8 chirps are made when
pushing the Test/Teset button, the unit has detected
a CO level of 100 PPM or greater.
• HUSH®: If the smoke/CO Alarm is sounding a
smoke alarm, pressing the test/reset button will
temporarily silence the alarm. If the smoke level
continues to build, the alarm will reactivate. See
Page 16.
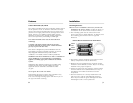
The unit needs to be tested weekly! If at anytime it
does not perform as described, verify the three
batteries are installed correctly and that they don’t
need replacing. Clean dust and other buildup off the
unit. If it still doesn’t operate properly call the
Consumer Hotline at 1-800-880-6788.
Install at least 12" (30.5 cm) away from fluorescent lights
as electronic noise may cause nuisance alarms. Do not
place in direct sunlight and keep out of insect infested
areas. Extreme temperatures will effect the sensitivity of
the Smoke/CO Alarm. Do not install in areas where the
temperature is colder than 40°F (4.4°C) or hotter than
100°F (37.8°C), such as garages and unfinished attics.
Do not install in areas where the relative humidity (RH)
is greater than 85%. Place away from doors and
windows that open to the outside.
Mounting
CAUTION: Your Smoke/CO Alarm is sealed and
the cover is NOT removable!
• To help identify the date to replace the unit, a label
has been affixed to the side of the alarm. Write the
“Replace by” date (7 years from power up) in
p e rmanent marker on the label. See “Alarm
Replacement” section for additional details.
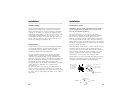
• The mounting plate must be removed from the
back of the alarm to install. To detach, twist the
mounting plate and the alarm in opposite dire c t i o n s.
Hold the mounting plate against the selected
installation location (wall or ceiling) and mark the
center of the holes with a pencil.
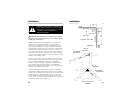
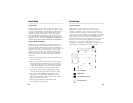
• To ensure aesthetic alignment of the alarm with the
hallway, or wall, the “A” line on the mounting plate
should be parallel with the hallway when ceiling
mounting, or horizontal when wall mounting. Drill a
hole through the pencil marks and use the enclosed
screws and anchors to secure. Use 3/16” drill for
anchor holes. Align the Smoke/CO Alarm with the
mounting plate and rotate clockwise (right) until the
unit is aligned. Screw and anchor accessories are
supplied.
I n s t a l l a t i o n
O p e r a t i o n
1514