


Battery Installation and Replacement
To install or replace the batteries in this Kidde CO alarm, please perform
the following steps.
1. Slide open the bottom cover to expose the battery compartment.
2. If replacing batteries, remove the old batteries and properly dispose
of them as recommended by the battery manufacturer.
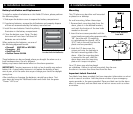
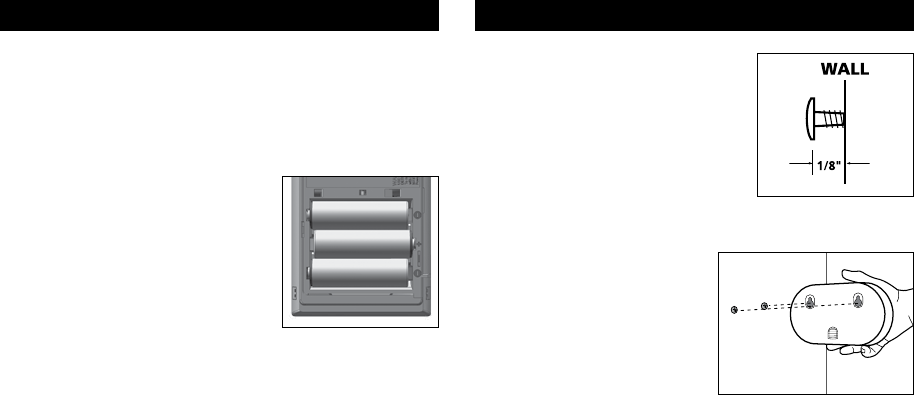
3. Install the new batteries. Note the polarity
illustration in the battery compartment.
4. Close the bottom cover. Note: The bot-
tom cover will not close if all three AA
batteries are not installed.
When replacing the batteries, use one of
the following approved brands:
•Duracell MN1500orMX1500
•Energizer E91
•GoldPeak15A
•GoldenPowerGLR6A
These batteries can be purchased where you bought the alarm or at a
local hardware store. Use of a different
battery may have a detrimental effect on the alarm operation.
IMPORTANT: Constant exposures to high or low humidity may reduce
battery life. A good safety measure is to replace the battery at least
once a year, or at the same time as you change your clocks for daylight
saving time.
After installing or changing the batteries, reinstall your alarm. Test
your alarm by using the Test/Reset button and check that the green
“Power” LED is on.
4. Installation Instructions
Mounting
This CO alarm can be either wall mounted
or placed on a tabletop.
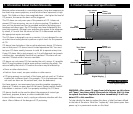
For wall mounting, follow these steps:
1. Remove back mounting plate from the
alarm, place it in the desired location,
and mark the location of the two holes
needed on the wall
2. Insert the two screws provided until the
screw heads are protruding approximately
1/8” from the wall. (If mounting
in a plasterboard or drywall, drill a
3/16” hole in the wall and use the
plastic anchors provided.)
3. Hook the CO alarm over the
screws and onto the keyholes in
the back mounting plate of the
alarm. After the mounting plate
is secured to the wall, slide the
alarm down over the mounting
plate until it snaps into place.
Your CO alarm may also be placed
on a tabletop. If alarm is not wall mounted, then be sure
the alarm is no more than three feet from the floor.
Important Labels Provided
Two labels have been provided that have important information on what
to do in case of an alarm. Add the phone number of your emergency
service provider in the space provided. Place one label next to the alarm
after it is mounted, and one label near a fresh air source such as a door
or window.
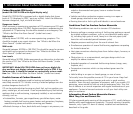
4. Installation Instructions
Wall Mount
Battery Polarity
for the three AA batteries
Screw Head Distance
from Wall
+
+
- +
-
-