Foryourconvenience,all three filters (Pro-
Filter,Washable Nano-Silver/Carloon Filter,
and True HEPA Filter) come in one pre-
packagedreplacement cassette.
For optimumunit efficiency,wash the Pre-
Filter and Washable Nano-Silver/Carbon
Filter as described below (Filter Cleaning)
every three months.
Do not wash and reuse the True HEPA
Fitter_tt willnot workeffectively.
replacing or cleaning t
WARNING: Before
any filters, make sure to remove the
powerplugfrom the wa out et.
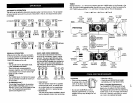
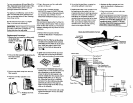
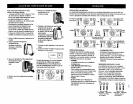
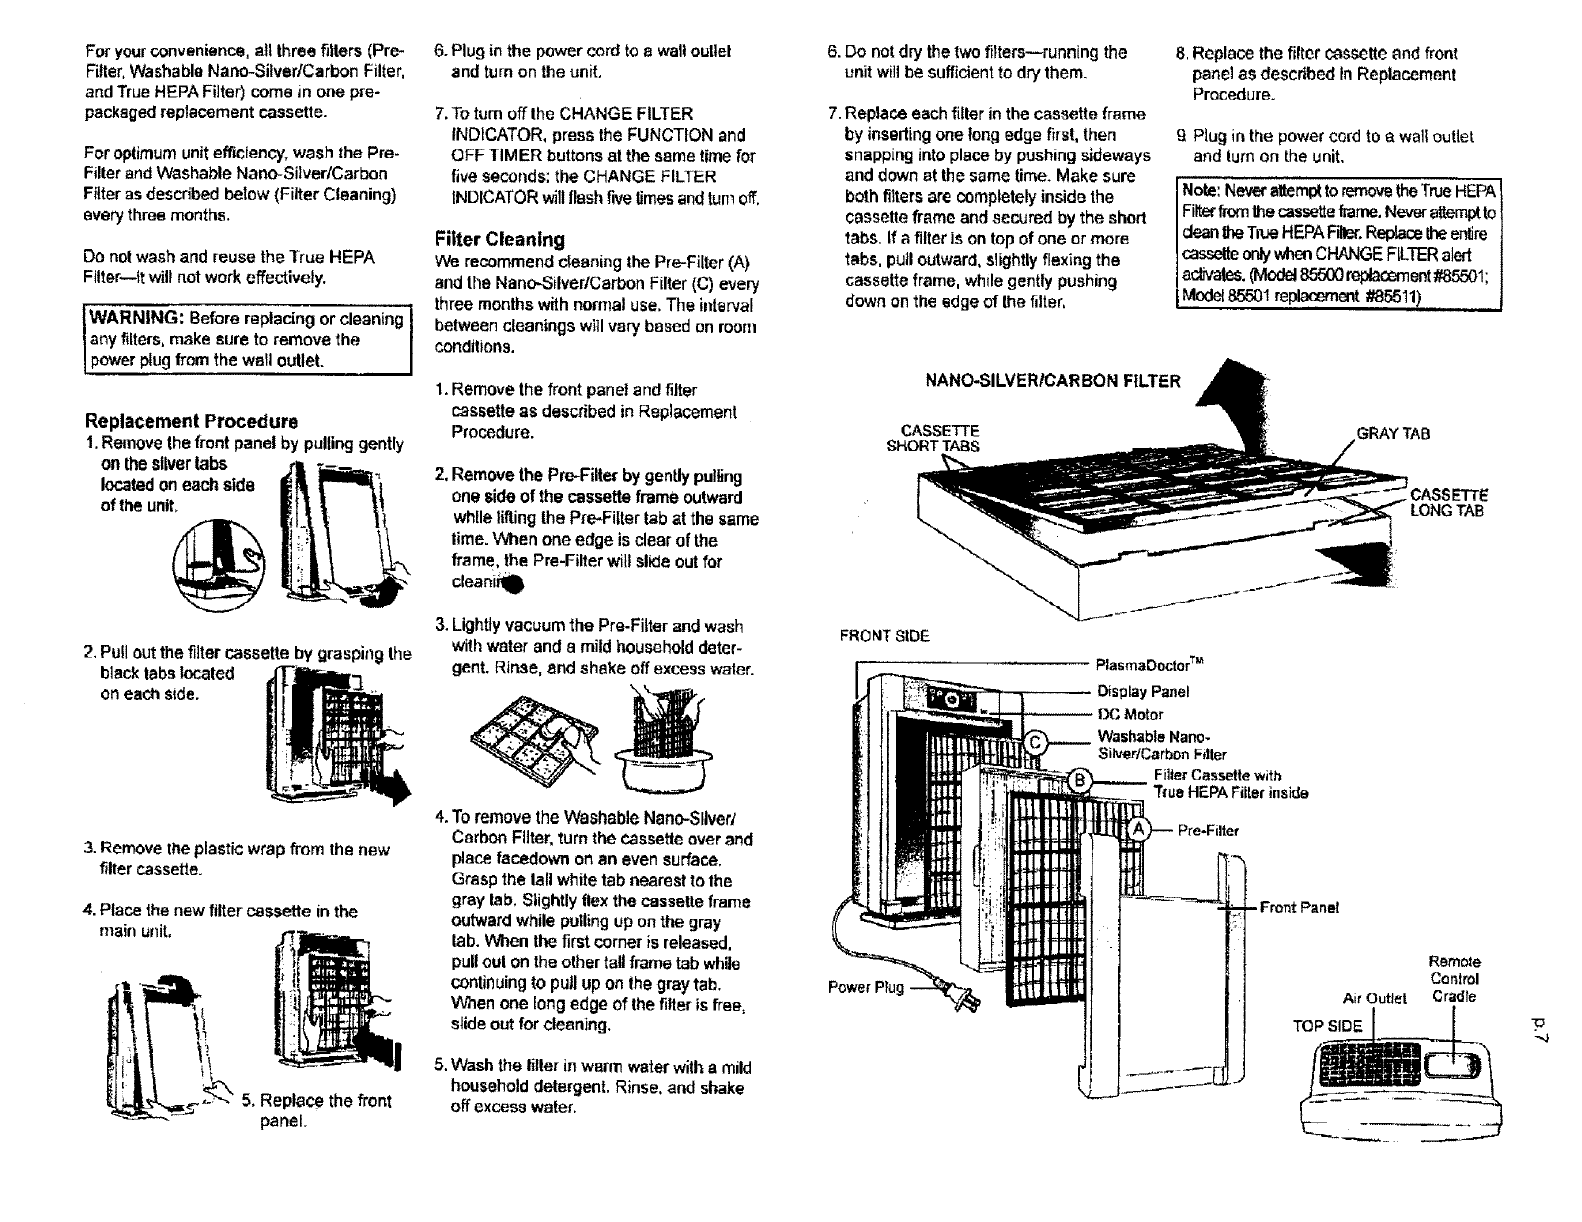
Replacement Procedure
1,Remove the front panel by pullinggently
on theslivertabs
locatedon each side
of the unit,
2. Pull out the filter cassette by grasp!rig tile
black tabs located
oneach side.
3. Remove the plasticwrap from the new
filter cassette.
4. Place the new filter cassette in the
main unit,
5, Replace the front
panel.
6. Plug in the power cord to a we1|outlet
and turn on the unit,
7. To turnoff the CHANGE FILTER
INDICATOR, press the FUNCTION and
OFF ]IMER buttons at the same time for
five seconds;the CHANGE FILTER
INDICATORwill flash five times and turnoff.
Filter Cleaning
we recommend cleaning the Pro-Fitter(A)
and tile Nano_Silver/CarbonFilter (C) every
three monthswith normal use, The interval
between cleanings will vary based on room
conditions.
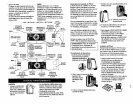
1.Remove the front panel and filter
cassette as describedin Replacement
Procedure.
2, Remove the Pro-Filter by gentlypulling
one side of the cassette frame outward
while lifting the Pro-Filter tab at the same
time. When one edge is clearof the
frame, the Pro-Filter willslide out for
cleanii_
3. Lightty vacuum the Pra-Fitter andwash
withwater and a mildhousehold deter-
gent. Rinse, end shake offexcess water.
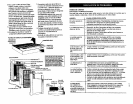
4. To remove the Washable Nano-SIIverl
Carbon Fitter, turn the cassette over and
place facedown onan even surface.
Grasp the lall white tab nearest tothe
gray lab, Slightlyflex the cassette frame
outward while pullingup on the gray
lab. When the first corner isreleased,
pulloul onthe olhertall frame tab while
continuingto pullup on the graytab.
When one long edge of the filter is free,
slide out for cleaning,
5, Wash the filterin warm water with a mild
householddetergent, Rinse, and shake
off excess water,
6. Do not dry the two _ters--running the
unit willbe sufficient to drythem.
7. Replace each filter inthe cassette frame
by insertingone tong edge first, then
snapping intoplace by pushingsideways
and down at the same time. Make sure
both fittersare completelyinsidethe
cassette frame and secured by the short
tabs. If a filter Is on top of one or more
tabs, pulloutward,slightly flexing the
cassette frame, whilegently pushing
down onthe edge of {he filter,
8, Replace the filter ¢_ssette and front
panelas described in Replacement
Procedure.
g Plug in the power card to a wallouttet
and turn on the unit.
Note: Neveratlem!_toremovetheTrue HEPA1
Filterfrom_e cassetteframe.Neverattemptto
cleantheTlue HEPAFiller.Replaoetheentire
casselteonlywhenCHANGE FILTERalert t
activates.(Model85500mplacoment#85501; I
Model85501 replacement#85511) j
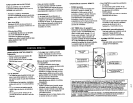
NANO-SILVER!CARBON FILTER
CASSETTE
SHORT TABS
GRAY TAB
! CASS ETT_
LONG TAB
FRONT SIDE
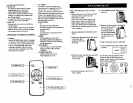
PlasrnaDoctorTM
Display Panel
I)C Motor
Washable Nano-
SiivertCarbon F_tler
Filler Cassette with
1"rueHEPA Filter inside
- Front Panel
PowerP_g
Air Outlet
TOP SIDE
Remme
CanI_l
C_d_


