TrueHEPAFilterReplacement
1.Turnoff theair cleanerandunplugthe
electrical cord.
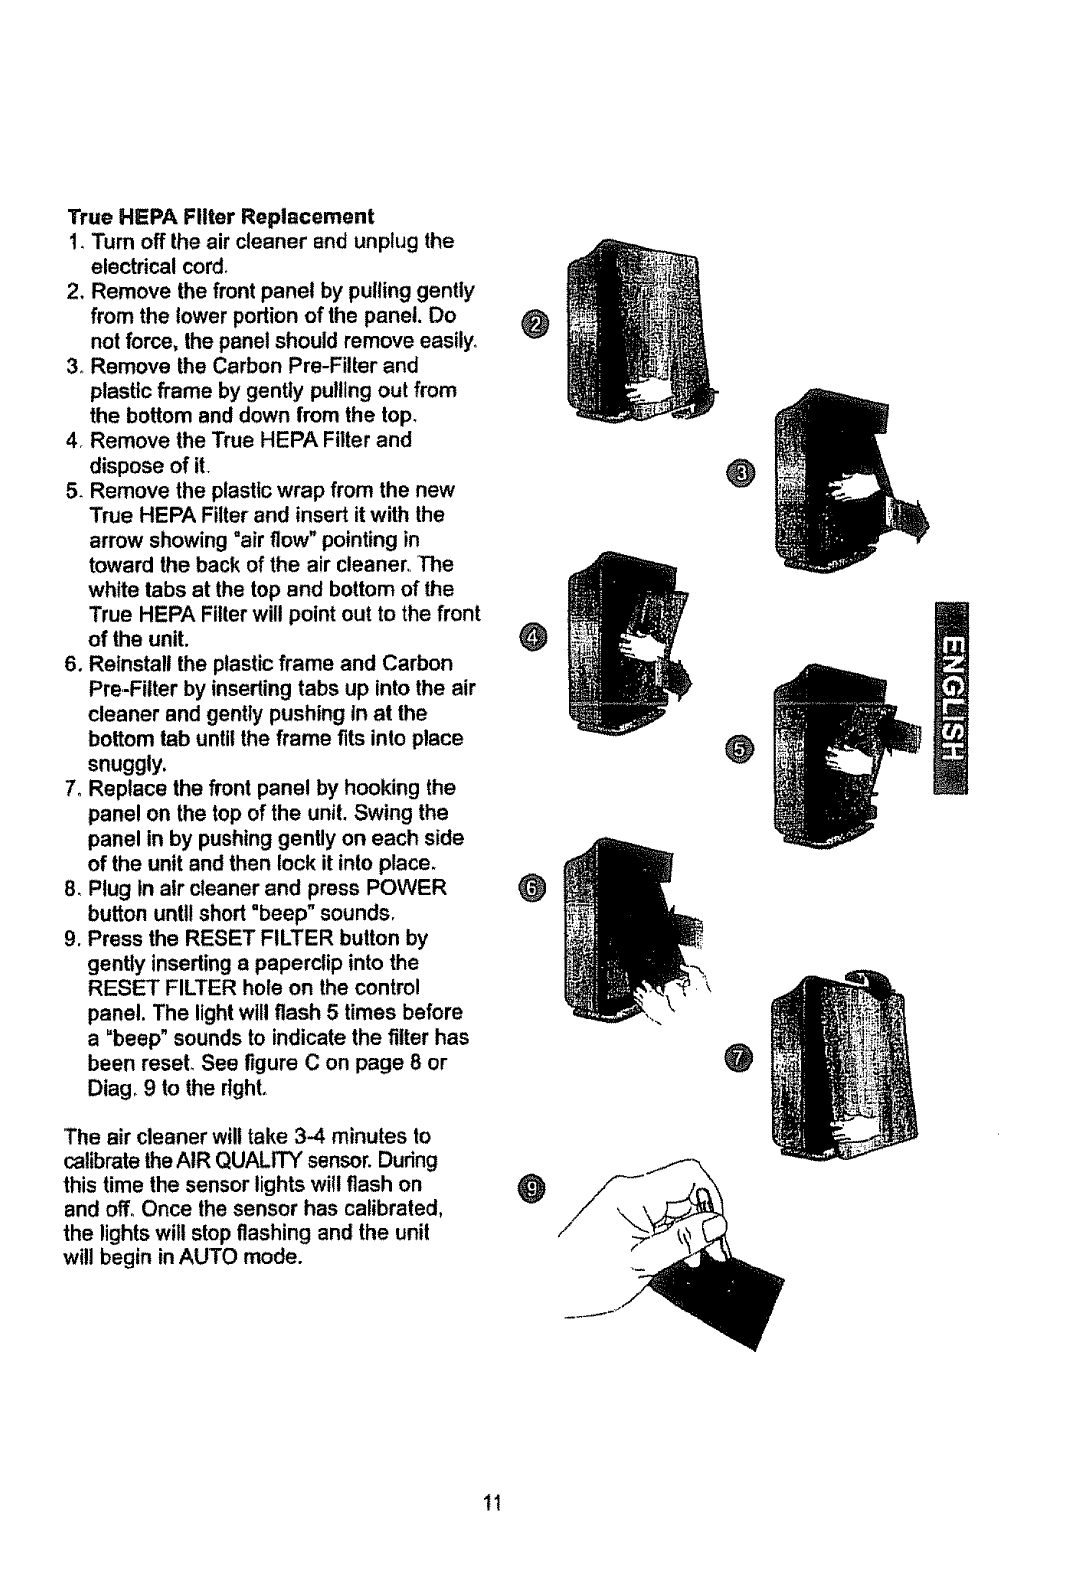
2. Remove the front panel by pulling gently
from the lower portion of the panel. Do
not force, the panel should remove easily.
3_ Remove the Carbon Pre-Filter and
plastic frame by gently pulling out from
the bottom and down from the top.
4_ Remove the True HEPA Filter and
dispose of it.
5. Remove the plastic wrap from the new
True HEPA Filter and insert it with the
arrow showing =air flow" pointing in
toward the back of the air cleaner. The
white tabs at the top and bottom of the
True HEPA Filter will point out to the front
of the unit.
6. Reinstall the plastic frame and Carbon
Pre=Filter by inserting tabs up into the air
cleaner and gently pushing in at the
bottom tab until the frame fits into place
snuggly,
7. Replace the front panel by hooking the
panel on the top of the unit. Swing the
panel in by pushing gently on each side
of the unit and then lock it into place.
8. Plug in air cleaner and press POWER
button until short "beep" sounds.
9. Press the RESET FILTER button by
gently inserting a paperclip into the
RESET FILTER hole on the control
panel. The light will flash 5 times before
a =beep" sounds to indicate the filter has
been reset. See figure C on page 8 or
Diag_ 9 to the right.
The air cleaner will take 3-4 minutes to
calibrate the AIR QUALITY sensor. During
this time the sensor lights wilt flash on
and off. Once the sensor has calibrated,
the lights will stop flashing and the unit
will begin in AUTO mode.
O
@
@
O
O
@
@
tl


