


8
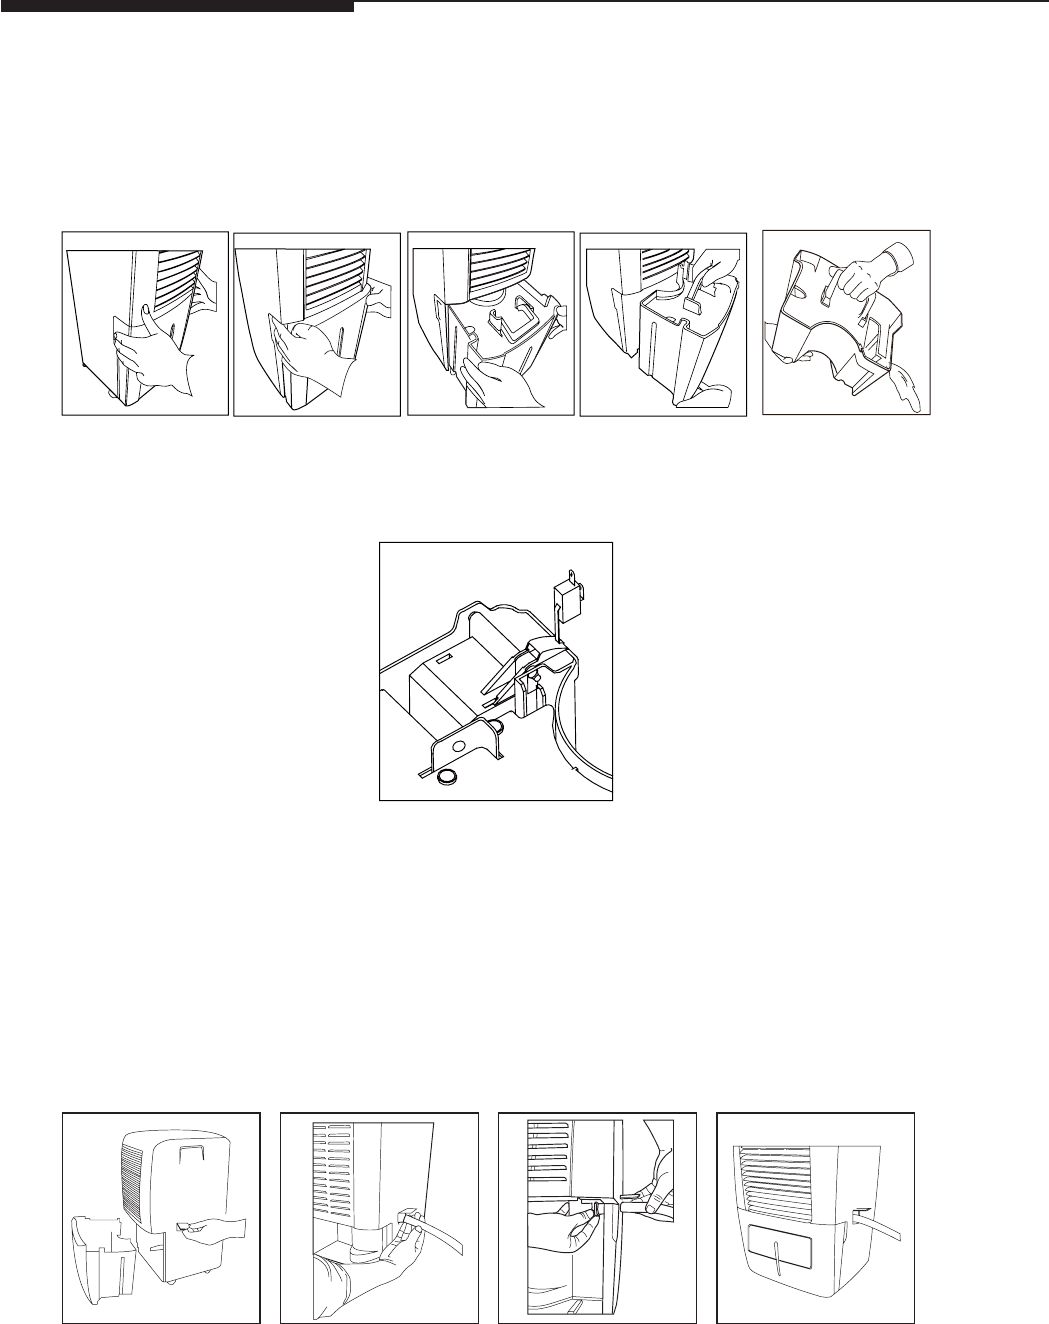
Removing Collected Water
(continued)
b. Do not move the unit at this point, otherwise water may spill on the floor.
c. Press sides of bucket gently to unclip the bucket from the unit.
d. Remove the bucket as shown in the photographs below and empty the bucket.
e. Replace the empty bucket back into the unit and once seated correctly, the unit will start up again.
f. You should hear a click when the bucket is in the correct position
WARNING: Discard water from bucket. Water is not potable and cannot be used for drinking.
If the bucket full light does not extinguish, check that the float is correctly snapped in place as indicated by the diagram.
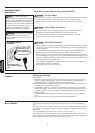
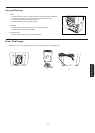
2. Continuous Drainage:
a. For constant drainage operation, you will need a garden hose and a drain nearby to discharge the water into.
b. Remove the bucket from the unit and set aside.
c. Lift up the side flap located on the right side of the unit as Iooking from the front. (fig.1)
d. Insert the female threaded end of the hose through the opening. (fig.2)
e. Screw the garden hose onto the threaded portion of the tray underneath the bucket opening. (fig.3)
f. Make sure the hose is secure so there are no leaks.
g. Direct the hose toward the drain, making sure that there are no kinks that will stop the water flowing.
h. Place the end of the hose into the drain.
i. Place the bucket back in the unit and make sure that it is located correctly. (fig.4)
j. Select the desired humidity setting and fan speed on the unit for continuous draining to start.
NOTE: If the unit stops operating, check if the bucket full light is illuminated. If it is, remove the bucket, and empty the
contents and then check the seal between the hose and the drip tray. If there is a small leak, then replace the hose gasket
and re-tighten the hoseˊ
fig. 2 fig. 3 fig. 4
fig. 1