


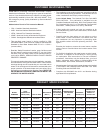

8
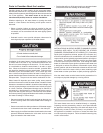
INSTALLATION INSTRUCTIONS
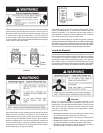
1. Turn “OFF” the gas supply to the
water heater.
If the main gas line shutoff valve
serving all gas appliances is
used, also shut “OFF” the gas
at each appliance. Leave all
gas appliances shut “OFF” until
the water heater installation is
completed, see Figures 2 and 3.
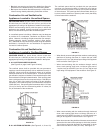
2. Turn “OFF” the water supply to
the water heater at the water shut
off valve or water meter. Some
installations require that the water
be turned off to the entire house,
see Figures 2 and 4.
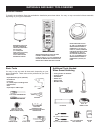
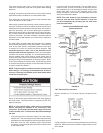
FIGURE 2.
Removing the Old Water Heater
FIGURE 3.
FIGURE 4.
3. Check again to make sure the gas supply is “OFF” to the water
heater. Then disconnect the gas supply connection from the
gas control valve.
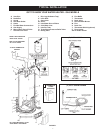
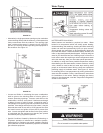
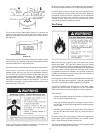
4. Attach a hose to the water heater
drain valve and put the other end in
a oor drain or outdoors. Open the
water heater drain valve. Open a
nearby hot water faucet which will
relieve pressure in the water heater
and speed draining. The water
passing out of the drain valve may
be extremely hot. To avoid being
scalded, make sure all connections
are tight and that the water ow is
directed away from any person, see
Figures 2 and 5.
FIGURE 5.
5. Disconnect the vent pipe from the draft hood where it connects
to the water heater. In most installations the vent pipe can
be lifted off after any screw or other attached devices are
removed. Dispose of the draft hood. The new water heater
has a draft hood which must be used for proper operation.
6. If you have copper piping to the water heater, the two copper
water pipes can be cut with a hacksaw approximately four
inches away from where they connect to the water heater,
see Figure 6. This will avoid cutting off pipes too short.
Additional cuts can be made later if necessary. Disconnect the
temperature-pressure relief valve drain line. When the water
heater is drained, disconnect the hose from the drain valve.
Close the drain valve. The water heater is now completely
disconnected and ready to be removed.
FIGURE 6.
If you have galvanized pipes to the water heater, loosen
the two galvanized pipes with a pipe wrench at the union in
each line. Also disconnect the piping remaining to the water
heater, see Figure 7. These pieces should be saved since
they may be needed when reconnecting the new water heater.
Disconnect the temperature-pressure relief valve drain line.
When the water heater is drained, disconnect the hose from
the drain valve. Close the drain valve. The water heater
is now completely disconnected and ready to be removed.
Mineral buildup or sediment may have accumulated in the
old water heater. This causes the water heater to be much
heavier than normal and this residue, if spilled out, could
cause staining.
FIGURE 7.