


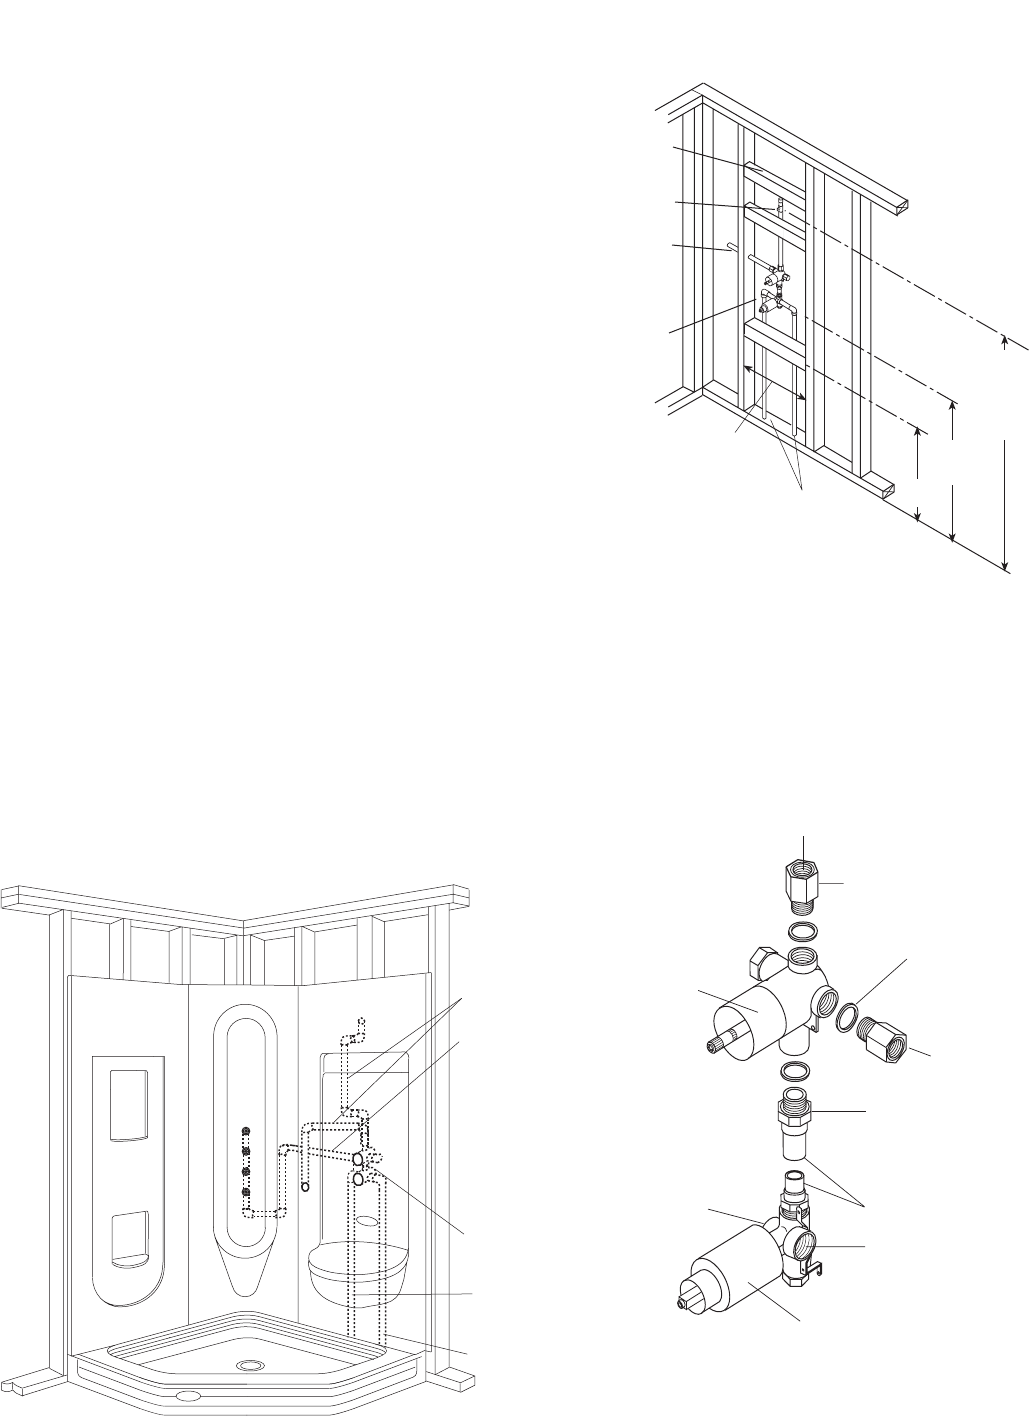
STEP 2. ROUGH-IN PLUMBING
A. Install water lines and rough plumbing. Valve should
be located between 36" and 48" from the floor. Use
blocking and secure with pipe straps.
B. If stationary shower is used, install shower riser.
Suggested shower head location is 78" from the floor
(above the endwall).
C. The locations of the valves, mixers, and shower head
should be determined before the walls are placed in
position. Where access to connections is limited, allow
enough flexibility in the supply lines for easier position-
ing of the valves after the unit is in place.
From stable reference points such as subfloor and
front of the double studs, measure and note the
locations of the valves, shower head arm and connec-
tion for body spray jets.
STEP 3
Install Shower Base per Shower Base Instructions.
A. For proper fit and installation of the custom shower
system it is imperative that the shower base is
level on all sides and the wall structure is plumb.
NOTE: Watertight installation of the drain is the installer’s
responsibility. Drain leakage is excluded from the Jacuzzi
Whirlpool Bath warranty of this product. (See “Drain
Installation Instructions” provided with drain.)
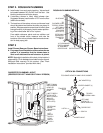
ROUGH-IN PLUMBING DETAILS
COLD IN
HOT IN
TO BODY
SPRAY WALL
TO SHOWER HEAD OR HAND HELD SHOWER
TRANSFER
VALVE
MIXER VALVE
COPPER PIPE
MxF ADAPTER (3)
COPPER GASKET (4)
LEFT-HAND
THREAD TO
SWEAT ADAPTER
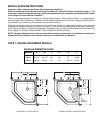
SUGGESTED PLUMBING LAYOUT
(REVERSE FOR LEFT HAND SEAT WALL VERSION)
OPTICA 300 CONNECTIONS
LINE TO BODY
SPRAY JETS
WALL (IF BACK
WALL IS
EQUIPPED
WITH JETS)
OPTICA 300
MIXER/
TRANSFER
VALVE
HOT
WATER
SUPPLY
COLD
WATER
SUPPLY
LINE TO WALL
BAR SHOWER
HEAD OR
SHOWER
HEAD
SUPPLY LINES
OPTICA 300
MIXER AND
TRANSFER
VALVE
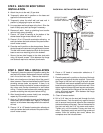
BLOCKING
TO
SHOWER HEAD
TO BODY SPRAY
JETS WALL
(IF NEO WALL IS
EQUIPPED
WITH JETS)
78"
(FOR FIXED
SHOWER
HEAD)
36" MIN.
48" MAX.
24"
12" CLEARANCE
FOR PLUMBING
AT SEATWALL
CENTERLINE