For more detailed information, visit: www.irobot.com 23
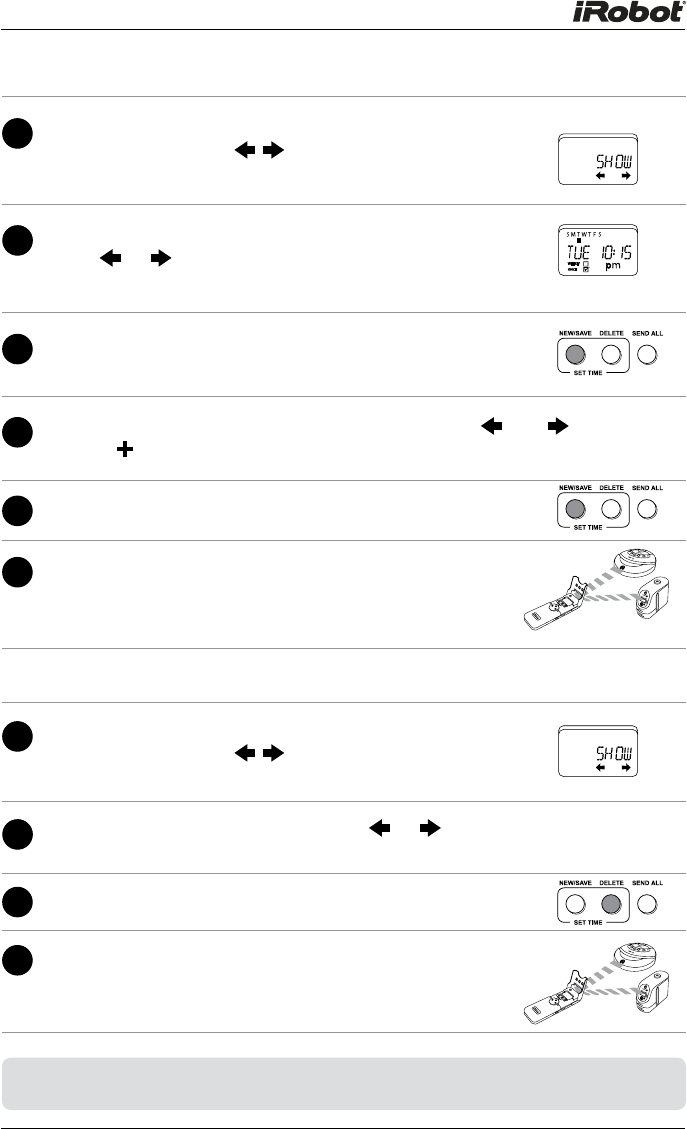
Changing Schedules
1
Open the Scheduler Remote’s cover. The display
should read “SHOW .” If it reads “Set Time”,
see p. 15.
2
Scroll through the programmed schedules
using or until you find the schedule you
want to change.
3
Press New/Save when the remote displays the
schedule you wish to change.
4
Scroll to the field you wish to change using the and buttons and
use the to change the time, day, or frequency.
5
Press New/Save to save the new time.
6
Send the updated schedule to Roomba and
the scheduling Virtual Walls.
Deleting Schedules
1
Open the Scheduler Remote’s cover. The display
should read “SHOW .” If it reads “Set Time”,
see p. 15.
2
Scroll through the schedules using or until the schedule you
wish to delete is displayed.
3
Press Delete to clear the schedule.
4
Send the deleted schedule to Roomba and
the scheduling Virtual Walls. See pp. 17 – 18
for details.
TIP: You can clear the schedule from the scheduling Virtual Walls and from
Roomba by removing and replacing the batteries.


