


635392Page 2 of 4
PARTS LIST
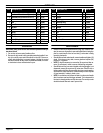
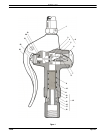
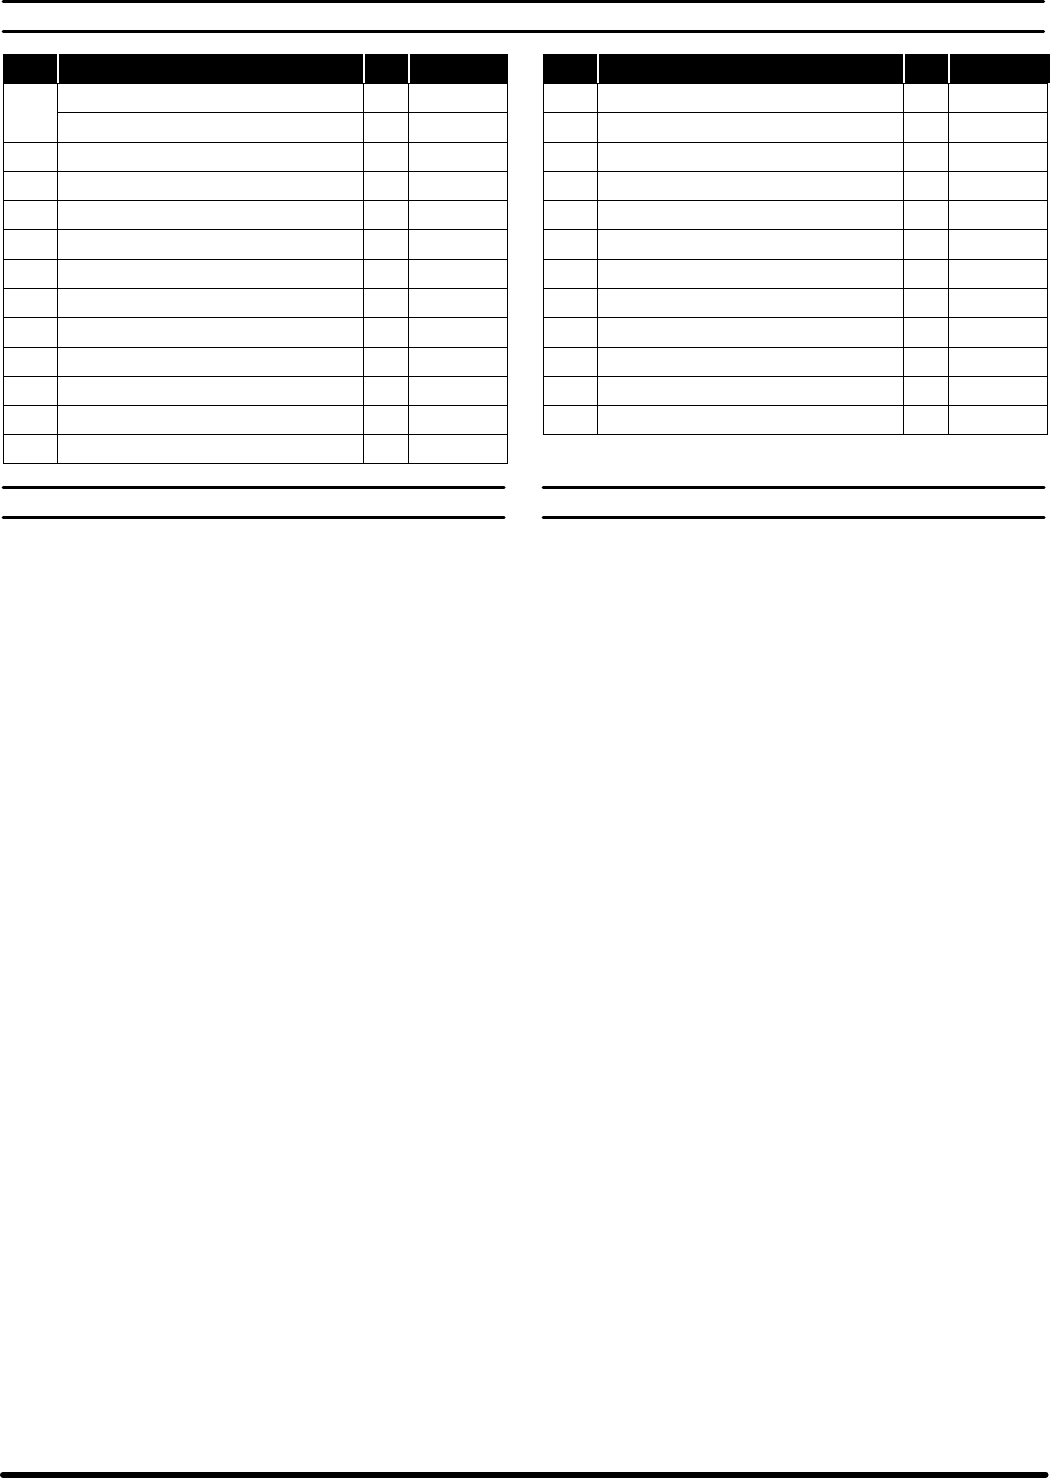
Item Description (size) Qty Part No. Item Description (size) Qty Part No.
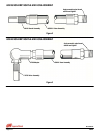
1 Nozzle and Hose Assembly (635392) (1) 629239
Nozzle and Hose Assembly (635399) (1) 629240
n 2 Seal Asm (Stem) (includes items 3 thru 5) (1) 61142
3 Pin (1) Y178-21
4 Seal (1) 61080
5 Valve Stem (1) 76846
n 6 Cap Nut (1) 76847
n 7 Gasket (1) F21-42
n 8 Spring (1) 76850
9 Spring (1) 71269
10 Filter (1) 71268
11 Valve (Body) (1) 73755
12 Swivel (includes items 13 thru 18) (1) 60543
13 Washer (2) 75747
14 Adapter (1) 77926
15 Gasket (1) F21-37
16 O" Ring (3/32" x 3/4" o.d.) (1) Y325-113
17 Back-Up Ring (1) 72469
18 Insert (1) 77927
n 19 Gasket (1) 73750
n 20 Packing (1) Y186-43
21 Pin (1) 2600
22 Gland (1) 73752
23 Trigger (1) 2585
n Service Kit 61130
OPERATION
Disconnect pump power source and relieve all pressure from sys-
tem when in use.
1. Do not drop or leave control handle on floor.
2. Be sure non-drip nozzle is fully open before actuating handle. If non-
drip tip is not fully open control handle will not shut off. Close com-
pletely after dispensing to prevent leakage. Holding the control
handle so that the non-drip nozzle is pointed downward, turn count-
er-clockwise to close and clockwise to open.
MAINTENANCE
S Should no lubricant be dispensed even though (23) handle is oper-
ated, be sure non-drip nozzle is open and that lubricant is being sup-
plied to control handle. Also be sure that (5) valve stem is being
moved by the handle.
S Should lubricant leak under handle, remove handle and tighten (22)
gland. If this does not stop leak, remove gland and replace (20)
packing or (19) gasket.
S NOTE: It may be necessary to remove the (6) cap nut and then re-
move (5) valve stem in order to remove the packing and gasket.
S Should lubricant flow from control handle even though trigger is not
depressed, remove (6) cap nut and (5) valve stem. Check for dirt or
foreign matter which may be preventing valve from properly seating,
also check the rubber seat of the valve assembly for seal. Replace
(4) seal assembly if rubber is pitted or torn.
S NOTE: A small amount of lubricant will leak from the control handle
after it has been used and the trigger released. This is because this
lubricant is already past the non-drip valve seat. The non-drip nozzle
should be closed after each use to prevent this.