ECR International
Hyundai Ductless Split System9
OPERATION MODE (Continued)
MAINTENANCE
• A hissing noise or hollow sound:
This sound may be generated from the refrigerant flowing
within pipes during operation or after turning off the unit(s).
• A squeaking noise:
This noise is generated from the air conditioner(s) when it
expands or contracts due to temperature changes.
• A rustling noise:
This noise is generated from the indoor fan at start up.
• Operating sounds may change:
The operation sounds varies with the fan speed.
• Odors:
Such odors as tobacco, cosmetics, or foods may accumu-
late in the indoor unit(s).
• Indoor fan motor(s) stop:
In the “AUTO”, “DRY” and “HEAT” operation mode, the in-
door fan motor(s) will be stopped when the room tem-
perature reaches the set temperature.
BEFORE CALLING FOR SERVICE
• The air conditioner(s) do not start or change operation
mode immediately:
To prevent overloading the compressors, the air
conditioner(s) will not start for approx. 3 minutes.
• No change on the operation mode by the remote control:
The signal of operation mode changing has not reached
the indoor unit(s). Press the ON/OFF button again and
change the operation mode.
• The fan speed of the indoor fan motor changes or the
fan motor of the outdoor unit stops:
To prevent overloading the unit, the air conditioner(s) may
change the indoor fan speed and operate the outdoor fan
intermittently.
• In heat mode water comes out the outdoor unit:
The ambient air can condense on the pipes of the outdoor
unit.
THE FOLLOWING ARE NOT DEFECTS
ROUTINE MAINTENANCE
• Be sure to stop the operation and disconnect the power
source before performing any checks or cleaning.
• Do not wet the air conditioner(s).
• Benzene, thinner and cleaning powder may damage the
coated surface or the plastics.
• Do not use water higher than 40° C (104° F), or the air
filters may shrink and the plastic materials may be dam-
aged.
• Do not touch the evaporator coil when removing and re-
placing the air filters. Injury may occur.
• Never operate the unit without the air filters.
1. CLEANING AIR FILTERS (ONCE EVERY TWO WEEKS)
Clean the air filters at least once every two weeks to save elec-
tricity. Use the vacuum cleaner to remove dust from the air filter.
NOTE: In case the dust on the air filter cannot be easily
removed with a vacuum cleaner, use a neutral clean-
ing agent. Be sure to sufficiently rinse the air filter with
water to completely remove the cleaning agent and
allow it to dry in the shade.
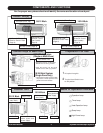
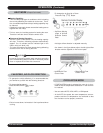
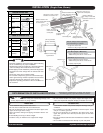
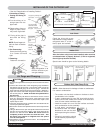
How to remove air filters:
A) Pull the front grille by grasping the recesses on the ends.
B) Open the front grille up to the position where it is stopped
with a click sound.
C) Raise the air filter, disengage the claws, and remove.
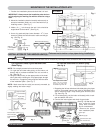
How to replace air filters:
A) Place the air filters with “Front” marking facing toward you
in the reverse order of mentioned “How to remove air
filters”.
B) Gently push to close the front grille to the unit.
C) Secure the grille in position by pressing evenly along the
lower edge.
2. CLEANING INDOOR UNIT(S) & REMOTE CONTROL(S)
Use a dry cloth for cleaning the indoor unit(s) and remote
control(s).
BEFORE THE SEASON
• Check that the air inlet and outlet of the indoor and outdoor
units are not blocked.
• Check that the ground wire is connected and there is no
wire breaks anywhere.
• Check that the installation bracket is not corroded or rusty.
• Check that the air filters are clean and in place.
AFTER THE SEASON
• Operate on “CIRCULATION” only mode for several hours
on a dry day. Storage when wet will allow mold to develop.
• Disconnect the power source
• Remove the batteries from the remote control.
• Clean the air filters and replace.


