


8©2010 Hunter Fan Co. 44030-01 20100119
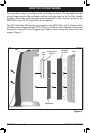
Figure 10.
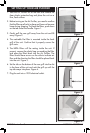
Replace The UVC Bulb
The UVC light should be replaced once yearly. Follow
these instructions to remove and replace the UVC bulb.
1. Unplug the unit from the wall outlet and remove the
back grill by pressing down on the top tab.
2. Remove the 2 screws holding the Photcatalytic Screen
in place and remove the screen. Figure 9.
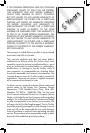
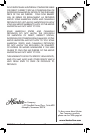
3. Remove the 3 screws holding the UVC Guard in place
and remove it from the unit. Figure 10. & 11.
4. Grasp the bulb with your thumbs and forefingers at
the plastic top and bottom and gently roll the bulb to
the left. Figure 12.
5. When the bulb releases, slide the top of the bulb out
of the bracket and remove.
6. Partially remove the new UVC Bulb from it’s packaging
being careful not to let the bulb come in contact with
your skin.
Figure 11.
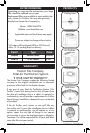
5. If the Pre-Filter needs to be cleaned, It may be
submerged in warm soapy water to clean. Gently lift
and submerge the filter several times to clean.
6. When complete, rinse the filter with warm water and
allow to dry completely.
Note: Wet parts placed into the unit can cause damage
to the filters and or the motor of the Air Purifier.
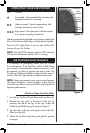
Check or Replace Your Filters
1. Turn the Air Purifier off and disconnect from the wall.
2. Remove the rear grill on the back of the unit by
pressing the tab at the top of the unit, under the
handle and pull the rear grill outward. Figure 7.
3. Remove the HEPA Filters from the unit.
4. Check the Filters for particle build-up.
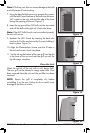
5. The HEPA filter should be removed every 12 months
of use and matched to the color indicator on the inside
of the filter compartment. When the filter matches the
dark, charcoal gray indicator, it should be replaced.
Figure 9.
Screws
Screws