


41695-01 5/17/2004
WARNING
• To avoid possible electrical shock, before in-
stalling light fixtures, disconnect power by
turning off the circuit breakers both to the
outlet box and to its associated wall switch
location. If you cannot lock the circuit break-
ers in the off position, securely fasten a
prominent warning device, such as a tag, to
the service panel.
• This fixture must be mounted to an approved
outlet box that is directly supported by the
building structure.
• All wiring must be in accordance with na-
tional and local electrical codes and ANSI/
NFPA 70. If you are unfamiliar with wiring,
you should use a qualified electrician.
CAUTIONS
• Read entire text carefully before beginning
installation and save these instructions.
• Should you desire to change the unit over to
a different style mounting, you will need to
follow these instructions to convert from one
installation style to another.
• To reduce the risk of electrical shock, install
this light kit only on listed Hunter ceiling
fans type A through Z.
CEILING FAN LIGHT KIT
SECTION:
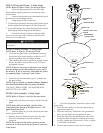
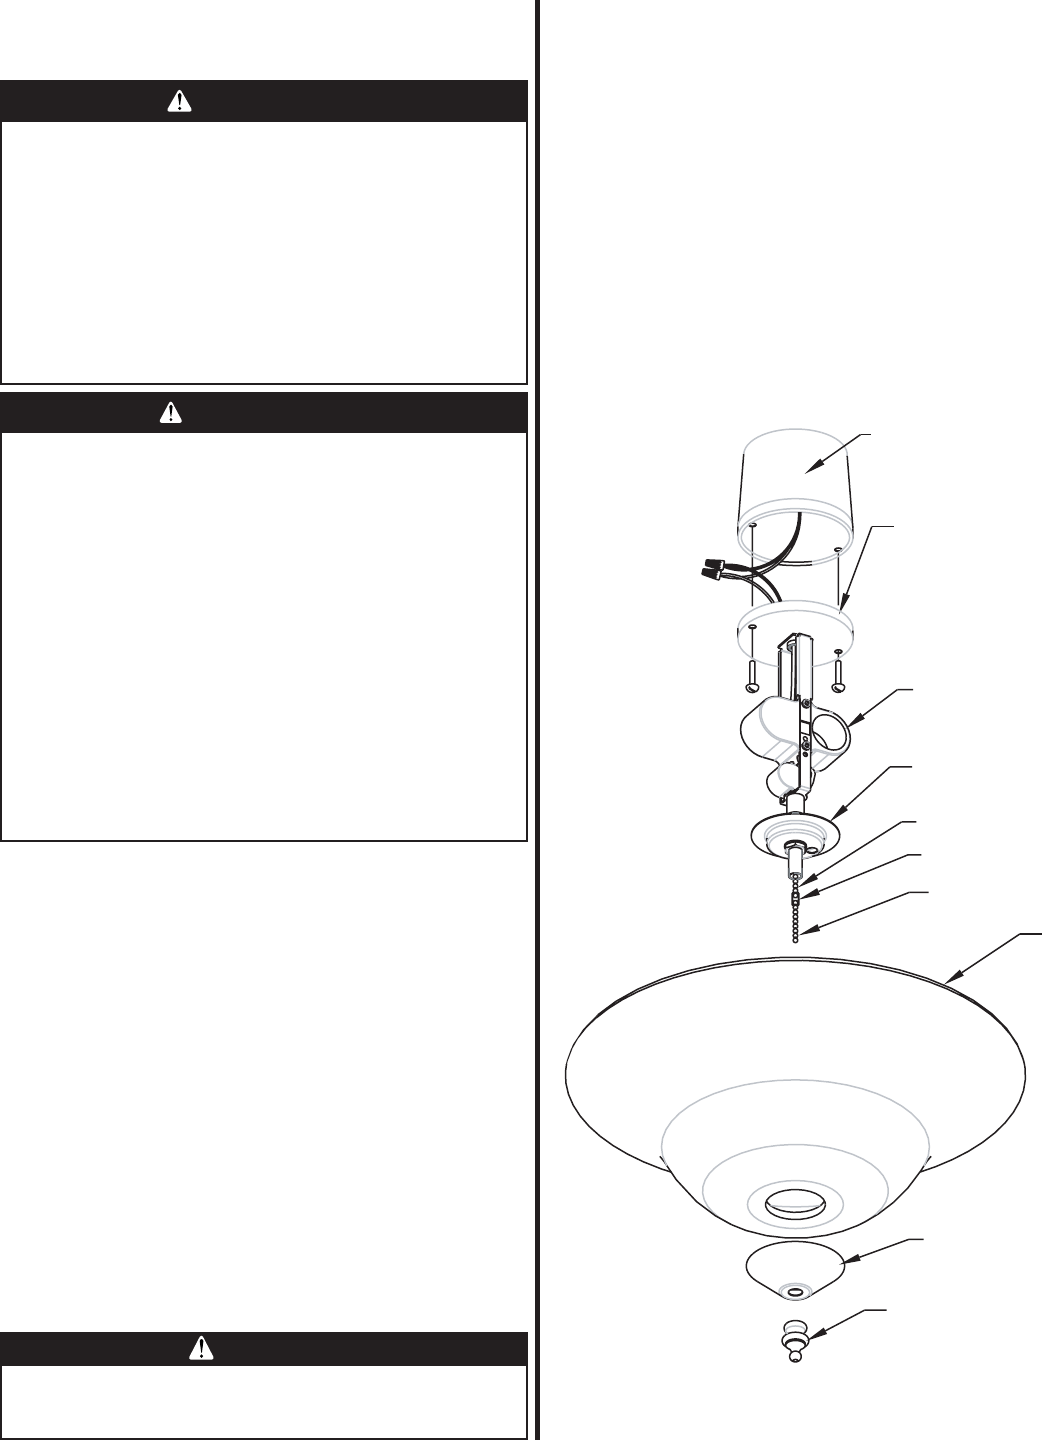
NOTE: Refer to Figure 3 for the steps below .
1. To install the light fixture in the ceiling fan instal-
lation, you must first remove the canopy that comes in-
stalled on the ceiling light fixture and replace it with the
fan mounting plate.
2. Loosen the nut inside the canopy and remove the
nut, the lock washer and the ground wire.
3. Locate and install the fan mounting plate over the
pipe nipple as shown in Figure 3.
4. Install the lock washer and nut and tighten se-
curely.
NOTE: It is not necessary to inst all the ground wire onto
the fan light kit, as it is not used for grounding in the fan
installation.
STEP 1: Fixtur e Conversion - Ceiling Fan Light
Kit
CAUTION
Be sure no bare wire or wire strands are visible after making
connections.
STEP 2: W iring the Light Kit - Ceiling Fan
1. Remove the bottom switch housing cover from the
ceiling fan.
Note: If your Hunter fan has a remote control or a
removable switch housing, follow the supplemental
instructions supplied with this light kit for that
installation.
2. Using approved wire connectors:
* Connect the white wire from the light fixture to the white
supply wire coming out of the ceiling fan; and
* Connect the black wire from the light fixture to the black
with white striped wire coming out of the ceiling fan.
3. Spread the electrical splices so that the black wires
are on one side of the outlet box and the white wires are on
the other side.
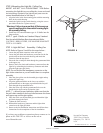
FAN SWITCH
HOUSING
FAN MOUNTING
PLATE
LAMPHOLDER
UPPER CAP
BREAKAWAY CONNECTOR
LIGHT CHAIN
EXTENSION
GLOBE
LOWER CAP
UPPER CHAIN (LIGHT)
FINIAL
FIGURE 5