® U.S. Registered Trademark
Copyright © 1999 Honeywell Inc. • •All Rights Reserved
INSTALLATION MANUAL
The Round
®
Creative Series
Y460A2003 Thermostat
The Y460A2003 Thermostat is for 15 to 30 Vac control
of gas- or oil-fueled warm air, steam or hot water
heating/electric cooling systems.
Your Y460A Thermostat
❑
Follow these instructions step-by-step for proper
installation of your Honeywell thermostat. It is
recommended that as you read, understand and
complete each step, you check
√
it off with a pencil
or pen.
1 PREPARE FOR INSTALLATION
❑
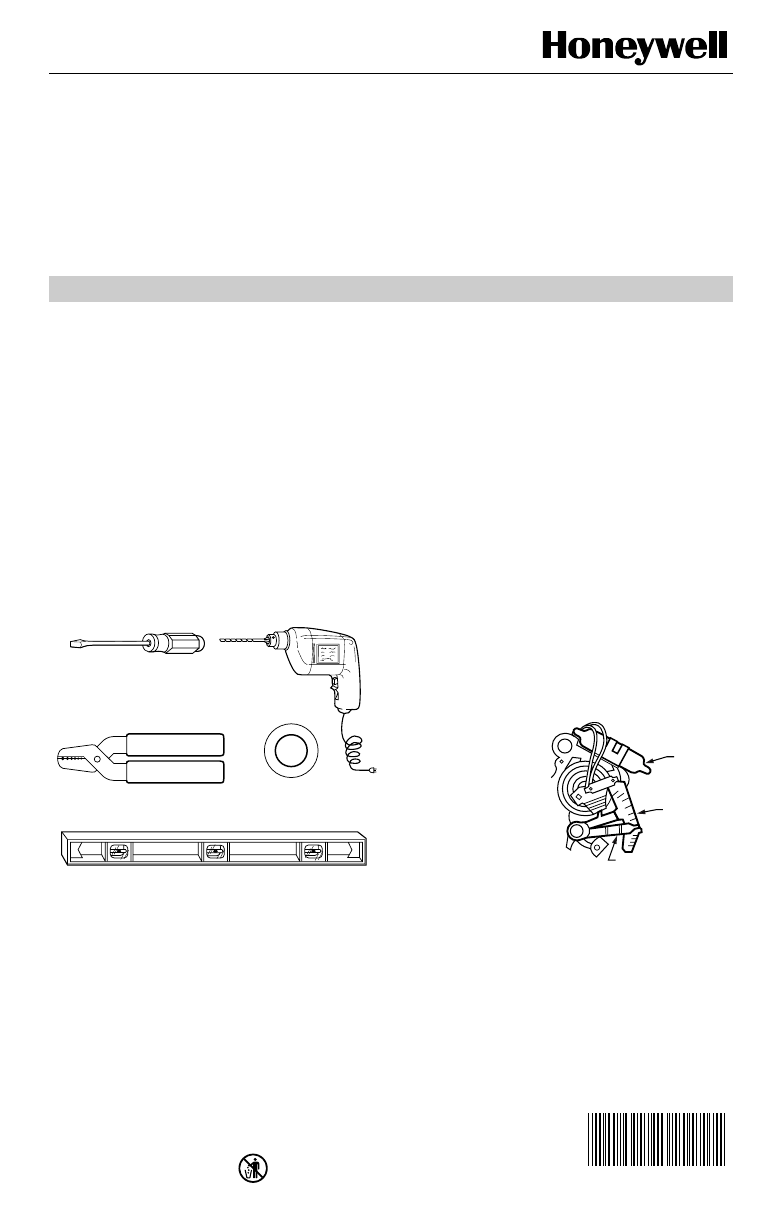
Assemble the following required tools:
Flat-bladed screwdriver; hand or power drill with
3/16 in. (4.8 mm) drill bit; wire cutter/stripper or sharp
knife; bubble level or plumb bob and line.
IMPORTANT:
For cooling systems, do not operate cooling if
outdoor temperature is below 50°F (10°C).
❑
Test your heating and/or cooling systems to be sure
they are working, especially if they have been
inoperative for any length of time. If either system
does not work, contact your local heating/air
conditioning dealer for assistance.
IMPORTANT:
Turn off power to the system at the main fuse
or circuit breaker panel. Most buildings have a
separate switch box or circuit breaker for dis-
connecting power to the furnace.
2 UNPACK YOUR THERMOSTAT
❑
Carefully unpack your new thermostat.
❑
Remove and discard the shipping wrap; be sure to
save the screws and the instructions.
❑
Remove the thermostat cover and set it aside to use
later.
❑
Remove the red plastic insert that holds the mercury
switch in place.
3 REMOVE YOUR OLD
THERMOSTAT
❑
Remove the cover of the old thermostat. If the cover
does not snap off when pulled firmly from the
bottom, look for screw(s) to loosen to unlock the
cover.
❑
Before removing
the old thermostat
from the wall, look
at it carefully to
locate the heat
anticipator
adjustment
mechanism. Look
at the illustration to
help you recognize
the heat
anticipator. Make a
note here ______________ of that anticipator
setting for use in Step 7. The heat anticipator pointer,
if adjustable, will be set at one of a series of numbers
representing the electrical current rating of the
primary control in your furnace: .2, .4, .8, etc or 0.2,
0.4, 0.8, etc. If no heat anticipator/indication is
showing, go on to the next step.
❑
Loosen screw(s) holding the thermostat base to the
subbase or wall and lift it away.
FLAT BLADE
SCREWDRIVER
HAND OR POWER
DRILL WITH 1/16 INCH
DRILL BIT, IF NEEDED TO
DRILL HOLES IN WALL
WIRE CUTTER/STRIPPER OR SHARP
KNIFE, IF NEEDED TO STRIP WIRES
MASKING TAPE, IF NEEDED
TO LABEL WIRES AS THEY
ARE DISCONNECTED FROM
OLD THERMOSTAT
SPIRIT LEVEL OR PLUMB BOB AND LINE TO LEVEL
THERMOSTAT FOR ACCURATE OPERATION
M 835
M6115
BULB
SWITCH
ANTICIPATOR
SCALE
ANTICIPATOR
SETTING LEVER


