69-1052—1
4
T8511G DELUXE HEAT PUMP ZONE THERMOSTAT
SETTINGS
System and Fan Settings
System settings control the thermostat operation as
follows:
Em Heat: Emergency heat relay is automatically
controlled by the thermostat. The cooling system is
off. The compressor is de-energized.
Heat: The thermostat controls the heating.
Off: Both the heating and cooling are off.
Cool: The thermostat controls the cooling.
Auto: The thermostat automatically changes between
heating and cooling operation, depending on the
indoor temperature.
Fan settings control the system fan as follows:
On: Fan operates continuously.
Auto: Fan operates with equipment.
The system default setting is Heat and the fan default
setting is Auto. Use the keyboard to change to the desired
settings. See Fig. 8.
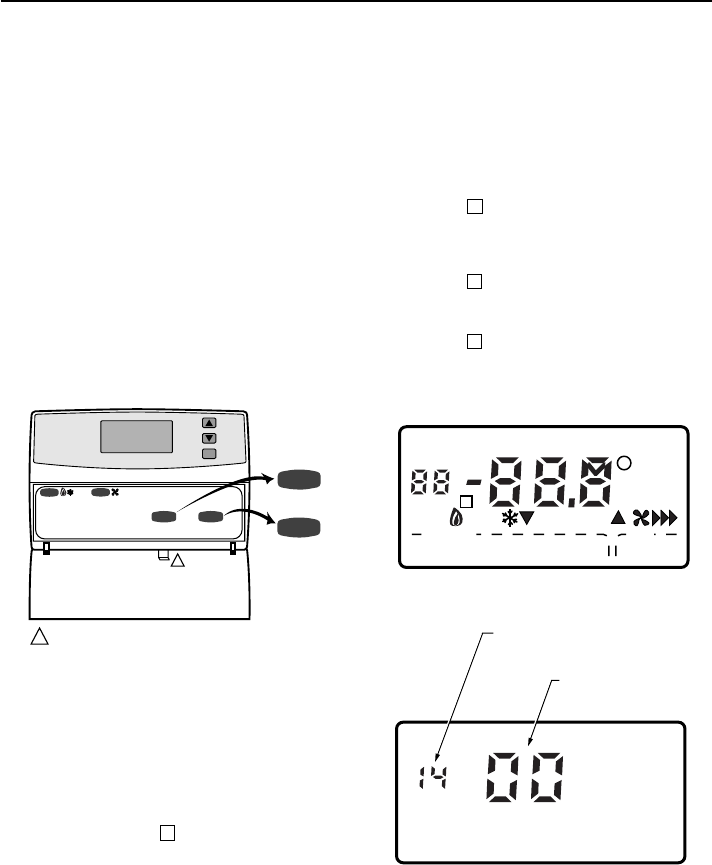
Fig. 8. Thermostat System and Fan key location.
NOTE: Always press the keys with your fingertip or
similar blunt tool. Sharp instruments like a pen or
pencil point can damage the keyboard.
Temperature Settings
The default setpoint for heat is 70°F (21°C) and for cool is
78°F (25.5°C). Press the increase ▲ or decrease ▼ key to
change the present setting to change between heat and
cool, press the Information i key until the setting to be
changed appears. Press the increase ▲ or decrease ▼
key to adjust the setting.
INSTALLER SETUP
NOTE: For most applications, the thermostat factory
settings will not need to be changed. Review the
factory settings in Table 2 and if no changes are
necessary, go to the Installer System-Test
section.
The Installer Setup is used to customize the thermostat to
specific systems. Some of the options include temperature
display, changeover and outdoor temperature display.
Installer Setup numbers are listed in Table 2. The table
includes all the configuration options and the factory
settings for the T8511G.
A combination of key presses are required to use the
Installer Setup feature.
— To enter the Installer Setup, press and hold the
Information i key with the increase ▲ and decrease
▼ keys until the first number is displayed. All display
segments appear for approximately three seconds
before the number is displayed. See Fig. 9 and 10.
— To advance to the next Installer Setup, press the
Information i key.
— To change a setting, use the increase ▲ and de-
crease ▼ keys.
— To exit the Installer Setup, press and hold the
Information i key until the display returns to normal
(approximately three seconds). The display will scroll
the numbers backwards to get to the normal display.
The Installer Setup is automatically exited if no key
presses are made for ten minutes.
Fig. 9. Display of all the segments of the LCD.
Fig. 10. Display of Installer Setup number and setting.
IMPORTANT
Only configurable numbers are shown on the
device. Example: If thermostat does not have
outdoor temperature capability, Installer Setup
Number 24 will not be displayed. Review Table 2
factory-settings and mark any desired changes in
the Actual Settings column. When Installer Setup
is complete, review the settings to confirm that
they match the system.
M10147
i
Press to select
heating or cooling
equipment.
Em. Ht.
-Emergency heating
Heat— Heating equipment
Off —No equipment
Cool—Cooling equipment
Auto—Thermostat
automatically selects
heating and cooling
equipment.
Press to select
heating or cooling
equipment.
On— Fan runs continuously
Auto—Fan runs when
heating or cooling
equipment operates
System
System
System
Fan
Fan
Fan
1
1
CHECK LIGHT ON SELECT MODELS
Em HeatOffCool Auto Only
Heat Cool
OnAuto
System Fan
Room
Outdoor
Em Ht Temporary Setting
Wait
%Humid
Aux Ht
Remote
Repl
Batt
M4844
M10105A
INSTALLER SETUP
MODE NUMBER DISPLAY
(COLUMN 2 OF TABLE 2)
FACTORY SETTING OR
OTHER CHOICE DISPLAY
(COLUMN 3 OR 5 OF TABLE 2)


