L4188A,B; L4189A,B; L6188A-C; L6189A-C AQUASTAT® CONTROLLERS
68-0061—1 6
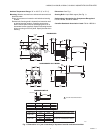
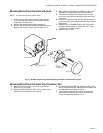
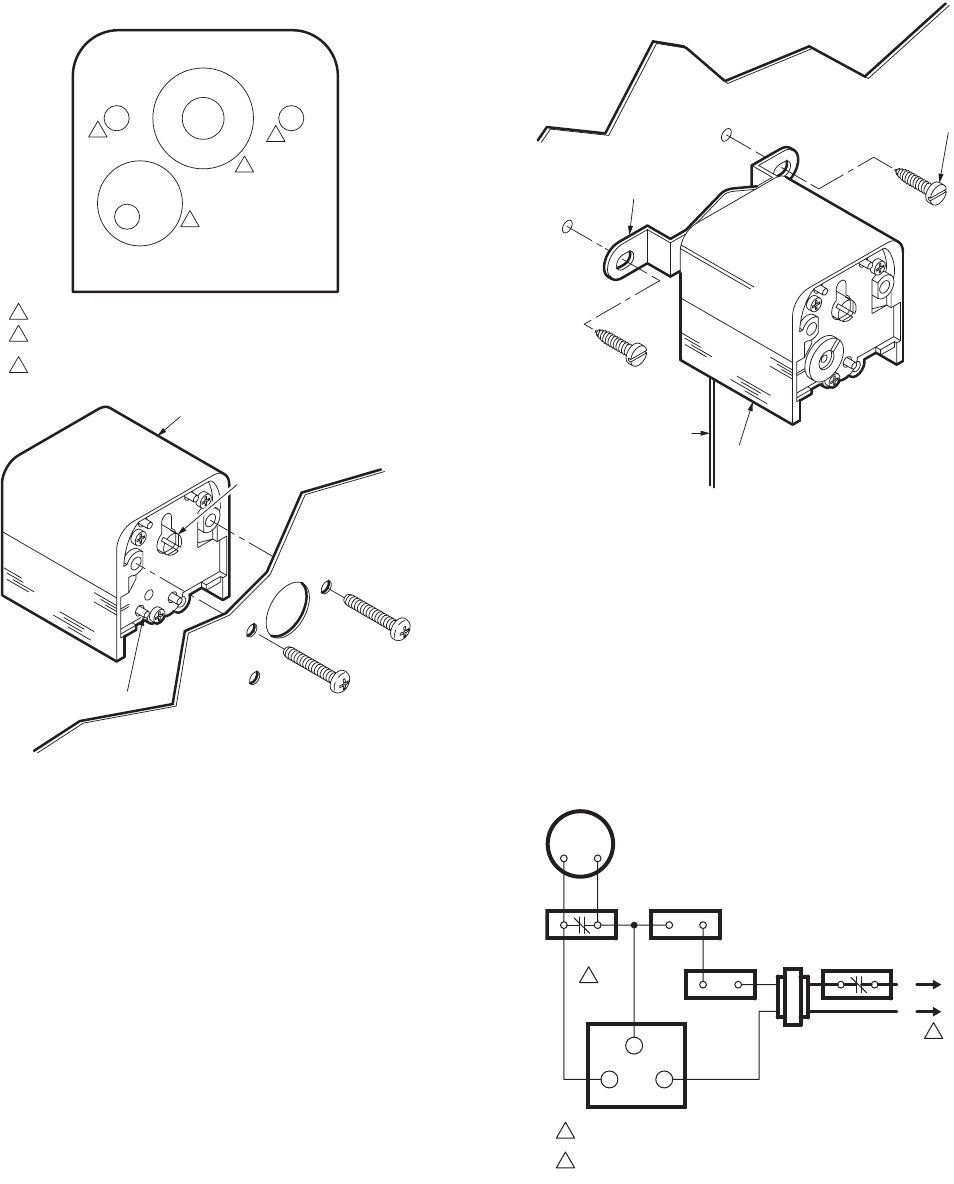
Fig. 6. Drill holes in the Panel as shown.
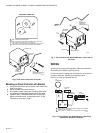
Mounting on Panel-Controller with Bracket
1. Using controller bracket as a template, mark and drill two
holes in the panel.
2. Mount controller with terminals down.
3. Run capillary neatly along panel, avoiding sharp bends
and interference with other components on the panel.
4. MODELS WITH TEMPERATURE LIMIT STOP ONLY:
Adjust to desired setting, as described under “To Set
Temperature Limit Stop,” page 8.
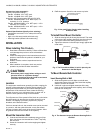
Fig. 7. The Controller with Bracket Mounts on the Front of
the Panel.
WIRING
All wiring must comply with applicable codes and ordinances,
Disconnect power before beginning wiring.
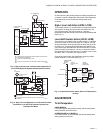
Connect as shown in equipment manufacturer’s instructions, if
provided. Otherwise, use the typical hookups shown
(See Fig. 8) (refer to Figures 9 and 10).
Fig. 8. Low and High Limit Application on a Gas-Fired
System with Domestic Hot Water.
DRILL 2 MOUNTING SCREW HOLES.
1
1
2
3
3/16
5/16
3/4
1
3/16
3/16
5/8
DRILL HOLE FOR SLOTTED SHAFT. USE SMALL HOLE FOR SHAFT
ONLY; LARGE HOLE SHAFT PLUS SETTING SCALE.
2
DRILL SMALL HOLE FOR MODEL WITH MANUAL RESET BUTTON OR
LARGE HOLE FOR MODEL WITH DIFFERENTIAL ADJUSTMENT.
3
MOUNTING TEMPLATE
CONTROLLER
SLOTTED
SHAFT
MANUAL
RESET
BUTTON
PANEL
NO. 8
MOUNTING SCREWS (2)
(OBTAIN LOCALLY)
M25419
MOUNTING
BRACKET
PANEL
NO. 10
SHEETMETAL
SCREWS (2)
(OBTAIN LOCALLY)
CAPILLARY
CONTROLLER
M25420
POWER SUPPLY. PROVIDE DISCONNECT MEANS AND OVERLOAD
PROTECTION AS REQUIRED.
1
USE L6188.9C (C-1 CONTACTS) IF MANUAL RESET IS REQUIRED.
2
24V
THERMOSTAT
1
2
LOW WATER
CUTOFF
PRESSURE
CONTROLLER
L4188.9
HIGH LIMIT
24V
GAS VALVE
TH-TR
TH TR
L1
(HOT)
L2
L4188.9
LOW LIMIT
M25421


