


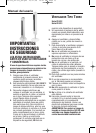
NOTE: Remove all contents from the box being careful not to discard
the manual and hardware needed for assembly. A phillips head screw
driver ( ) is required for assembly and is not included with the fan
purchase.
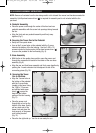
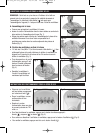
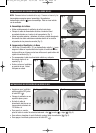
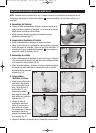
A. Base Assembly
• Gently turn the fan upside down.
• Place the power cord through the recessed channel located in the
center of the rear base assembly (Fig 1).
• Align the rear and front base assembly and firmly snap together by
pushing the 4 round extrusion into the adjacent circles of the
connecting pieces (Fig 2).
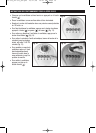
B. Securing the Tower Fan to the Base
• Using the 3 (M5 x 12) screws and phillips head screw driver ( )
secure the base into the bottom portion of the fan housing by
aligning the 3 screw holes on the base with the 3 screw holes on
the bottom of the fan housing (Fig 3).
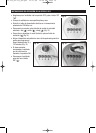
• Gently pull any slack out of the power cord and place the cord
securely in the power cord
holding bracket (Fig. 4).
• Place the fan right side up.
Your fan is now ready
for use.
DY-012 SERIES ASSEMBLY INSTRUCTIONS
Fig. 3
Fig. 4
Fig. 2
Fig. 1
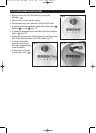
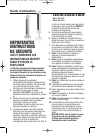
DY-012 SERIES OPERATION INSTRUCTIONS
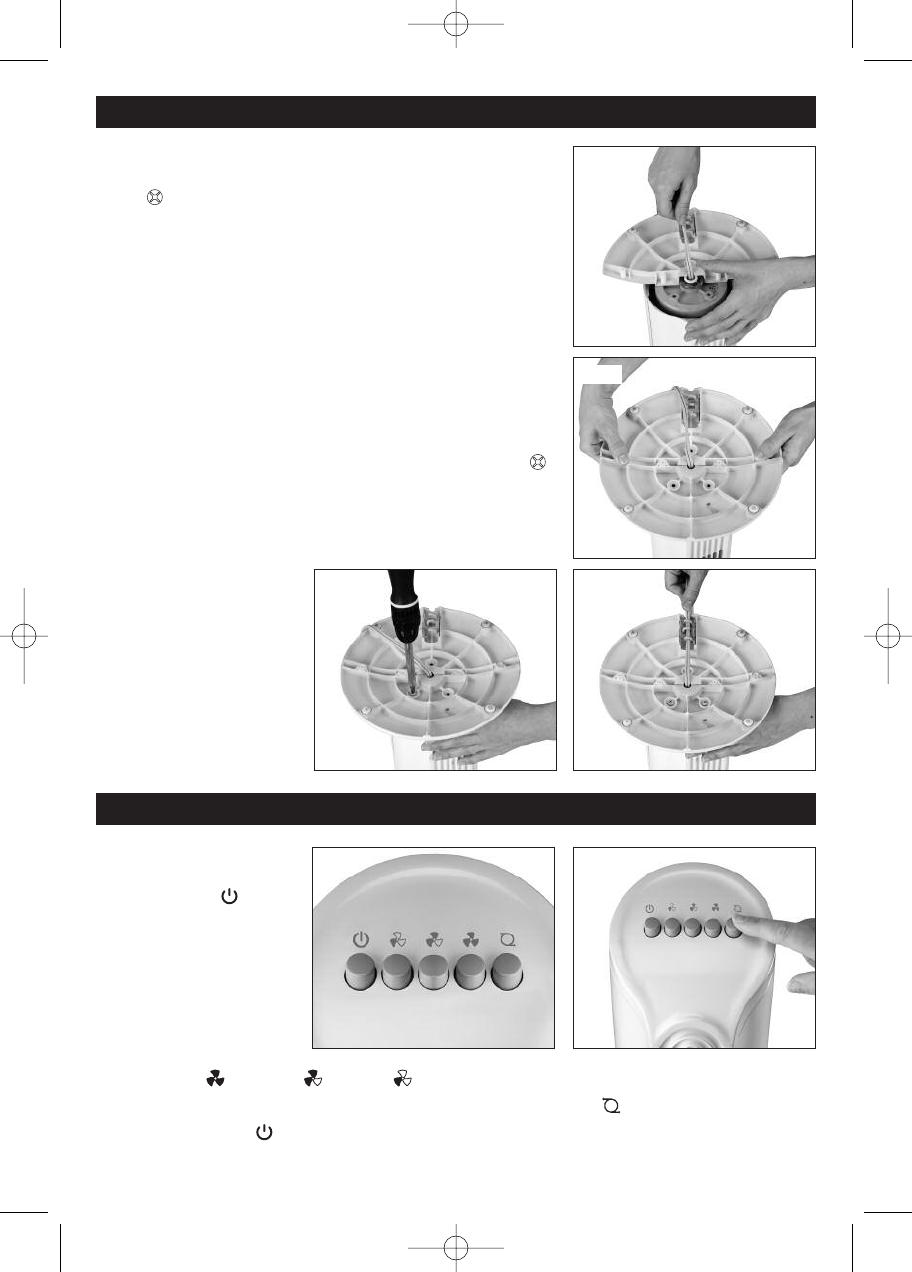
• Be sure your fan is in the
OFF position by pressing
the off button. ( )
• Place the fan on a level and
dry surface.
• Plug the power cord into a
polarized 120 Volt AC wall
outlet.
•
To operate, press the
appropriate speed control
option: High ( ), Medium ( ), or Low ( ) (Fig. 5).
• To activate or disengage the fan oscillation, press the oscillation button ( ) (Fig 6).
•
To turn the fan OFF ( ) press the Off button once.
Fig.
5
Fig. 6
DY-012_HY-013_OM.qxd 10/17/08 10:47 AM Page 2