


69-0846 2
3 REMOVE OLD THERMOSTAT
WARNING
Begin by turning off power to the heat pump at the
main service panel.
Remove cover of old thermostat—cover normally
snaps off when pulled firmly from the bottom. If it
resists, check for a screw that locks the cover.
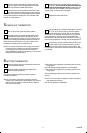
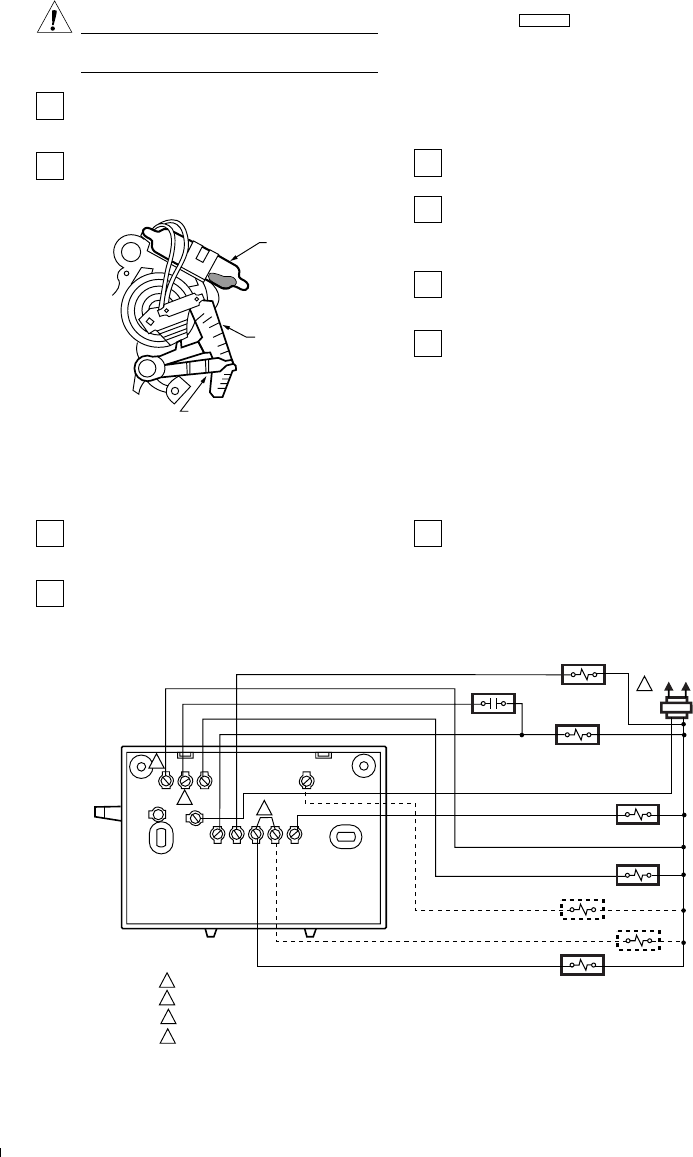
Before removing the old thermostat from the wall,
look at it carefully to locate the heat anticipator
adjustment mechanism. (See illustration to help you
recognize the heat anticipator.)
M8449
MERCURY
SWITCH
ANTICIPATOR
SCALE
ANTICIPATOR
SETTING LEVER
Make a note here of that anticipator setting for
reference in setting the anticipator on your new thermostat.
The heat anticipator pointer, if adjustable, will be set at one
of a series of numbers representing the current rating for
the primary control of your heat pump. The number will be
one of the following: .2, .4, .8, etc., or 0.2, 0.4, 0.8, etc. If
no heat anticipator indication is showing, do not be
concerned for now; go on to the next step.
Loosen screws holding thermostat base to wall and
lift away.
Disconnect wires from old thermostat. As you
disconnect each wire, tape the end and label it with
the enclosed wiring labels to make reconnection to new
thermostat easier.
Check the old insulation for cracks, nicks or fraying,
and apply high quality plastic tape where necessary
for adequate insulation.
Retain the old thermostat for reference purposes
and until your new thermostat is functioning
smoothly.
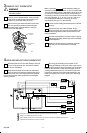
M8447
BACK OF DEVICE
W2
W1
X
O
E
G
Y1
R
LB
L1
(HOT)
L2
1
POWER SUPPLY. PROVIDE DISCONNECT MEANS AND OVERLOAD PROTECTION AS REQUIRED.
REMOVE W1-Y1 JUMPER WHEN HEAT RELAY 1 IS USED.
WHEN L TERMINAL IS CONNECTED TO SYSTEM MONITOR, EM. HEAT. LED ALSO INDICATES COMPRESSOR MALFUNCTION.
X TERMINAL MUST BE CONNECTED FOR PROPER OPERATION.
1
2
3
4
COMPRESSOR
CONTACTOR
FAN RELAY
EM. HEAT
RELAY
CHANGEOVER
RELAY (HEAT)
HEAT RELAY 1
CHANGEOVER
RELAY (COOL)
AUX. HEAT
RELAY
SYSTEM
MONITOR
2
3
4
4 WIRE AND MOUNT NEW THERMOSTAT
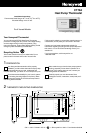
This thermostat can be mounted directly to the wall
or on a horizontal outlet box. Choose the method
that best fits your installation.
Grasp the thermostat cover at the top and bottom
with one hand. Pull outward on bottom edge of the
cover until it snaps free of the thermostat base. Carefully
remove and save the packing material surrounding the
mercury switches.
Run wiring (if necessary) to the location. If the
wiring is plastered into the wall, make a hole next to
the cable and loosen the wires so that they can be pushed
back into the wall later. Thread wires through the hole in
packing material saved above. Connect the wires to the
terminals on the back of the thermostat according to the
labels you placed on the wires or as shown in the wiring
diagram.