CT41A HEATING/COOLING THERMOSTAT
69-0788-2 2
2 REMOVE OLD THERMOSTAT
❑ Test to be sure your heating and air conditioning
systems (where applicable) are working correctly. If
not, contact your local heating/air conditioning dealer.
To avoid compressor damage, do not operate the
cooling system when outdoor temperature is below
50°F (10°C).
CAUTION
Equipment Damage Hazard.
Handling wires during installation can
damage equipment.
Disconnect power at furnace or main breaker/
fuse box before beginning installation.
❑ Carefully unpack your new thermostat and save the
package of screws, the instructions and the receipt.
❑ Remove the cover from the old thermostat. If it does
not snap off when pulled firmly from the bottom, check
for a screw that locks on the cover.
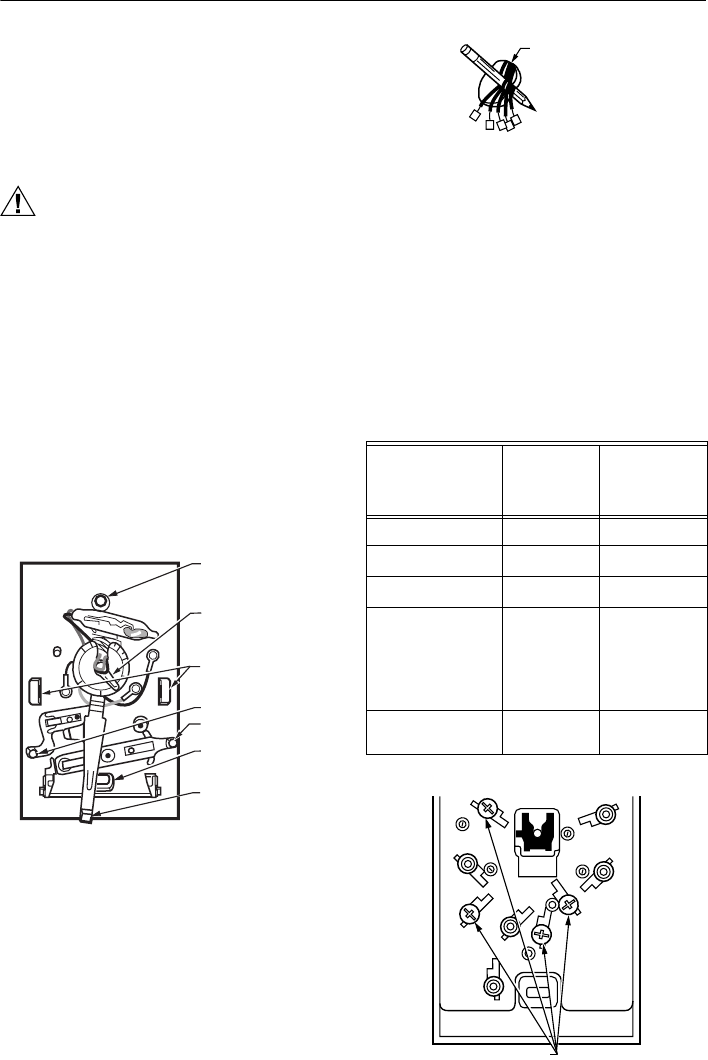
❑ Before removing the old thermostat from the wall, look
at it carefully to locate the heat anticipator adjustment
mechanism, see Fig. 2. Make a note here ________
of the anticipator setting for future reference. The heat
anticipator pointer, if adjustable, is set at one of a
series of numbers representing the (electrical) current
rating of the primary control of your system (in
amperes). The numbers range from 0.18 to 1.0. If no
heat anticipator/indication is showing, do not be
concerned; move on to the next step.
Fig. 2. Locating heat anticipator adjustment
mechanism.
❑ Loosen screws holding thermostat to subbase,
wallplate or wall and lift away.
❑ Disconnect wires from old thermostat or subbase. As
you disconnect each wire, tape the end and label it
with the letter of the terminal designation. If there are
only two wires, they do not require labeling. Wrap
wires around a pencil to keep them from falling back
into the wall as shown in Fig. 3.
Fig. 3. Wrapping wires around pencil.
❑ Keep the old thermostat for reference until your new
thermostat is functioning smoothly.
3 WIRE AND MOUNT THERMOSTAT
❑ Connect wires from the wall to the matching terminals
on the back of the thermostat. See Fig. 4. Tighten the
screws.
NOTE: If terminal designations on old thermostat do not
match those on new thermostat, see Table 1.
Fig. 4. Connect wires from wall to thermostat
matching terminals.
.18
.2
.25
3
.5
.7
.9
BOTTOM
MOUNTING HOLE
M3782A
TEMPERATURE
SETTING LEVER
MOUNTING CLIPS
(FOR COVER)
TOP MOUNTING HOLE
(THERMOSTAT TO WALL
OR OUTLET BOX)
ADJUSTABLE HEAT
ANTICIPATOR
SETTING LEVER
FAN SWITCH
SYSTEM SWITCH
Table 1. Terminal Functions.
Old Thermostat
Terminal Marking Function
New
Thermostat
Terminal
Marking
G or F Fan G
Y or C or M or Y
1
Cooling Y
W or H or W
1
Heating W
RC, V, VC or B Power Your 5-wire
system cannot
use this
thermostat;
use a CT87B
instead.
RH, M, VR, 4, A or
R
Power R
WIRES THROUG
WALL OPENING
M5136
TERMINAL SCREWS
M8067A
R
W
Y
G


