


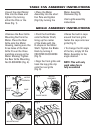
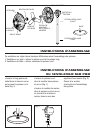
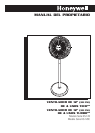
GRILLE ASSEMBLY INSTRUCTIONS
• Remove the Rear Grille
Mounting Nut from the
Motor. Place the Rear
Grille onto the Motor
Housing, making sure the
three holes of the Rear
Grille fit over the three
matching prongs on the
Motor Housing. Tighten
the Rear Grille Mounting
Nut CLOCKWISE (Fig. 4).
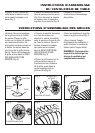
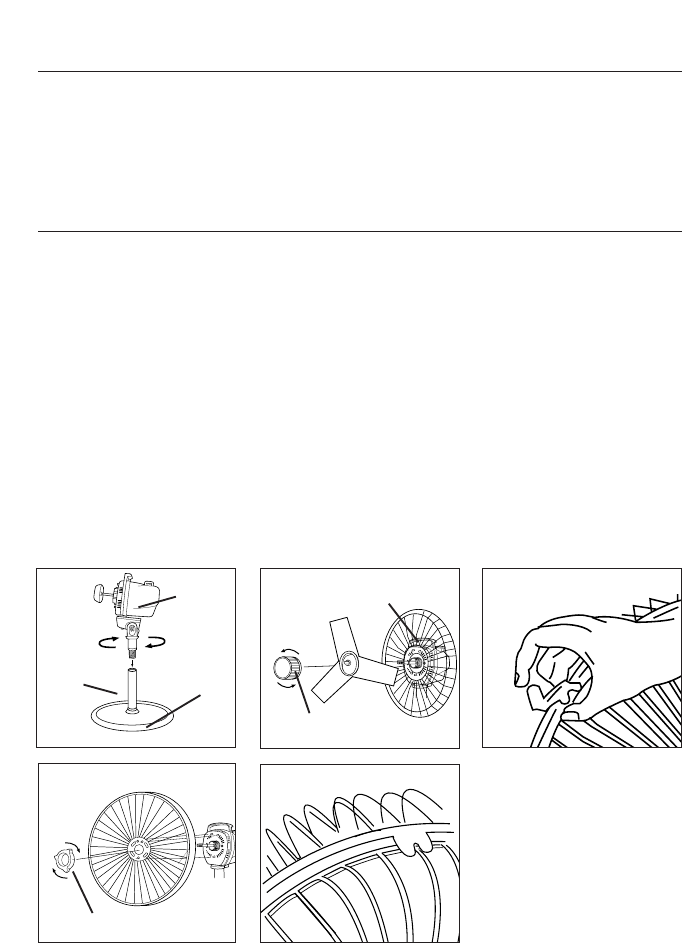
Fig. 5
BLADE KNOB
MOTOR
ASSEMBLY
Fig. 6
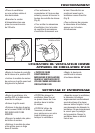
• Raise the built in caps
around the front grille
fasten the caps onto rear
grille (Fig.7).
• To change the tilt angle
of the fan, simply tilt the
Motor Assembly to the
angle desired.
NOTE: This will only
work when fan is
fully assembled
• Push the Fan Blade
onto the Motor Shaft,
lining up the center
of the blade with the
D-shape on the Motor
Shaft. Tighten the Blade
Knob by turning it
COUNTER CLOCKWISE
(Fig. 5).
• Align the front grille and
hook the top grille clip
onto the rear grille
(Fig. 6).
Fig. 4
MOUNTING NUT
REAR GRILLE
Fig. 7
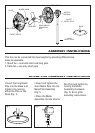
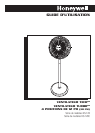
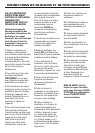
TABLE FAN ASSEMBLY INSTRUCTIONS
• Insert the short Metal
Pole into the Base and
tighten it by turning
either the Pole or the
Base (Fig. 1).
• Place the Motor
Assembly into the short
Fan Pole and tighten
(Fig.2) by turning the
Motor Assembly
Clockwise (Fig. 3).
• Go to grille assembly
instructions
Fig. 3
MOTOR
ASSEMBLY
SHORT
POLE
BASE