4. Flip the 600W switch for the low heat setting, the
900W switch for the medium heat setting, and both
switches for the high heat setting.
NOTE: When the heater is in use, it is normal for the
heater to cycle ON and OFF; this is to maintain your
desired temperature.
Setting the Thermostat
1. Set the Thermostat control all the way to MAX.
2. When the desired temperature/comfort level is
reached, turn the thermostat control counter-
clockwise to a lower position or until the heater stops
operating.
3. The control will now automatically maintain the
pre-set temperature level by turning the heater
ON and OFF.
FEATURES – OPERATIONS
Frost Protect
If you plug in the heater, it will start working at the
lowest temperature setting. (When thermostat control is
in the lowest temperature position, the temperature will
be maintained at 40 degrees F, thus the heater will not
turn on unless the room temperature is lower than 40
degrees F. If the room temperature is lower than 40
degrees F, the heater will automatically start working and
will keep turning on and off all the time, maintaining its
ambient temperature.
NOTE: Unit must be unplugged for it to be fully off.
Tip Over Protection:
When the unit is accidentally knocked over, or tilts on one
side at more than a 45° angle, it will instantly shut off.
To reset, simply place the heater in an upright position.
por el fabricante o su agente de servicio el cual
debería ser contactado si existe una fuga de aceite.
22. Cuando se deshaga de el calefactor, siga las reglas de
cómo deshacerse del aceite.
NOTA: Para el suelo utiliza sólo.
CONSERVE ESTAS
INSTRUCCIONES
ESPECIFICACIONES TÉCNICAS
• Amperes:12.5
• Vatios:1500(+5%-10%)
• Voltajedeoperación:120VAC/60Hz
INSTRUCCIONES DE ENSAMBLAJE
1. Remueva cuidadosamente su calefactor de la caja.
Por favor guarde la caja para almacenaje después de
la temporada.
2. Voltee la unidad de cabeza.
3. Coloque a presión las ruedas en la base para las
ruedas.
4. Envuelva el soporte con las ruedas adjuntas alrededor
del componente de el calefactor entre las dos
primeras aletas o las dos últimas aletas. Los hoyos
del soporte deben encarar el exterior de la unidad.
5. Asegure el soporte con el tornillo en la tuerca de
mariposa.
6. Repita este procesos para el otro juego de ruedas.
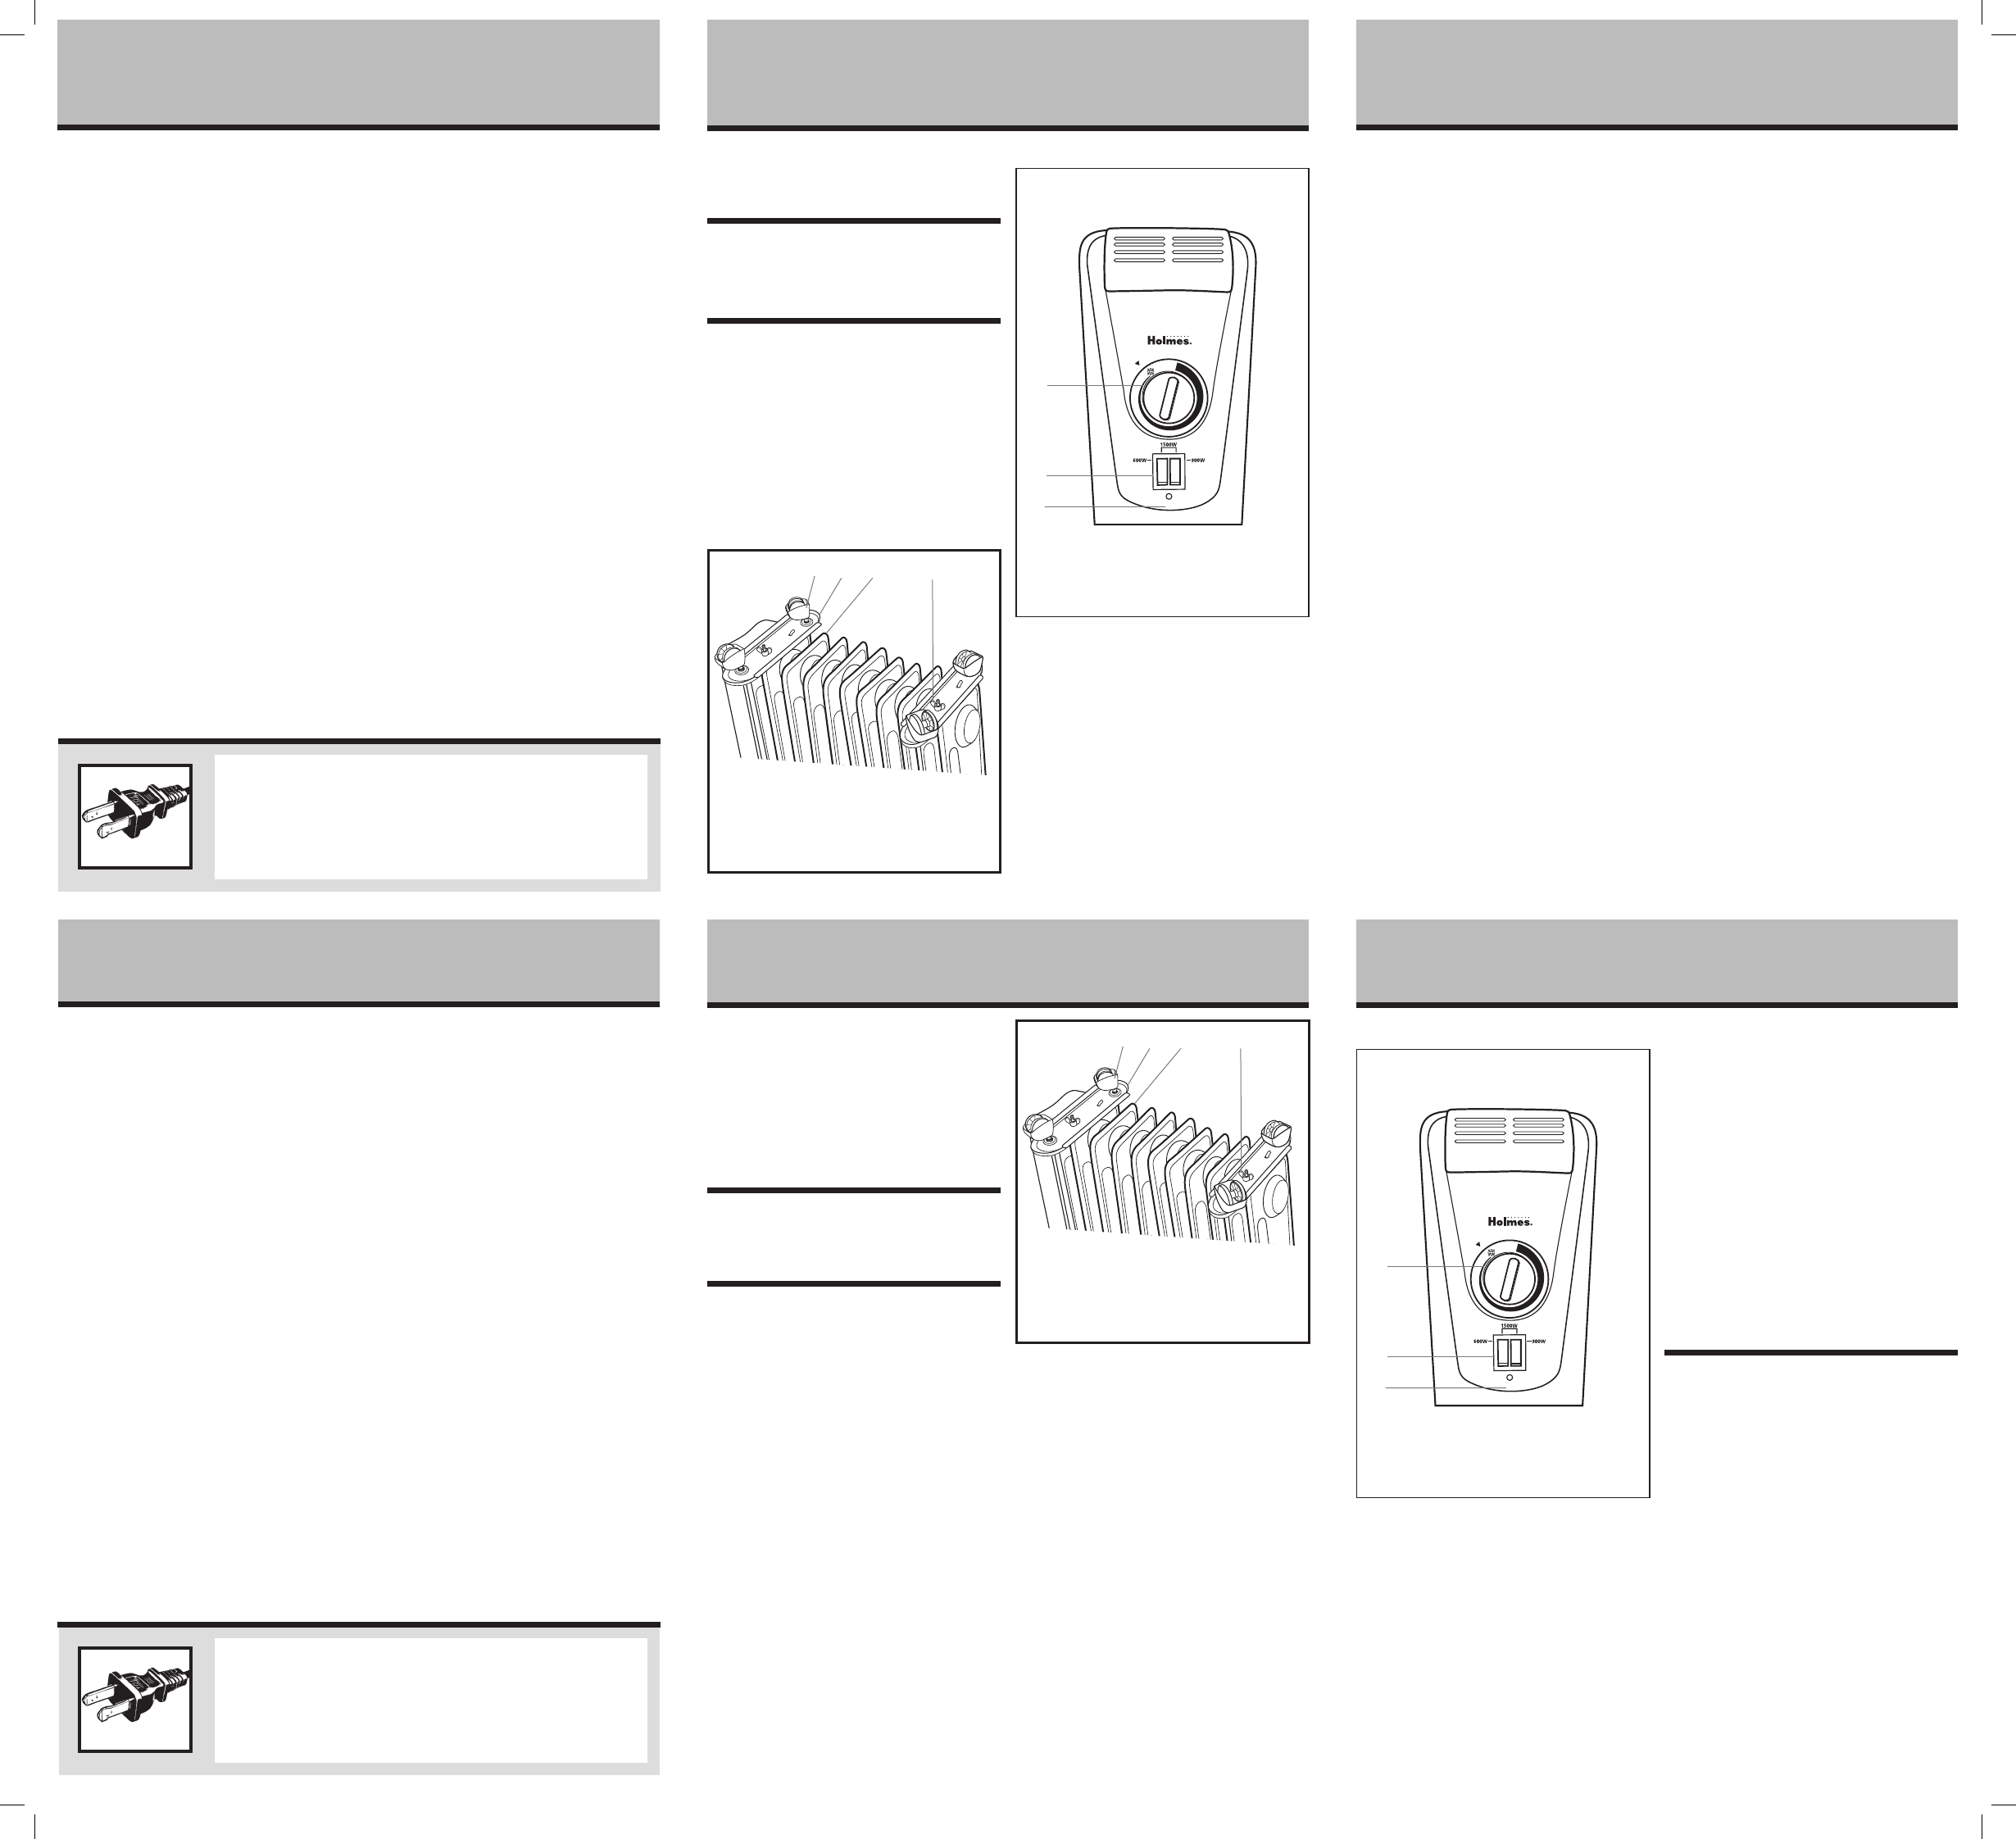
Figura 1
A. Base de las ruedas
B. Soporte
C. Primeras dos aletas
D. Tornillo de mariposa
A
B C D
PLEASE READ AND SAVE THESE
IMPORTANT SAFETY INSTRUCTIONS
FEATURES - OPERATIONS
SAVE THESE
INSTRUCTIONS
TECHNICAL SPECIFICATIONS
• Amps:12.5
• Wattage:1500W(+5%–10%)
• Workingvoltage:120VAC/60Hz
ASSEMBLY INSTRUCTIONS
1. Carefully remove your heater from the box. Please
save the carton for off-season storage.
2. Turn unit upside down.
3. If necessary snap wheels into wheel base.
4. Wrap mounting bracket with wheels attached around
the heater component between the first two fins or
the last two fins. Mounting bracket holes should face
the outside of the unit.
5. Secure the mounting bracket with screw on wing nut.
6. Repeat process for other set of wheels.
Figure 1
A. Wheel base
B. Mounting Bracket
C. First Two Fins
D. Wing Nut
A
B C D
OPERATING INSTRUCTIONS
A
B
C
A. Thermostat
B. Heat Setting
C. Power Light
Figure 2
CONTROL PANEL
1. Place the heater on a firm, level surface.
2. Set the Thermostat Knob to the Off position. Plug the
heater into a standard outlet.
NOTE: Avoid overloading your circuit by not using
other high wattage appliances in the same outlet. At
1500 watts, this unit draws 12.5 Amps.
3. Turn the Thermostat Knob clockwise to the highest
setting.
When using electrical appliances, basic safety precautions
should always be followed to reduce the risk of fire, electric
shock, and injury to persons, including the following:
1. Read all instructions before using this heater.
2. This heater is hot when in use. To avoid burns, do not
let bare skin touch hot surfaces. If provided, use
handles when moving this heater. Keep combustible
materials, such as furniture, pillows, bedding, papers,
clothes, and curtains at least 3 feet (0.9 m) from the
front of the heater and keep them away from the
sides and rear.
3. Extreme caution is necessary when any heater is used
by or near children or invalids and whenever the
heater is left operating and unattended.
4. Always unplug heater when not in use.
5. Do not operate any heater with a damaged cord or
plug or after the heater malfunctions, has been
dropped or damaged in any manner. Discard heater,
or return to authorized service facility for
examination and/or repair.
6. Do not use outdoors.
7. This heater is not intended for use in bathrooms,
laundry areas and similar indoor locations. Never
locate heater where it may fall into a bathtub or
other water container.
8. Do not run cord under carpeting. Do not cover cord
with throw rugs, runners, or similar coverings. Do not
route cord under furniture or appliances. Arrange
cord away from traffic area and where it will not be
tripped over.
9. To disconnect heater, turn controls to off, then remove
plug from outlet.
10. Do not insert or allow foreign objects to enter any
ventilation or exhaust opening as this may cause an
electric shock or fire, or damage the heater.
11. To prevent a possible fire, do not block air intakes or
exhaust in any manner. Do not use on soft surfaces,
like a bed, where openings may become blocked.
12. A heater has hot and arcing or sparking parts inside.
Do not use it in areas where gasoline, paint, or
flammable liquids are used or stored.
13. Use this heater only as described in this manual. Any
other use not recommended by the manufacturer may
cause fire, electric shock, or injury to persons.
14. Always plug heaters directly into a wall outlet/
receptacle. Never use with an extension cord or
relocatable power tap (outlet/power strip).
15. When unplugging, be sure to pull by the plug and not
the cord.
16. If the heater will not operate, see specific instructions
on Auto Safety Shut-off.
17. DO NOT attempt to repair or adjust any electrical or
mechanical functions on this unit. Doing so will void
your warranty. The inside of the unit contains no user
serviceable parts. All servicing should be performed
by qualified personnel only.
18. Discontinue use if plug or outlet is hot. It is
recommended that the outlet be replaced if plug or
outlet is hot to touch.
19. Do not use this heater in the immediate surroundings
of a bath, a shower or a swimming pool.
20. DO NOT use this heater when it is lying on its side.
21. This heater is filled with a precise quantity of special
oil. Repairs requiring opening of the oil container are
only to be made by the manufacturer or his service
agent who should be contacted if there is an oil leak.
22. When disposing of the heater, follow oil disposal
regulations.
NOTE: For floor use only.
FEATURES - OPERATIONS
LEA Y CONSERVE ESTAS INSTRUCCIONES
IMPORTANTES DE SEGURIDAD
Para reducir el riesgo de incendios, descargas eléctricas
y lesiones personales al utilizar electrodomésticos, siga
siempre las precauciones básicas de seguridad,
incluyendo las que se mencionan a continuación:
1. Lea todas las instrucciones antes de usar este calefactor.
2. El calefactor se calienta al usarlo. Para evitar
quemaduras, NO toque las superficies calientes con la
piel. Si existen, utilice las manijas para mover la
unidad. Mantenga los materiales combustibles, como
muebles, almohadones, sábanas, papeles, ropa y
cortinas a por lo menos 3 pies (0,9m) de la parte
delantera del calefactor y manténgalos alejados de
los costados y de la parte de atrás.
3. Debe tener mucho cuidado cuando el calefactor es
utilizado por, o cerca de niños o inválidos, y siempre
que se deje el calefactor prendido y desatendido.
4. Siempre desenchufe el calefactor cuando no lo utilice.
5. NO utilice el calefactor si el cable o el enchufe están
dañados o luego de una falla, se haya caído o haya
sufrido cualquier tipo de daño. Deseche el calefactor
o devuélvalo al centro de servicio autorizado para su
revisión y/o reparación.
6. NO utilizar en el exterior.
7. Este calefactor no está diseñado para ser utilizado en
baños, lavaderos y zonas similares de interiores.
NUNCA coloque el calefactor donde pueda caerse
dentro de una bañera u otro recipiente con agua.
8. No coloque el cable debajo de la alfombra. No cubra
el cable con alfombras, tapetes o artículos similares.
No pase el cable por debajo de muebles o
electrodomésticos. Coloque el cable lejos del área de
tráfico y donde no se tropiece con él.
9. Para desconectarlo, gire el control a la posición OFF,
luego quite el enchufe del tomacorriente.
10. No inserte ni permita que objetos extraños penetren
en la ventilación o salida de aire ya que esto puede
causar un choque eléctrico o incendio, o dañar el
calefactor.
11. Para evitar un posible incendio, no bloquee las
entradas de aire o escape de ninguna manera. No lo
use en superficies blandas, como una cama, donde
las aberturas se pueden bloquear.
12. Un calefactor tiene partes calientes y que pueden
producir chispas en su interior. NO lo utilice en áreas
donde se utiliza o se guarda gasolina, pintura o
líquidos inflamables.
13. Utilice este calefactor sólo como se describe en este
manual. Cualquier otro uso no recomendado por el
fabricante puede provocar incendios, descargas
eléctricas o lesiones a personas.
14. Siempre conecte el calefactor directamente a un
tomacorriente de pared. Nunca lo use con un cable
de extensión o con un tomacorriente múltiple.
15. Al desenchufarlo, asegúrese de tirar del enchufe y no
del cable.
16. Si el calefactor no funciona, vea las instrucciones
específicas del apagado automático de seguridad.
17. NO intente reparar o ajustar ninguna función
eléctrica o mecánica de esta unidad. El hacerlo
invalidará la garantía. La unidad no contiene partes
reparables por el usuario. Toda reparación debe ser
realizada únicamente por personal calificado.
18. Deje de usarlo si el cable o el enchufe se calienta. Se
recomienda que reemplace el tomacorriente si el
enchufe o el tomacorriente se calienta.
19. No use este calefactor en áreas cercanas a un baño,
una ducha o una piscina.
20. NO use este calefactor cuando está restando de lado.
21. Este calefactor se ha llenado con una cantidad precisa
de un aceite especial. Reparaciones que requieran
abrir el recipiente de aceite deben hacerse solamente
CARACTERISTICAS Y FUNCIONAMIENTO CARACTERISTICAS Y FUNCIONAMIENTO
INSTRUCCIONES DE OPERACIÓN
1. Coloque el calefactor en una superficie plana y firme.
2. Fije la perilla del termostato a la posición APAGADO
(OFF). Enchufe el calefactor a un tomacorriente
estándar.
NOTA: Para evitar sobrecargar su circuito, no use
otros aparatos eléctricos de alto voltaje en el mismo
tomacorriente. A 1500 Vatios, esta unidad jala 12.5
Amperes.
3. Gire la perilla del termostato en dirección de las
mancillas del reloj a la posición más alta.
4. Gire el interruptor de 600 vatios para la posición de
calor bajo, el interruptor de 900 vatios para la
posición de calor medio, y ambos interruptores para
la posición de calor alto.
NOTA: Usando los calefactores está en uso, es
normal para la unidad saltar en ciclos de ENCENDIDO
(ON) a APAGADO (OFF); esto sucede para mantener
la temperatura deseada.
Fijando el termostato
1. Fije el control del termostato a la posición Máxima
(MAX).
2. Cuando el nivel deseado de temperatura/confort se
haya alcanzado, gire el control del termostato en
contra de las manecillas del reloj a una posición más
baja o hasta que el calefactor deje de operar.
3. El control mantendrá automáticamente ahora el nivel
de temperatura prefijada encendiendo (ON) y
apagando (OFF) la unidad.
CARACTERÍSTICAS/OPERACIONES
Protección rápida
Si usted enchufa el calefactor, ésta empezará a funcionar
en la temperatura más baja. (Cuando el control del
termostato está en la posición de temperatura más baja,
la temperatura se mantendrá a 40 grados Fahrenheit,
por lo tanto el calefactor no se encenderá a no ser que la
temperatura de la habitación sea menor a 40 grados F°.
Si la temperatura de la habitación es menor a 40 grados
F°, el calefactor empezará a trabajar automáticamente y
continuará apagándose y encendiéndose todo el tiempo,
manteniendo su temperatura ambiente.
NOTA: La unidad debe estar desenchufada para que esté
totalmente apagada.
Protección contra vuelcos:
Cuando la unidad se vuelque de forma accidental, o se
incline hacia un lado a más de un ángulo de 45°, se
apagará automáticamente. Para reiniciar, simplemente
coloque el calefactor en posición vertical.
A
B
C
A. Termostato
B. Configuración de Calor
C. Luz de Encendido
Figura 2
PANEL DE CONTROL
THIS APPLIANCE HAS A POLARIZED PLUG (one blade is wider than the
other). To reduce the risk of electric shock, this plug is intended to fit in a
polarized outlet only one way. If the plug does not fit fully in the outlet,
reverse the plug. If it still does not fit, contact a qualified electrician to
install the proper outlet.
DO NOT ATTEMPT TO MODIFY THIS PLUG OR DEFEAT THIS
SAFETY FEATURE IN ANY WAY.
ESTE ARTEFACTO TIENE UN ENCHUFE POLARIZADO (una de las patas es
más ancha que la otra). Para reducir el riesgo de una descarga eléctrica,
este enchufe entra de una sola forma en un tomacorriente polarizado. De
no ser así, inviértalo, y si aún así no entra completamente, llame a un
electricista calificado para que instale un tomacorriente apropiado.
NO INTENTE MODIFICAR ESTE ENCHUFE O ALTERAR ESTE
DISPOSITIVO DE SEGURIDAD DE NINGUNA FORMA.
HOH3000B-TG_13ESM1.indd 2 4/30/13 1:52 PM


