


– 3 –
Fig. 1
Fig. 2
Fig. 3
1. Place skid plate on table where slicer is to be
located.
2. Make sure there is suffi cient room on the table
to support the front feet of the slicer (the feet
on the index knob end of slicer) before drilling
holes for the skid plate.
3. Check beneath the tabletop to be sure there are
no hazards before drilling holes for mounting the
heat lamp. Make sure there is suffi cient room
for the reinforcement base plate.
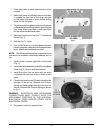
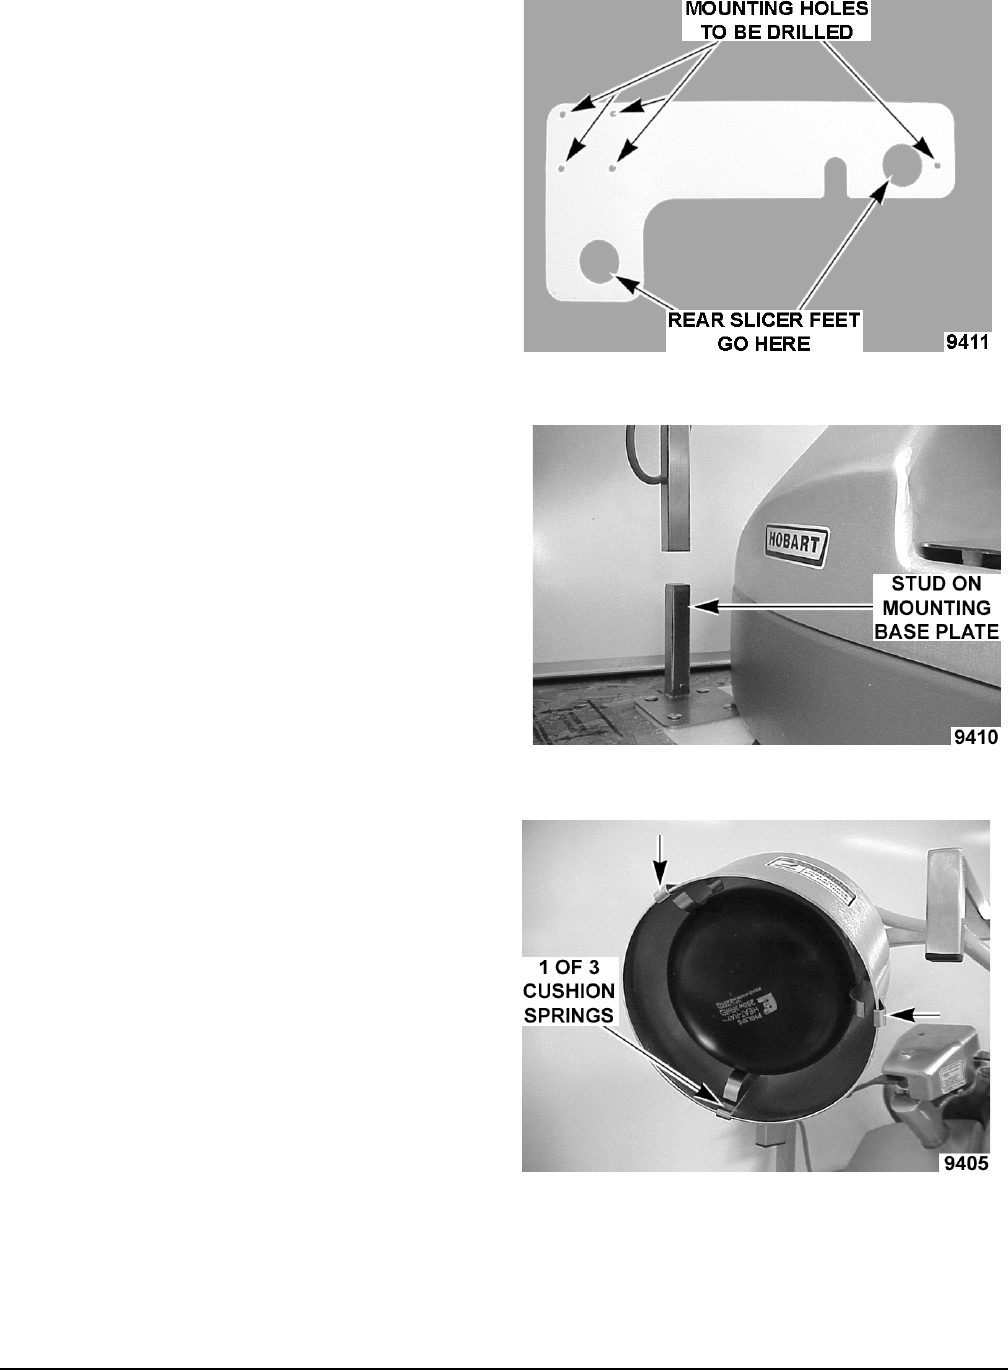
4. Mark and center punch the fi ve
9
/32" holes to be
drilled (Fig. 1).
5. Drill the fi ve
9
/32" holes.
6. Line up four holes in mounting base plate with
holes in skid plate, table and reinforcement base
plate. Attach with hardware provided.
NOTE: Reinforcement base plate, lockwashers and
nuts are to be installed underneath tabletop, not on
top.
7. Install screw to secure right side of skid plate
(Fig. 1).
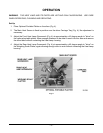
8. Insert heat lamp assembly onto Mounting Base
Plate (Fig. 2). Secure with thumbscrew.
9. Install four short feet on slicer and put slicer
in position with rear feet sitting in holes in skid
plate.
10. Check to be sure the two 250 watt infrared bulbs
are tight in the socket. Remove one Cushion
Spring and hand tighten the bulb to be sure it is
secure. Reinstall the Cushion Spring as shown
in Fig. 3.
WARNING: ELECTRICAL AND GROUNDING
CONNECTIONS MUST COMPLY WITH THE
APPLICABLE PORTIONS OF THE NATIONAL
ELECTRICAL CODE AND/OR OTHER LOCAL
ELECTRICAL CODES.
11. Plug power cord into nearest outlet.