


-3-
598-1070-04
• Removemicrophonefromchimeextenderandmountmicrophonedirectly
toexistingchimecaseorinsideexistingchime.Note: Do not mount mi-
crophonetochimebars.
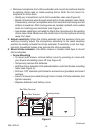
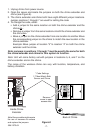
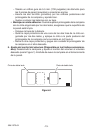
–Gentlyprymicrophoneoutofchimeextendercase(seeFigure3).
–Routemicrophonewiresthroughsmallslotinchimeextendercase.Note:
Ifnecessary,removemicrophonewiresfromwireterminalsusingasmall
phillipsscrewdriver.Afterroutingwiresasneeded,reattachcolor-coded
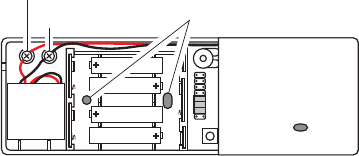
wirestomatchingwireterminals(seeFigure5).
–Usedouble-sidedtape(included)toattachthemicrophonetotheexisting
chimecase.Note: Make sure the small hole in the microphone is facing
awayfromtape.
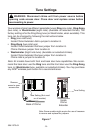
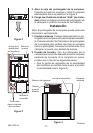
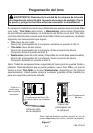
Whenthechimeextenderandthewirelesschimeare
workingcorrectly,adjustthemicrophonesensitivitytotheleastsensitive
positiontoreliablyactivatethechimeextender.Ifsensitivityissettoohigh,
commonhouseholdnoisesmayactivatethechimeextender.
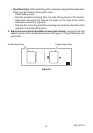
4. Mount chime extender.Useeitherscrewsordoublesidedtapetomount
chimeextender.
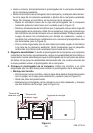
• Screw Mounting
– Tomountwithscrews,removebatterycoverbypressingoncoverwith
yourthumbandslidingcoveroff(seeFigure2).
– Temporarilyremovethebatteries.
–Holdthechimeextenderinthedesiredlocation,andmarkthetwomounting
holes(seeFigure5).
–Drilltwo7/32"diameterpilotholesforwallanchors(provided)andinsert
anchors.
–Insert2screws(provided)throughholesinbackofchimeextenderand
tightensecurely.
–Replacebatteriesandbatterycover.
MountingHoles
Figure 5
Continued
RedWireTerminal
BlackWireTerminal