


September 1, 2008
Page 29
Quadra-Fire · Sapphire · 250-7233H
8
Appliance Setup
A. Remove Shipping Materials
Remove shipping materials from inside or underneath the
firebox.
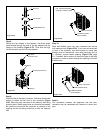
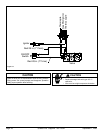
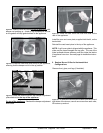
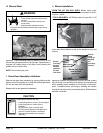
B. Top and Rear Vent Conversion
Figure 8.1 Remove rear access plate on the back shield and
discard.
Figure 8.2 Remove the rear outer flue cover plate (with the
damper adjustment plate attached). Ensure that the gaskets
and grommets stay in place.
Remove the inner flue cover plate and set aside.
KIT CONTENTS: Rear vent grill; .096 NG orifice; .059 LP
orifice; Rear Vent Cover Plate, Top Grill Cover Plate
TOOLS REQUIRED: Power drill; #2 Phillips bit; 5/32 in.
Allen wrench; 5/8 in. open end wrench; high-temp silicone
sealant (optional.)
Damper Adjustment
Plate
Outer Flue
Cover
Rear
Access
Plate
1.
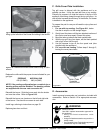
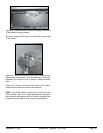
Convert to Rear Vent
At the REAR of the appliance:
Figure 8.3 Lift out the cast insert piece on top of the appli-
ance.
Remove the outer flue collar and inner collar adapter, and set
aside. Ensure that the gasket is intact; if not, high temperature
silicone can be used as an alternative to gasket replacement
as indicated in Figure 8.4 on the next page. Remove the
screws retaining the inner flue collar.
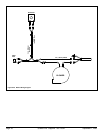
At the TOP of the appliance, with exceptions noted:
Lift out the inner flue collar with damper in place.
NOTE: In the Commonwealth of Massachusetts, the word
damper shall be replaced with the words flue restrictor.
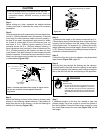
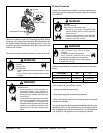
CAUTION
Sharp Edges
• Wear protective gloves
and safety glasses during
installation.