


Heatilator • Caliber CD Series • 4040-263 Rev N • 11/0856
Closed
L. Install Hood
• Align back edge of hood with attachment clips and press
fi rmly into place.
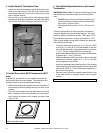
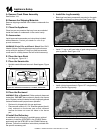
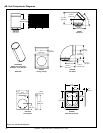
Figure 14.3 Fixed Glass Assembly
J. Fixed Glass Assembly
WARNING! Risk of Asphyxiation! Handle fi xed glass
assembly with care. Inspect the gasket to ensure it is
undamaged and inspect the glass for cracks, chips or
scratches.
• DO NOT strike, slam or scratch glass.
• DO NOT operate fi replace with glass removed, cracked,
broken or scratched.
• Replace as a complete assembly.
K. Install Trim and/or Surround
• Install optional trim kits and/or surrounds using the
instructions included with the accessory.
• Use non-combustible materials to cover the gap between
the sheet rock and the appliance.
• Do not obstruct or modify the air inlet/outlet louvers.
• Allow space to lower and remove bottom louver/access
panel.
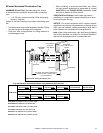
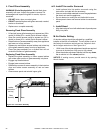
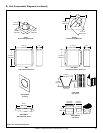
Removing Fixed Glass Assembly
• Lift and pull upper grille towards you to expose two (36 in.
model) or three (42 in. model) Quick Access Latches.
• Open the control access panel to expose two (36 in.
model) or three (42 in. model) Quick Access Latches.
• Rotate bottom of screen assembly away from appliance
and lower out of top retainers.
• Release top and bottom access latches and rotate top
of the glass assembly away from top of appliance.
• Place the glass assembly on a surface that will not
scratch the surface of glass assembly.
Replacing Fixed Glass Assembly
• Replace the glass assembly on lower access latches
and rotate upper portion of glass assembly into place.
• Engage top access latches.
• Engage lower access latches.
• Reinstall top corners of screen assembly in their retainer
clips and rotate screen assembly to rest on lower
latches.
• Close access panel and reinstall upper grille.
Latches
(both bottom
and top)
Glass
Assembly
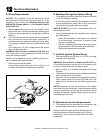
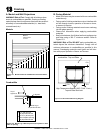
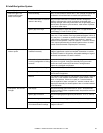
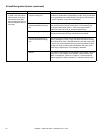
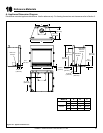
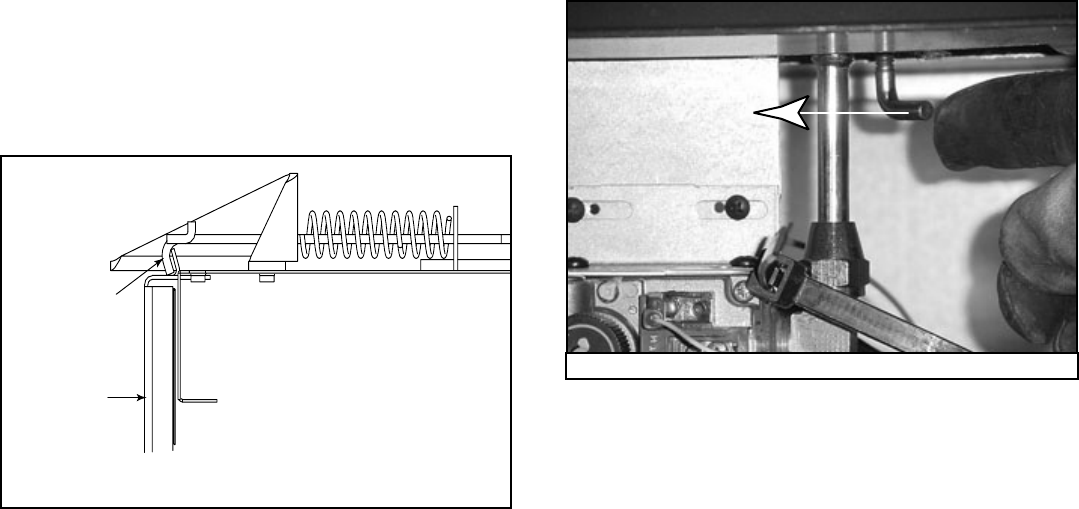
M. Air Shutter Setting
Air shutter settings should be adjusted by a qualifi ed
installer at the time of installation. The air shutter is set at
the factory for minimum vertical vent run. Adjust air shut-
ter for longer vertical runs. See Figure 14.4.
• 16 full turns of the shutter adjustment handle are required
to move air shutter from fully open to fully closed.
• When the shutter adjustment handle is all the way down,
the air shutter is in the closed position.
NOTICE: If sooting occurs, provide more air by opening
the air shutter.
Figure 14.4 Air Shutter