Page 11SKU 94280
For technical questions, please call 1-800-444-3353.
OPERATION
Refer to the floor cleaner/wax manufacturer’s instructions for the proper amount and
method of dispensing floor cleaner/wax on the floor surface.
Plug the Power Cord (34A) of the Floor Machine into the nearest 115 volt, ground-
ed, electrical outlet. In order to keep
the Power Cord out of the way, hang
it over your shoulder.
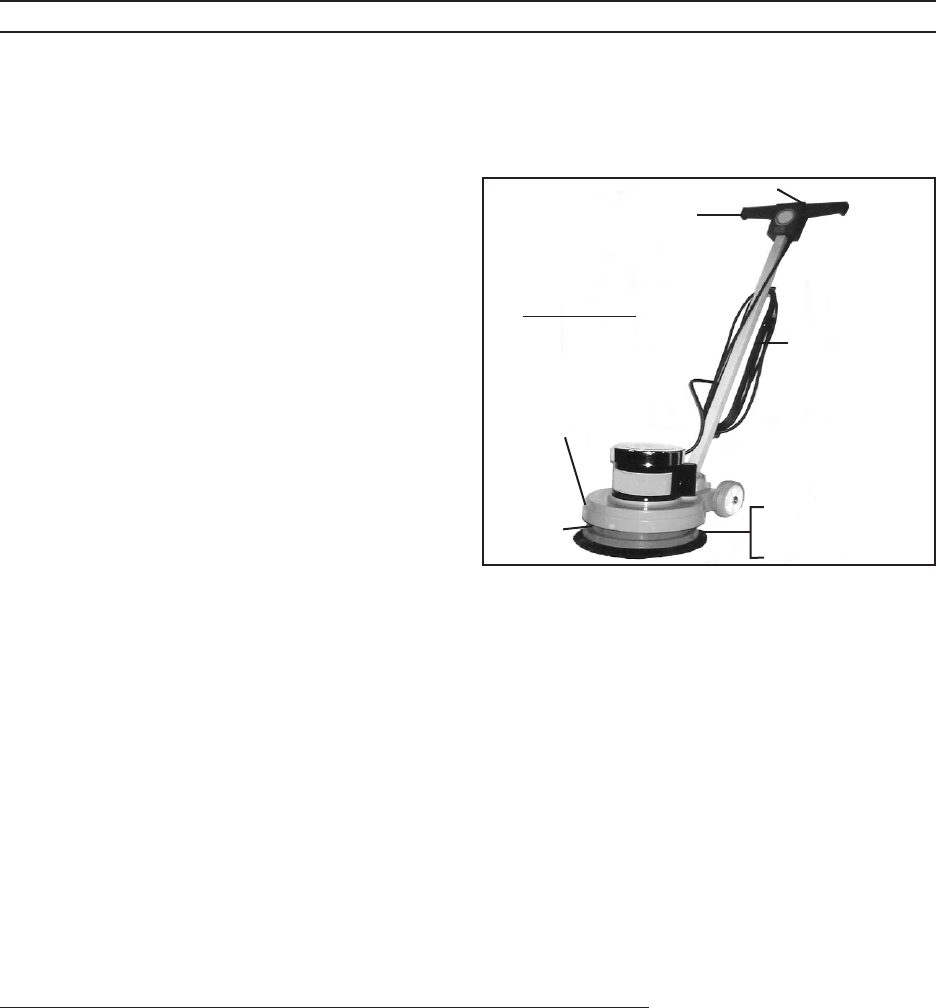
(See Figure E.)
Position the Carpet Brush (51), Floor
Brush (52), or Foam Pad (54) on the
floor surface. (See Figure E.)
Remove the Locking Pin (16) from the
holes in the bracket and place it in the
hole in the housing.
NOTE: Always start and stop the
Floor Machine while it is positioned
firmly against the surface of the floor.
Failure to do so may result in the Carpet Brush (51), Floor Brush (52), or Pad (54)
being thrown from the Brush Holder Pad (35). (See Figure E.)
Grip the Front Handle (26) firmly with both hands. Then turn the Power Switch
(29) to its “ON” position and allow the Brush Holder Pad (35) to orbit at full speed.
(See Figure E.)
Slowly move the Floor Machine in broad sweeping strokes in a criss-cross pattern
along the floor surface. Apply the floor cleaner/wax evenly over the surface of the
floor, and add additional floor cleaner/wax as needed.
After the floor cleaner/wax has been applied to the floor surface, turn the Power
Switch (29) to its “OFF” position. Then unplug the Power Cord (34A) from the 115
volt, grounded, electrical outlet. (See Figure E.)
To Remove The Carpet Brush, Floor Brush, Or Foam Pad:
Lay the Floor Machine on its back with its Front Handle (26) lying on the floor sur-
face. With both hands, pull out and remove the Carpet Brush (51), Floor Brush
(52), or Foam Pad (54).
1.
2.
3.
4.
5.
6.
7.
8.
CARPET BRUSH (51)
FLOOR BRUSH (52)
PAD (54)
POWER
CORD
(34A)
FRONT HANDLE (26)
POWER SWITCH (29)
BRUSH
HOLDER
PAD (35)
CHASSIS (1)
FIGURE E
CARPET BRUSH (51)
FLOOR BRUSH (52)
PAD (54)
POWER
CORD
(34A)
FRONT HANDLE (26)
POWER SWITCH (29)
BRUSH
HOLDER
PAD (35)
CHASSIS (1)
FIGURE E


