8
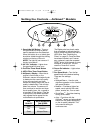
Setting the Controls – AirSmart
™
Models
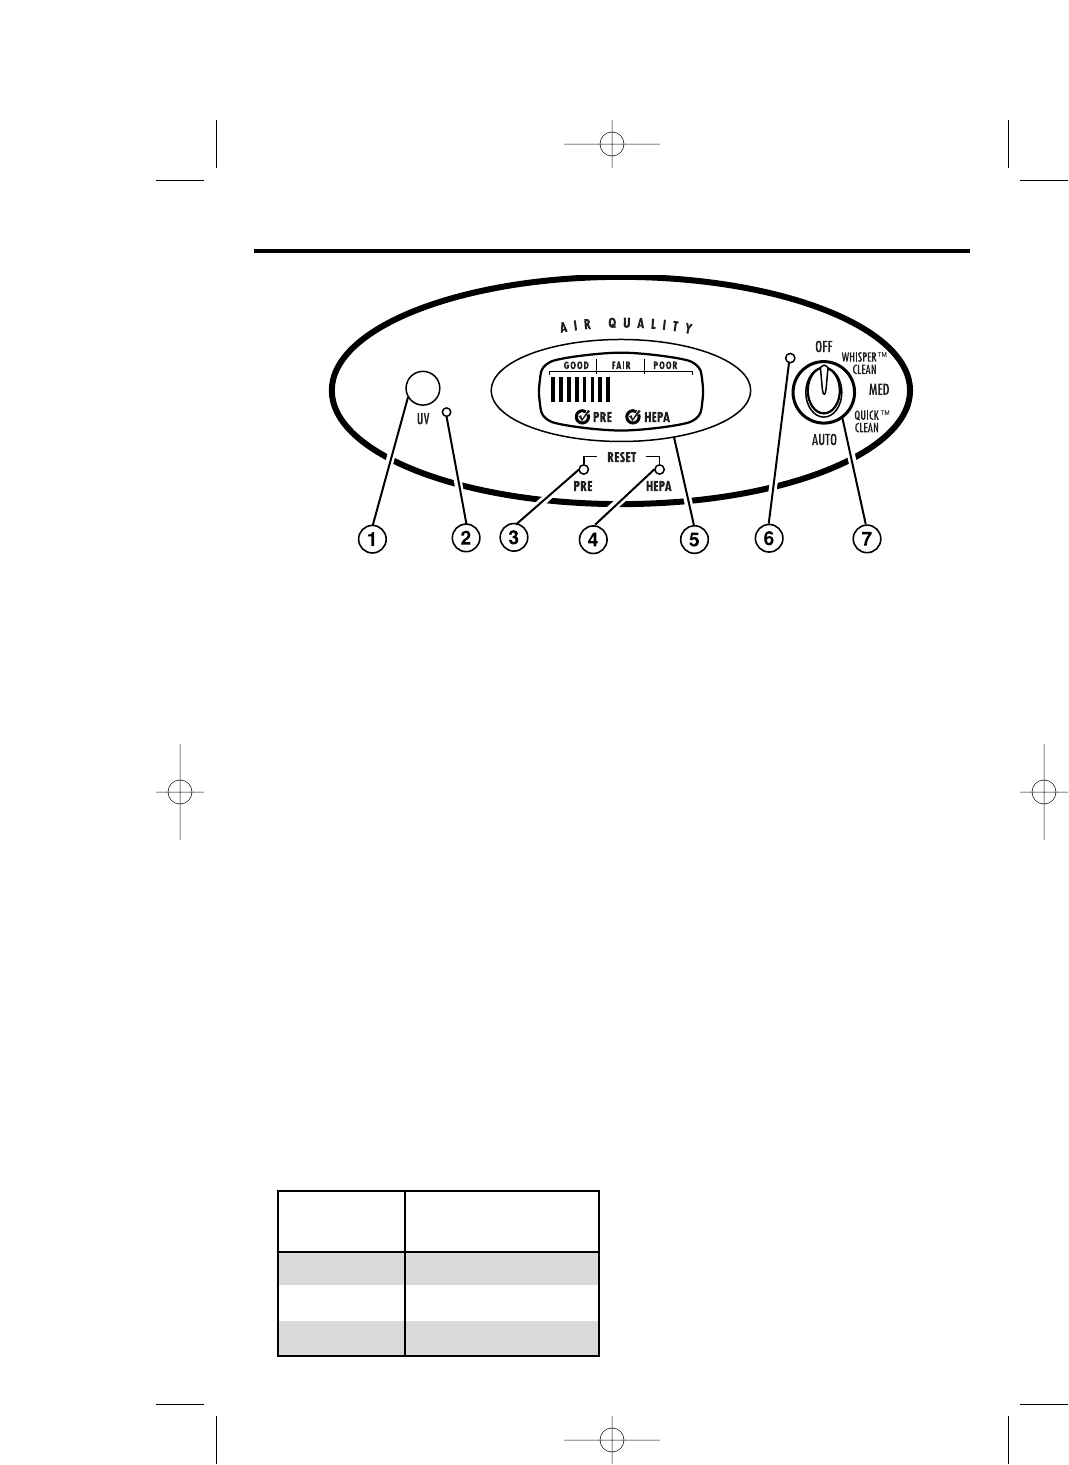
1. Germicidal UV Button – Turns on
the germicidal UV lamp to reduce
harmful bacteria from the filtered air.
When this button is on, a bluish glow
should be visible through the viewing
window on the top of the unit.
NOTE: The light will not come on if
the fan is turned off.
2. UV “On” Indicator – Lights when
the germicidal UV lamp is on.
3. Pre-Filter Timer Reset Button
4. HEPA Filter Timer Reset Button
5. AirSmart
™
Display – When the air
purifier is first turned on, the
AirSmart
™
sensor will analyze the air
to determine the current air quality.
A bar will move back and forth
across the display panel until the air
quality is determined. This will take
about one minute. The sensor will
then continue to monitor and show
the air quality (poor, fair, or good) in
a bar graph in the display. If the fan
is set to Auto, the sensor automati-
cally adjusts the fan speed for the
most effective air purification.
The Display also has check marks
that will appear to indicate that it is
time to check the carbon pre-filter or
HEPA filter. See “Checking the
Filters” on page 10. Once the filters
have been checked, and if neces-
sary, replaced, press the recessed
RESET button with the end of a pen,
toothpick, or small nail. This will
reset the “timer-like” control.
6. Power On Indicator – Lights when
unit is on.
7. Fan Speed Knob – Turn the fan
speed knob to the desired setting.
There are five settings:
• Off
• WhisperClean
™
– Use for quiet,
nighttime operation or for constant
low-speed filtration.
• Medium – Provides a higher fan
speed; use to quickly filter dust,
pollen, smoke, etc., from a room.
• QuickClean
™
– Provides cleaning
during acute needs.
• Auto – Functions with the
AirSmart
™
sensor and automatically
selects the fan speed depending
on the air quality detected. This
is the normal setting for
continuous use.
AIR
QUALITY
Poor
Fair
Good
AUTO SELECTED
FAN SPEED
QuickClean
™
Medium
WhisperClean
™
840129900 ENv02.qxd 11/1/04 11:01 AM Page 8


