


29
9.Installation check and trial operation
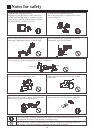
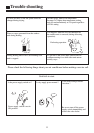
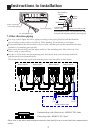
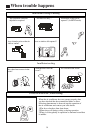
Check the Layout of the Drain Pipe and Connection Wires, and also the piping and address setting.
The drain pipe should be placed underneath, and the connection wires should be placed upside;
and the drain pipe especially the section inside the machine and indoors must be wound up with
insulating material to preserve heat. The drain pipe shall be sloped and no concave and convex
shall occur along the whole pipe. And the cases as the right figure indicates shall not occur.
10.Installation check
11.Trial operation
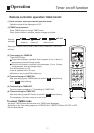
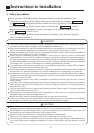
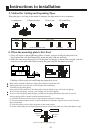
4. How to check the addresses?
When finish all the above works, please power off and power on again to the whole system but set all
the indoor units in STANDBY. Then continously press the emergency switch until you hear the buzzer
sound 5 times(Pi Pi Pi Pi Pi), and then the LCD display board will show the address of this indoor unit.
Press any key on the remote controller, it will exit the address checking precedure.
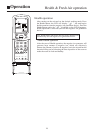
The person who has completed this installation shall be requested to conduct a test operation for check:
Is the temperature adjuster working normally?
Does the location for installation conform to requirements?
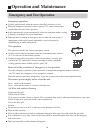
Winding up with Protective Plastic Tape.The connection pipes,drain pipe, and the connection wires shall
be wound up with PVC tape.
Notes: The connection pipes shall also be wound up with insulating material to preserve the temperature.
The airing direction shall be from bottom to top.
Is power supply voltage required?
Is water completely drained to outdoors?
Are power wire and connection wires between indoor and outdoor units correctly connected?
Is any gas leaked from the pipe connectors?
Are series numbers of the terminals on the indoor and outdoor units corresponding to each other?
Is the connection section of the auxiliary pipe insulated? Is the indoor unit fixed firmly?
Is noise big?
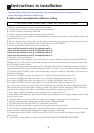
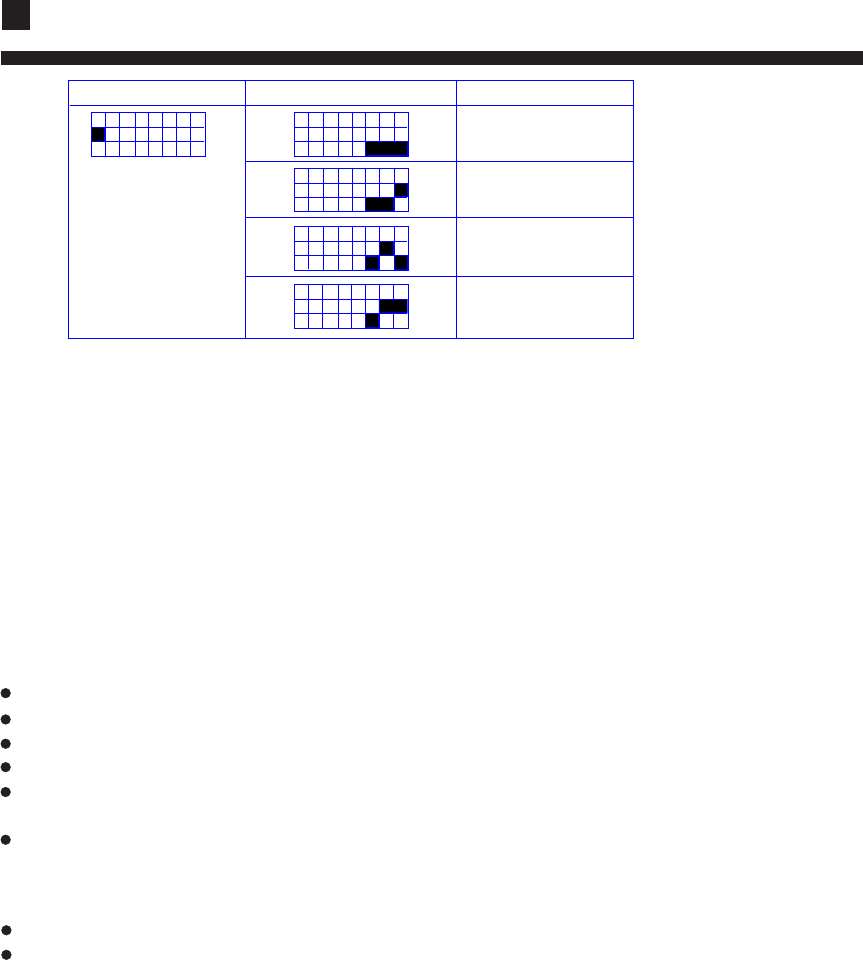
1 2 3 4 5 6 7 8
ON
OFF
SW01
SW02
INDOOR UNIT ADDRESS
1
2
3
4
1 2 3 4 5 6 7 8
ON
OFF
ON
OFF
1 2 3 4 5 6 7 8
ON
OFF
1 2 3 4 5 6 7 8
1 2 3 4 5 6 7 8
ON
OFF
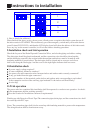
Instructions to installation