


© May 2003 Grizzly Industrial, Inc.529003622
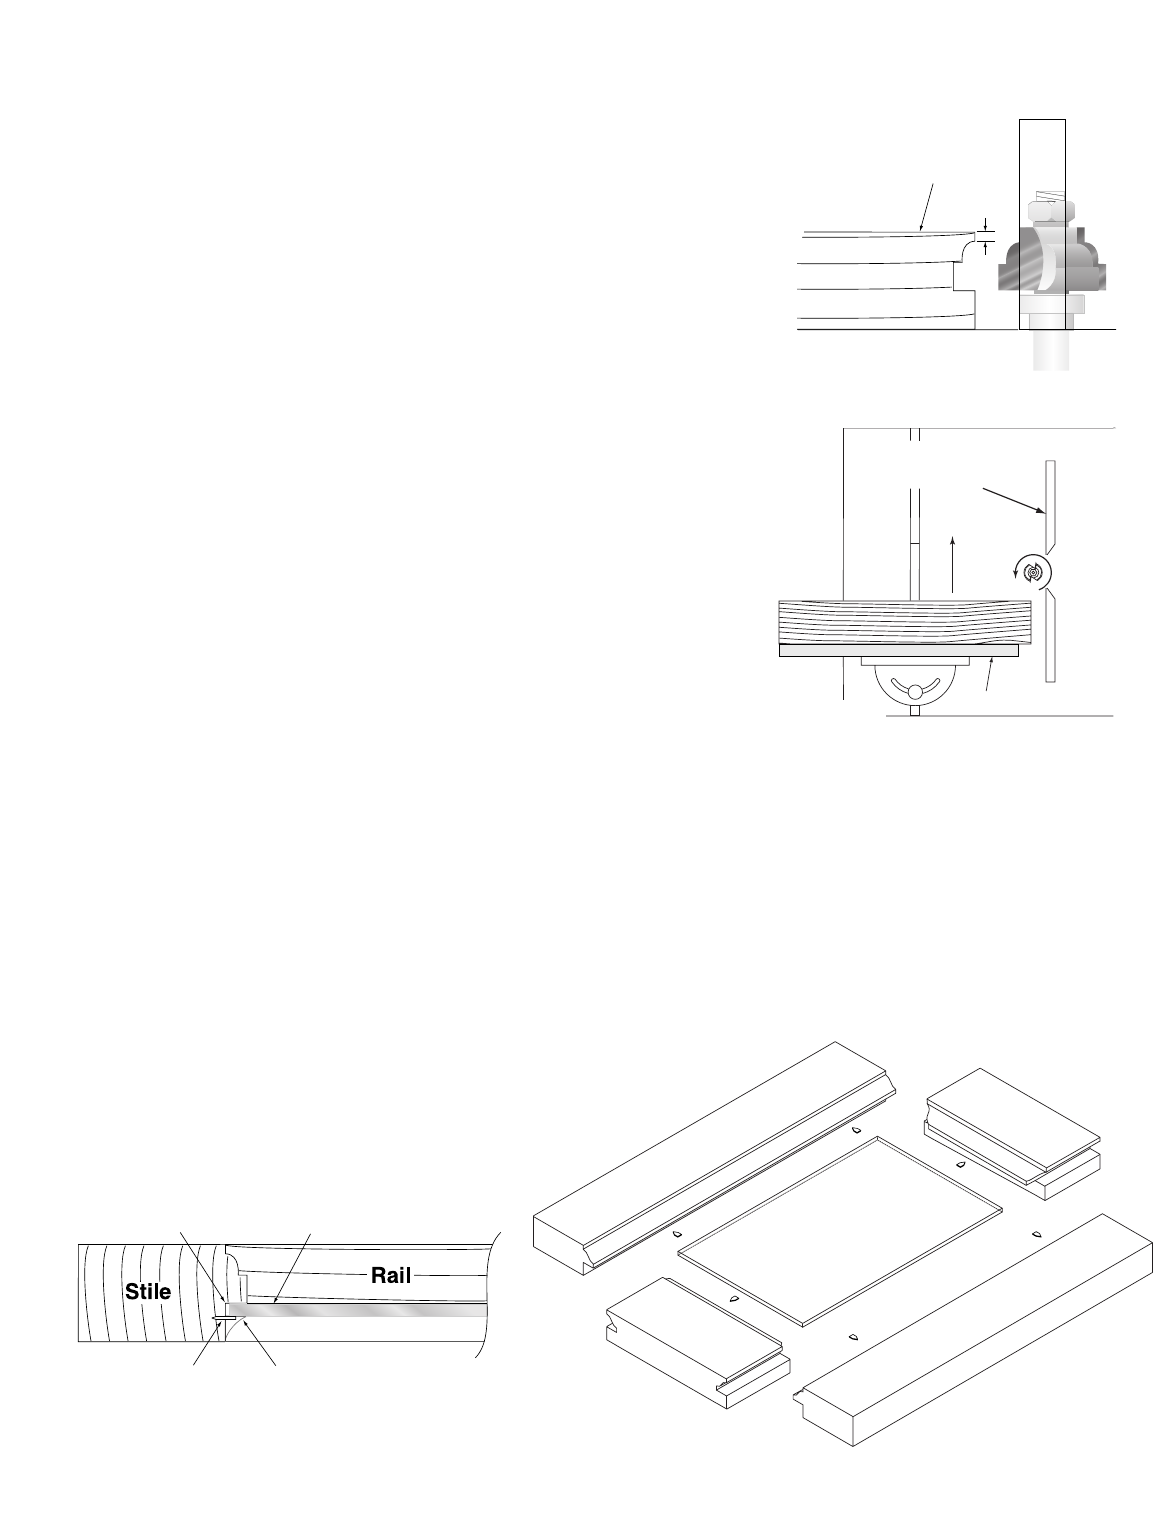
Putty
Glazer's
Point
Glass Pane
Gap
Step 2: Cutting Rail Ends
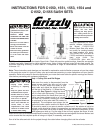
Unplug the router and change bits. Raise the router bit so the top of the bead is
1
⁄16" below the top of your stock as shown in Figure B. Make sure that the miter
gauge used passes closely enough to the router bit to give the workpiece
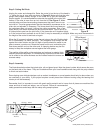
proper support. It is recommended an extension be applied to the miter with
screws, if the miter is more than an inch from the bit. See Figure C. Make
sure that miter and face have working clearance so they won’t come in con-
tact with bit. The miter gauge should also be checked for squareness to the
miter slot and adjusted, if necessary. The fence should be moved away so
the workpiece does not touch it during the cutting procedure. Run a test
piece which is the same thickness as your actual rail stock. Test fit the rail to
a finished stile to see how the joint looks. If the pieces do not fit together tightly,
or if the front and back surfaces do not fit flush, it may be necessary to readjust. Make very small movements in
the height of the router bit and test cut again.
When the fit is properly adjusted, make the end cuts on the rails. Double check
the fit occasionally, to insure accuracy. The workpiece must always be fed
against the cutter rotation and the full depth of profile should be made in one
pass to ensure a precise cut. Rotate the board end for end, maintaining the
face-down position and cut the other end. A clamping device may be nec-
essary to keep the workpiece secured against the miter gauge.
The position of the profile on the workpiece and variance in material thick-
ness will also affect alignment. It is therefore very important that test mate-
rial is milled to the same thickness as the finished material to ensure an
accurate setup.
Step 3: Assembly
The illustrations below show the typical style, rail and glass layout. Note the glazer’s points which secure the pane
on the back side of the frame. They can be obtained from your local hardware store along with the putty needed
to finish and seal window.
Doors having more intricate designs such as arched, tombstone or curved panels should only be done when you
are confident of your ability. If your project requires curved pieces then freehand routing using the bearing and
starter pin will be necessary.
Remember that it is important to work with good quality material and to insure that all pieces are machined the
same and that all ends and edges are cut square. Follow all recommended
safety procedures and always test the setup using sample pieces.
Router Table
Fence
1
⁄16''
Outer Side
Figure B
Miter
Extension
Fence Moved
Away from Cutter
Figure C