2 311777F
Pressure Relief Procedure
Follow this Pressure Relief Procedure whenever
you are instructed to relieve pressure, stop
spraying, check or service equipment or install or
clean spray tip.
1. Turn OFF power and turn sprayer pressure control to
lowest pressure setting.
2. Trigger gun into pail to relieve pressure.
Cleaning and Lubricating
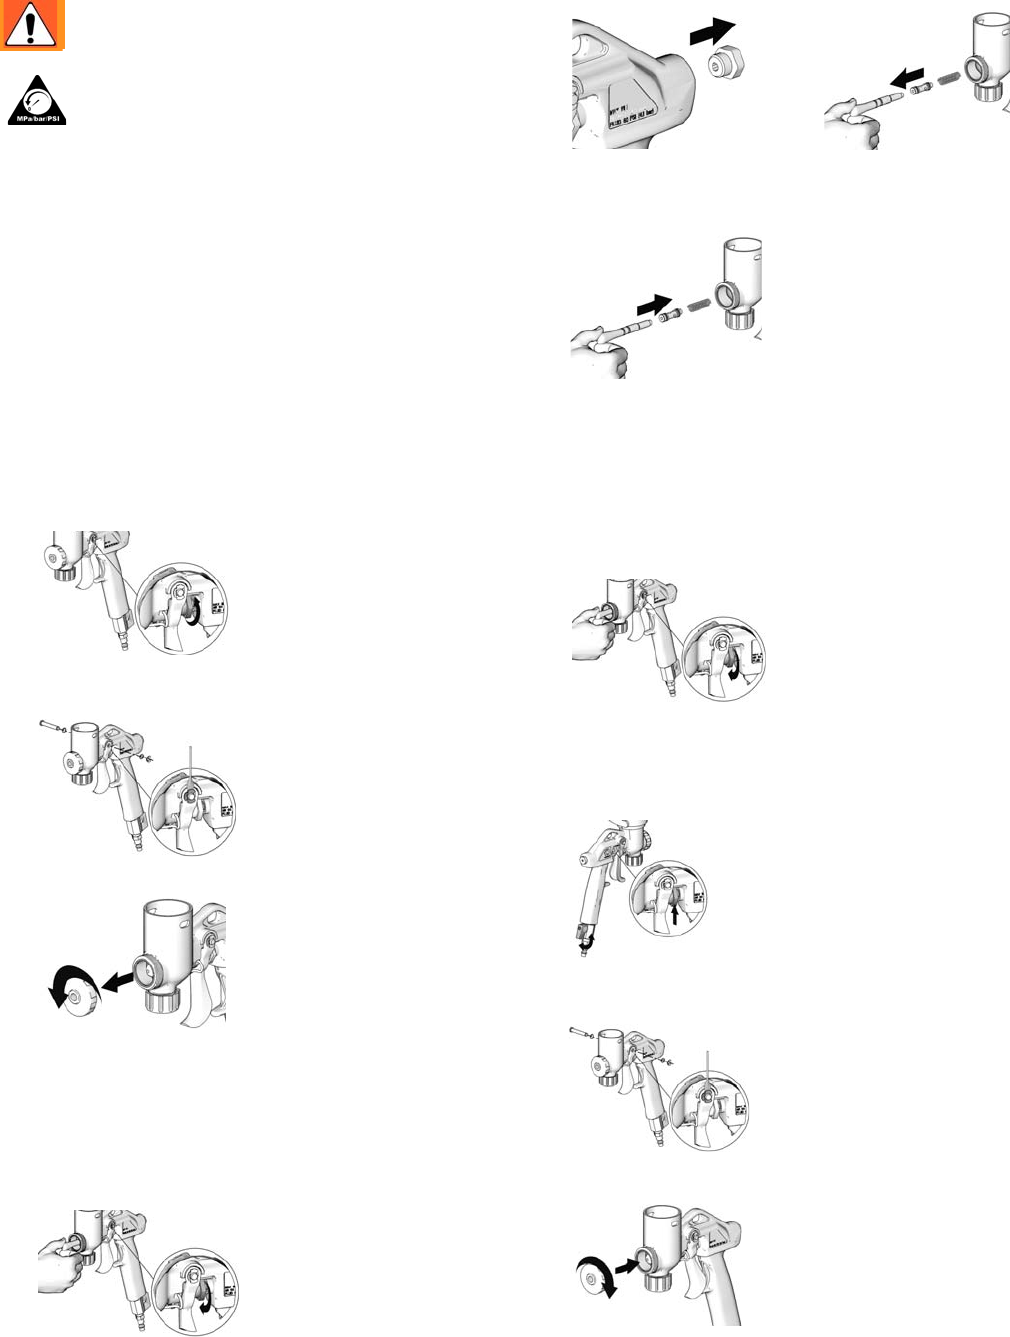
Disassemble needle assembly and clean and grease o-rings
regularly to prolong gun life.
Disassembly
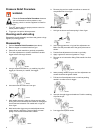
1. Perform Pressure Relief Procedure (see above).
2. Remove hopper or material hose from gun.
3. Clean off as much material on gun body as possible.
4. Turn flow adjustment nut counter-clockwise to enable
trigger to have full range of travel.
5. Using a small flat screwdriver, pry retaining ring off of
trigger pin. Remove pin, washer, and trigger.
6. Unscrew nozzle and remove it from gun.
7. Hold needle securely in place so it does not turn while
turning flow control clockwise until needle is disengaged
from thread and released. Pull needle and o-rings out
front of gun.
8. Hold hand under trigger area to catch adjustment nut,
spring retainer, and spring. Tap gun lightly to loosen
spring or use a small screwdriver to loosen.
9. Remove plug and use small screwdriver to remove all
components out front of gun.
Assembly
1. Hold gun as shown and insert spring in front of gun.
2. Insert spring guide with o-ring into flow adjustment nut.
Make sure the protruded end of the guide points out as
shown.
3. Position flow adjustment nut in seat on gun body.
4. Apply a generous amount of grease to o-rings.
5. Rest gun on air connection fitting. Slide needle into front
of gun.
6. While pushing needle into gun, turn flow adjustment nut
counter-clockwise to tighten needle.
7. Pull back on flow adjustment nut or continue pushing
needle in to make room for trigger.
8. Insert pin through trigger and washers. Push the retaining
clip onto the pin.
9. Pull trigger and replace nozzle.
WARNING
ti8539a
ti8530a
ti9273a
ti8538a
ti8807a
ti8806a
ti9271a
ti8538a
ti8532a
ti8530a
ti9272a


