


8) Inspect all parts for wear and replace as needed.
Note: The orientation of oil seal in seal case is: seal lips
face crankcase.
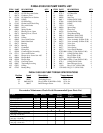
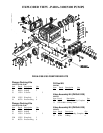
19 22 20 21 24 23(B) 25 24 23 23A
REPAIR INSTRUCTIONS - P420A-3100/5100 PUMPS
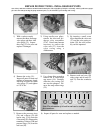
Note: Always take time to lubricate all metal and nonmetal parts with a light film of oil before reassembly. This step will ensure proper
fit, at the same time protecting the pump nonmetal parts (i.e., the elastomers) from cutting and scoring.
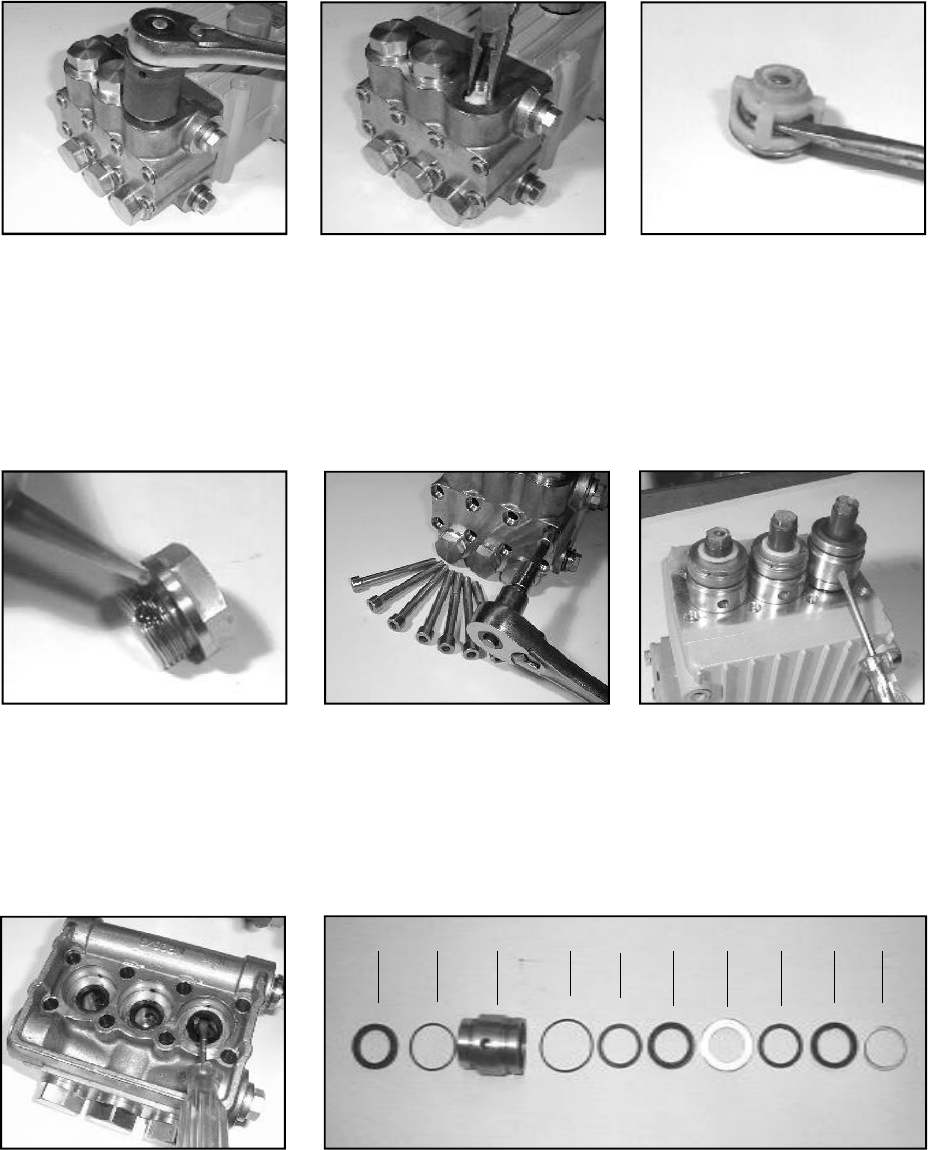
1) With a socket wrench,
remove the three discharge
valve plugs and three inlet
valve plugs (32). Inspect
the o-ring (33) for wear and
replace if damaged.
2) Using needle nose pliers,
remove the inlet and dis-
charge valve assemblies
(27A). Note: It may become
neccesary to remove the
valve seat (27) from the
valve casing using a
slidehammer.
3) By inserting a small screw
driver between the valve seat
(27) and the valve spring re-
tainer (30), the valve assem-
bly can be separated.
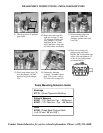
4) Remove the o-ring (31).
Inspect all parts for wear and
replace as necessary. Apply
one drop of loctite 243 to the
valve plugs (32) and tighten
to 125 ft. lbs.
5) Use a 8mm allen wrench to
remove the 8 socket head
cap screws (34). Carefully
slide the valve casing (26)
out over the plungers. Re-
move the weep return rings
(25).
6) Remove each seal case (20)
with o-rings and oil seals (21
and 22) from the crankcase
(1).
7) Remove the pressure rings
(24), and v-sleeves (23) and
spacer ring (23A) from the
valve casing (26). Remove the
remaining v-sleeves (23B) and
pressure rings (24) from the
seal case (20).