IMPORTANT
SAFEGUARDS
THIS LIGHTED MIRROR HAS A
POLARIZED PLUG (ONE BLADE IS
WIDER THAN THE OTHER). AS A
SAFETY FEATURE, THIS PLUG WILL
FIT IN A POLARIZED OUTLET ONLY
ONE WAY. IF THE PLUG DOES NOT FIT
FULLY IN THE OUTLET, REVERSE THE
PLUG. IF IT STILL DOES NOT FIT,
CONTACT A QUALIFIED ELECTRI-
CIAN. NEVER USE WITH AN EXTEN-
SION CORD UNLESS PLUG CAN BE
FULLY INSERTED. DO NOT ATTEMPT
TO DEFEAT THIS SAFETY FEATURE.
THIS APPLIANCE IS INTENDED FOR
HOUSEHOLD USE. WHEN USING
ELECTRICAL APPLIANCES, BASIC
SAFETY PRECAUTIONS SHOULD
ALWAYS BE FOLLOWED, INCLUDING
THE FOLLOWING:
WARNING-
To reduce the risk of burns,
electric shock, fire, or injury to persons:
1. Read all instructions before using the
appliance.
2. To protect against electrical hazards,
do not immerse in water or other liq-
uids. Do not use while bathing.
3. Close supervision is necessary when
any appliance is used by or near chil-
dren or by invalids.
4. Unplug the appliance from outlet
when not in use and before cleaning.
Do not leave appliance unattended
when it is plugged in. Keep cord away
from heated surfaces.
5. Do not operate this appliance with a
damaged cord or plug or if the appli-
ance malfunctions or has been dropped
or damaged in any manner. Return
appliance to the place of purchase for ex-
change. No repairs should be attempted
by the consumer.
6. Use appliance only for intended use
as described in this instruction book.
7. Do not use outdoors or operate
where aerosol (spray) products are
being used, or where oxygen is being
administered.
8. Be sure mirror is not in a position
where it can reflect sunlight; reflected
sunlight can cause fire.
9. Do not drop or insert any object into
any opening as this may cause an elec-
trical hazard.
10. Do not block openings. Do not use
on a soft surface such as a bed, where
openings may be blocked.
11. Use on any 120 volt 60 hertz AC elec-
tric outlet (ordinary house current). Do
not use on any other electrical outlet.
12. Unplug and allow to cool before
replacing bulb.
SAVE THESE
INSTRUCTIONS
OPERATING
INSTRUCTIONS
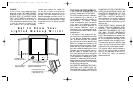
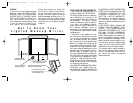
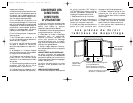
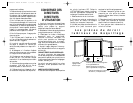
1. Your lighted makeup mirror will
adjust to 15 different angles. Simply tilt
the mirror housing back and place the
metal brace in the desired slot on the bar.
2. Take the plug and insert into any
standard wall outlet (120 Volt AC).
3. Now determine the appropriate light
setting for applying your makeup. Turn
the indicator knob to the setting. This
lighted mirror produces intimate light-
ing for shadow-free makeup applica-
tions. Choose either the regular or mag-
nified mirror for viewing.
4. After use, turn dial to “OFF” position,
unplug and store mirror in a safe
location.
SPECIAL FEATURES
This lighted makeup mirror uses incan-
descent light bulbs with special coating,
reproducing shadow-free lighting in
three different settings: home, office
and day.
This mirror has a courtesy outlet for
styling appliances, 12 amp max.
REPLACEMENT BULBS
Replacing the bulbs in your GE Lighted
Mirror is easy. Call 1-877-207-0923 for
instructions on ordering replacement
light bulbs. Then simply follow the
instructions below.
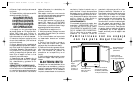
1. Unplug your Lighted Mirror.
2. Open the doors and look for the
thumb indentation in the middle of
each lens (the cover over the light bulbs).
3. With a coin or the tip of a screwdriver,
carefully lift up the lens.
4. Reach in and unscrew the used light
bulb and replace it with a light bulb of
the same color (blue bulbs on top, white
bulbs on the bottom).
5. Slide the lens back into position and
snap it closed (the snaps are located
on top and bottom of the lens).
6. Now you can plug your mirror back
in. It is ready for use.
MAINTENANCE
Your lighted mirror is designed for
household use, and is virtually mainte-
nance-free. No lubrication is needed. If
cleaning becomes necessary, disconnect
the appliance from the power source
and wipe exterior with a damp cloth.
Clean mirror surfaces with a glass clean-
er. If any abnormal condition occurs,
unplug the lighted mirror, allow it to
cool, and return it to the place of pur-
chase for exchange.
00GE26042 TM1GE IB MECH 1/17/01 11:05 AM Page 3


