9
Things to know about a WallMaster heat pump
Frosting of the indoor coil
Certain operating conditions may produce indoor coil frost. During
the cooling operation, a dirty filter or restricted air distribution in
combination with cool, damp weather could cause such an occurrence.
Should the indoor coil frost over while cooling, set the control to FAN
and keep it running until the frost on the coil is gone. Setting the
ther mo stat to a slightly warmer position will probably keep the coil
from frosting over again.
Cleaning the decorative front
The decorative front of your Friedrich room air conditioner, as well
as the complete cabinet, may be cleaned with warm water and mild
detergent. Under adverse operating conditions, the indoor and outdoor
coils and base pan may require periodic cleaning to maintain eficient
operation. Your Friedrich dealer should be called when this service
is required.
During the heat pump operation, you may notice some functions that
did not occur when the unit was used for c
ooling:
1. It is common for ice to form on the outdoor coil of your
WallMaster Heat Pump. The ice forms due to moisture in the
outdoor air passing over cold (below freezing) coil surfaces.
2. When the outdoor coil forms ice, your heat pump will
automatically initiate a defrost. The compressor will stop
and the fan will continue to run. The electric heat will be
turned on to continue warming the room while the outdoor
air defrost the outdoor coil. After the defrost is completed,
the unit will automatically return to the heat pump mode.
3. Steam may be seen rising from the outdoor coil during the
defrost
. This is similar to expelling warm breath on a cold
morning.
4. If the outdoor temperature drops below 43°F during heat
pump operation, your WallMaster Heat Pump will automati-
cally switch to electric resistance heat and will continue to
operate in this mode as long as the outdoor temperature
remains at 43º F or below.
Electrical Shock Hazard
WARNING
Disconnect power before servicing.
Replace all parts and panels before
operating.
Failure to do so can result in death or
electrical shock.
Installation instructions for
WSD sleeve
Wall preparation
STEP 1 The wall opening required for a WSD SLEEVE is 17 ¼"
high by 27 ¼" wide.
STEP 2 LINTELS must be used in opening of brick veneer and
masonry walls to support the material above the WSD
SLEEVE. The following considerations should also be given:
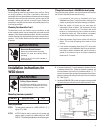
ITEM NO. DESCRIPTION QTY.
1 SCREW, #12A x 2" 7
Mounting hardware provided
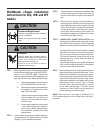
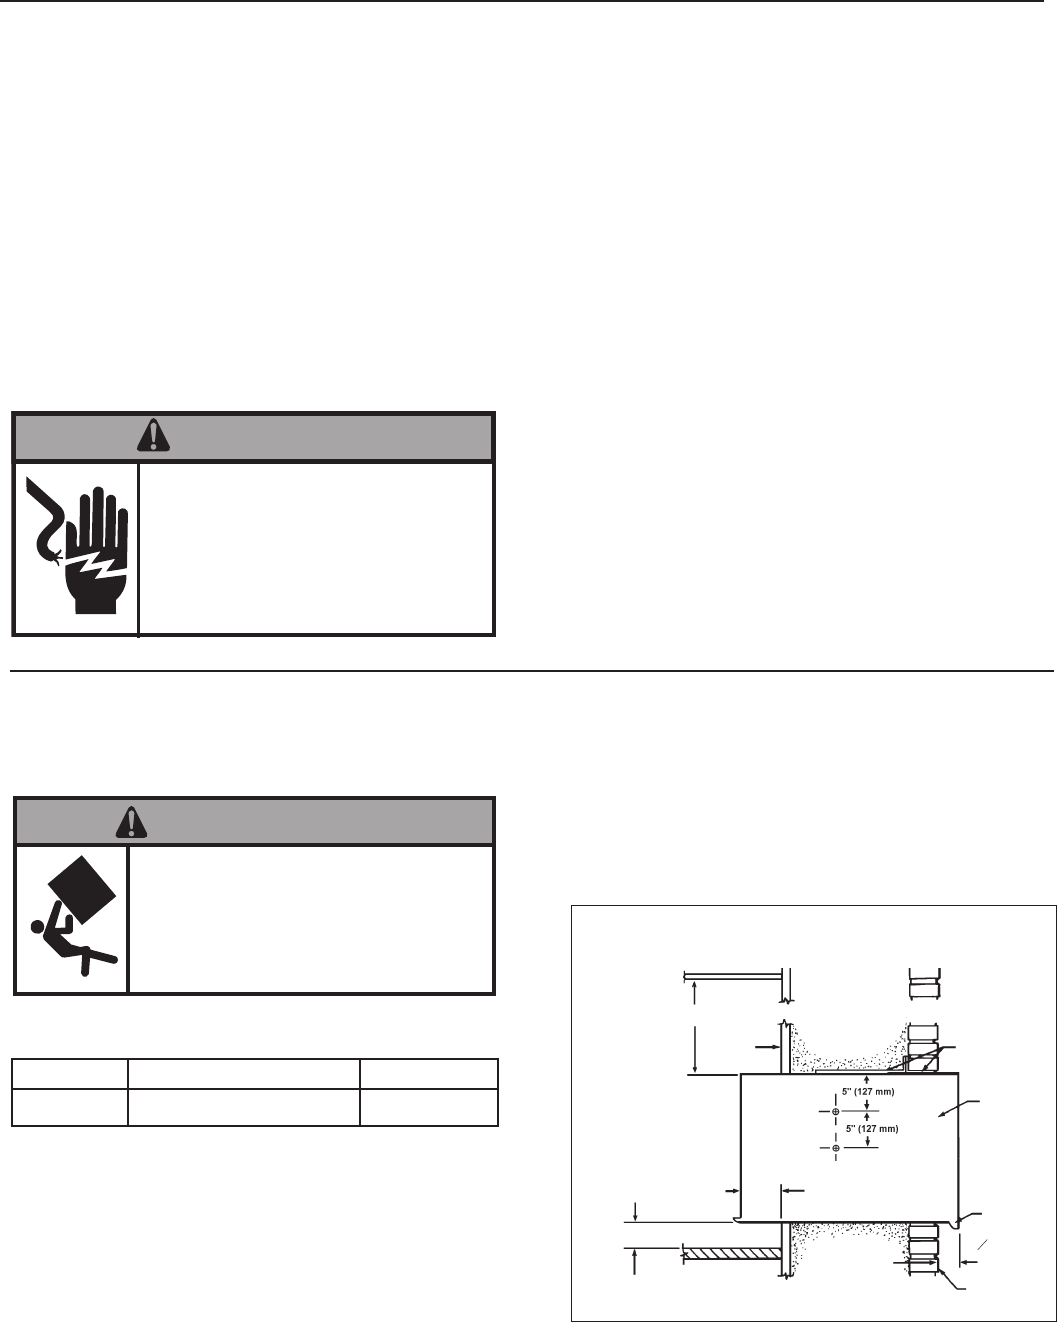
A. Adjustable SUBBASE (SB) or other unit support must be provided
for panel wall type construction and for walls less than 8" thick.
B. A minimum distance of 1" must be allowed on all sides of the unit
to adjacent wall and floor. Where the subbase is required, the
minimum distance from the floor to the sleeve must be 3 ½". To
minimize chances of short cycling of the compressor, the minimum
clearance between the ceiling and the top of the unit should be
24". (See Figure 7).
Falling Object Hazard
WARNING
Not following Installation Instructions for
mounting your air conditioner can result
in property damage, injury, or death.
Outside Wall
1" Minimum
3 ½" For Subbase
5 1/2" Maximum for Subbase
Inside
Wall
Minimum Of 1" Spacing
Required On All Sides
Of The Unit.
⅞" Minimum Beyond Inside
Wall
9
16
" Minimum
Beyond Outside
Wall
Drain
Extension
Minimum Of 24" Required
From Top Of Unit To Ceiling.
Lintels
WSD Sleeve
Figure 7
Side View


