


24
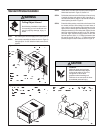
STEP 6. Inspect the unit before inserting it into the sleeve. The fan
VKRXOGEHPDQXDOO\URWDWHGWRLQVXUHWKDWWKH\WXUQIUHHO\%H
sure the electrical cord will be out of the way when inserting
the unit into the sleeve.
NOTE: )RU\RXUVDIHW\'2127SOXJWKHHOHFWULFDOFRUGLQWRDQHOHFWULFDO
outlet until installation is complete.
STEP 7. ,IWKHXQLWFKHFNVRXW2.LWLVUHDG\WREHSODFHGLQWRSRVLWLRQ
on bottom rails of the cabinet and pushed into place.
NOTE: 'RDOOOLIWLQJRIWKHXQLWE\WKHERWWRPSDQRQO\DQGZLWKDVVLVWDQFH
or help as necessary (See Figure 14).
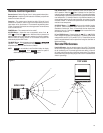
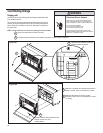
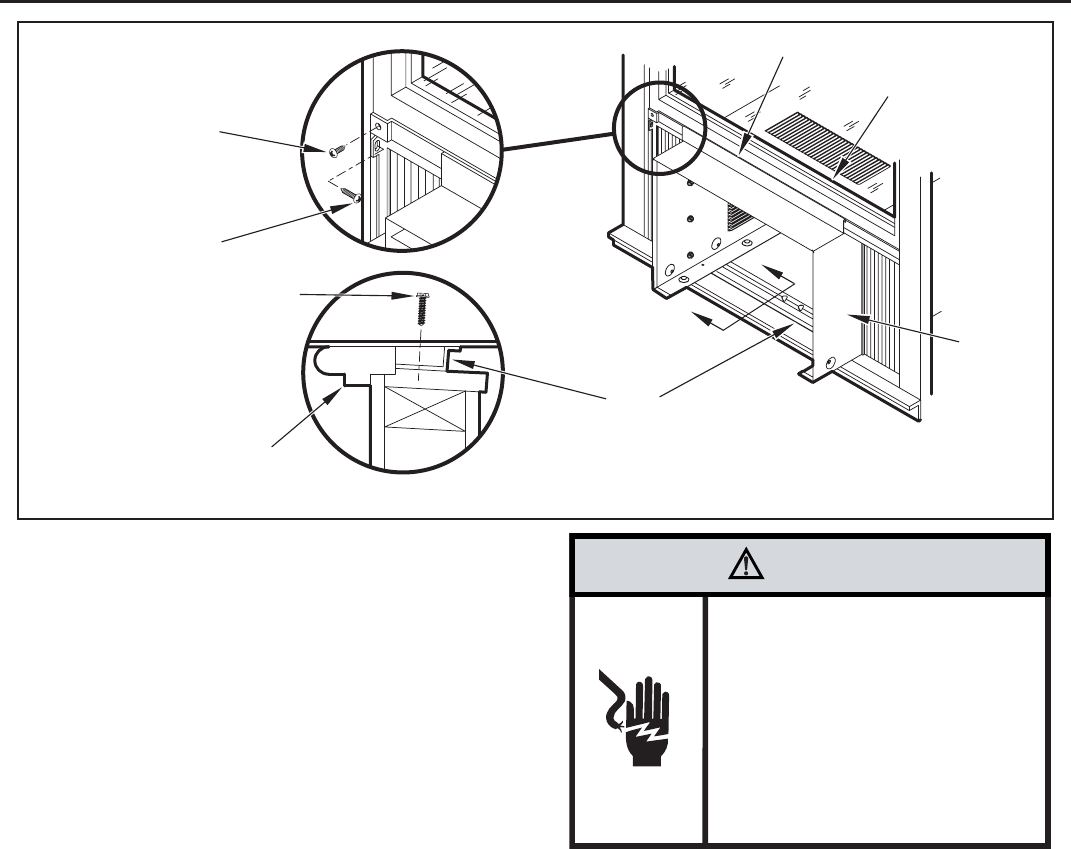
STEP 8. The chassis must be pulled out slightly, so that there is a gap
RIEHWZHHQWKHXQLWDQGVKHOO6HH)LJXUH
STEP 9. ,QVWDOOWKHZKLWHFKDVVLVVHDOJDVNHWLWHPSDJHDQG
WKHJUD\ZLQGRZVHDOJDVNHWLWHP&DUHIXOO\LQVHUWWKH
ZKLWHJDVNHWLWHPEHWZHHQWKHFKDVVLVDQGWKHFDELQHW
starting at either bottom corner and go up the side, across
the top and down the opposite side. Insert the gray gasket
LWHPEHWZHHQWKHZLQGRZVDVKHVDVVKRZQLQ)LJXUH
16. If chassis seal gasket is not installed, the operation of the
XQLWZLOOEHQHJDWLYHO\DIIHFWHG$OVRWKHRSHUDWLRQQRLVHDQG
RXWVLGHQRLVHZLOOEHDPSOL¿HG
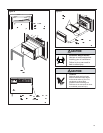
STEP 10. Hold the decorative front as shown in Figure 17. Insert the two
WDEVRIWKH'HFRUDWLYH)URQW3DQHOLQWRWKHVORWVLQWKHWRSRI
the cabinet and lower the bottom of the decorative front to the
ERWWRPRIWKHFDELQHW5RXWHWKHHOHFWULFDOFRUGWRWKHULJKWRU
left side of the bottom of the cabinet as required by the location
of the electrical wall outlet. Use the notches provided at the
ERWWRPRIWKH'HFRUDWLYH)URQW3DQHOIRUURXWLQJWKHHOHFWULFDO
FRUGRXWRIWKHXQLW$WWDFKWKHGHFRUDWLYHIURQWWRWKHFDELQHW
ZLWKWZR1R[ò3KLOOLSVKHDGVFUHZVLWHPSDJH
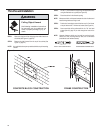
WARNING
Electrical Shock Hazard
Make sure your electrical receptacle has the
same configuration as your air conditioner’s
plug. If different, consult a Licensed Electrician.
Do not use plug adapters.
Do not use an extension cord.
Do not remove ground prong.
Always plug into a grounded 3 prong oulet.
Failure to follow these instructions can result in
death, fire, or electrical shock.
FRR087
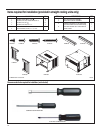
SCREW , 1/2” PHILLIPS HEAD
(SEE ILLUSTRATION,
ITEM #2, P AGE 22)
SCREW , 1 1/4” PHILLIPS HEAD
(SEE ILLUSTRATION,
ITEM #4, P AGE 22)
SCREW , #8 x 7/8” HEX HEAD
(SEE ILLUSTRATION,
ITEM #3, P AGE 22)
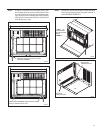
WINDOW STOOL
SHELL SUPPORT CHANNEL
WINDOW SASH
CABINET
SILL
CHANNEL
SECTION A-A
A
A
STEP 11. CIRCUIT PROTECTION - If the air conditioner is circuit
SURWHFWHGE\DIXVHXVHD7,0('(/$<IXVHRU+$&5W\SH
&LUFXLW%UHDNHUGXHWRPRPHQWDU\KLJKFXUUHQWGHPDQGZKHQ
\RXUDLUFRQGLWLRQHULVVWDUWHG%HIRUHRSHUDWLQJ\RXUXQLWYHULI\
the ampere rating of the time-delay fuse or circuit breaker
which protects your unit. The ampere rating of the time-delay
IXVHRUFLUFXLWEUHDNHUVKDOOEHDPSV5HIHUWR2SHUDWLRQ
section for more detailed operating instructions.
NOTE: 5HPRYHWDSHDQGYHULI\¿OWHULVLQWDFWDVSHU¿OWHULQVWUXFWLRQV
found inside door.
Figure 15