


5
Window installation
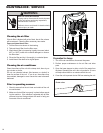
Maintain a clear distance (from walls, furniture, etc.)
of at least 10 inches around the unit to allow proper
air circulation and prevent damage to the unit.
Important: Do not over-stretch the exhaust tube or
make any unnecessary bends in it.
Installing the window adapter kit
Note: The window adapter kit must be installed and
connected for the air conditioner to work properly in
Cool mode. The window adapter kit is not required
when using the unit in Heat, Dehumidify, or Fan
modes.
Your window adapter kit has been designed to fit
most standard vertical and horizontal window
applications. However, it may be necessary for you to
improvise/modify some aspects of the installation
procedures for certain types of windows.
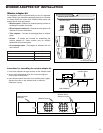
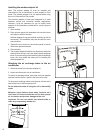
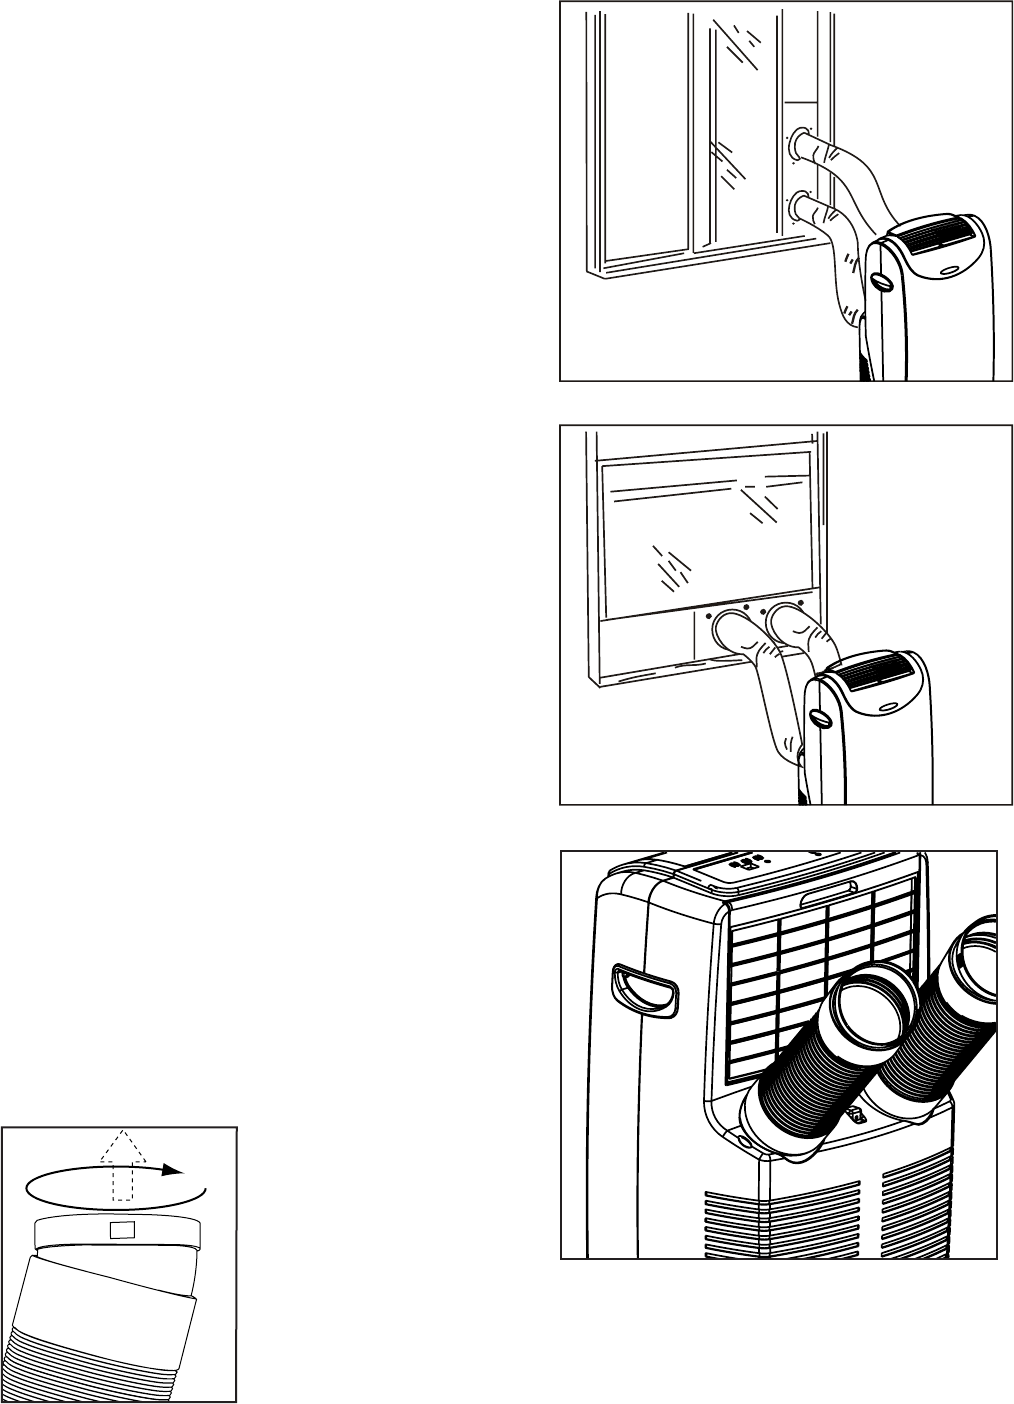
1. Open window. (fig.A)
2. Place window panel with extensions into window
frame and adjust to width of window. (fig.B)
Window adapter kit may be installed vertically as
well as horizontally. This installaton may also be
used for crank style windows. (fig.E)
3. Tighten the four screws on the window panel to
secure the window panel extensions.
4. Close window. (fig.C)
5. The window adapter kit should now fit securely
within the window frame and you can now attach
the air exchange tubes. If you are having trouble
attaching the air exchange tubes, you may attach
the tubes prior to installing the window adapter kit.
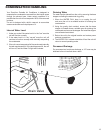
Attaching the air exchange tubes to the air
conditioner
1. Attach the tubes to the window adapter kit.
2. Attach the other end to the air conditioner.
To attach air exchange tubes: push tube onto tube
adapter and twist until the tab is in place in the hole
on the tube.
To remove air exchange tubes: twist the end until the
tab is clear of the hole in the tube and pull off.
Do not attach the tubes if using the unit in
dehumidify or heat mode.
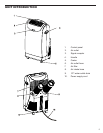
A
D
E
C
B
Vertical installation
7
8
9
Installing the window adapter kit
Note: The window adapter kit must be installed and
connected for the air conditioner to work properly in Cool
mode. The window adapter kit is not required when using
the unit in Dehumidify or Fan modes.
Your window adapter kit has been designed to t most
standard vertical and horizontal window applications.
However, it may be necessary for you to modify some
aspects of the installation procedures for certain types of
windows.
1. Open window.
2. Place window panel with extensions into window frame
and adjust to width of window.
Window adapter kit may be installed vertically as well as
horizontally. This installation may also be used for crank
style windows.
3. Tighten the four screws on the window panel to secure
the window panel extensions.
4. Close window.
5. The window adapter kit should now t securely within the
window frame and you can now attach the air exchange
tubes. If you are having trouble attaching the air exchange
tubes, you may attach the tubes prior to installing the
window adapter kit.
Attaching the air exchange tubes to the air
conditioner
1. Attach the tubes to the window adapter kit.
2. Attach the other end to the air conditioner.
To attach air exchange tubes: push tube onto tube adapter
and twist until the tab is in place in the hole on the tube.
To remove air exchange tubes: twist the end until the tab is
clear of the hole in the tube and pull off.
Do not attach the tubes if using the unit in dehumidify
mode.
Maintain a clear distance (from walls, furniture, etc.)
of at least 10 inches around the unit to allow proper
air circulation and prevent damage to the unit.
Important: Do not over-stretch the exhaust tube or
make any unnecessary bends in it.
12