Before getting started
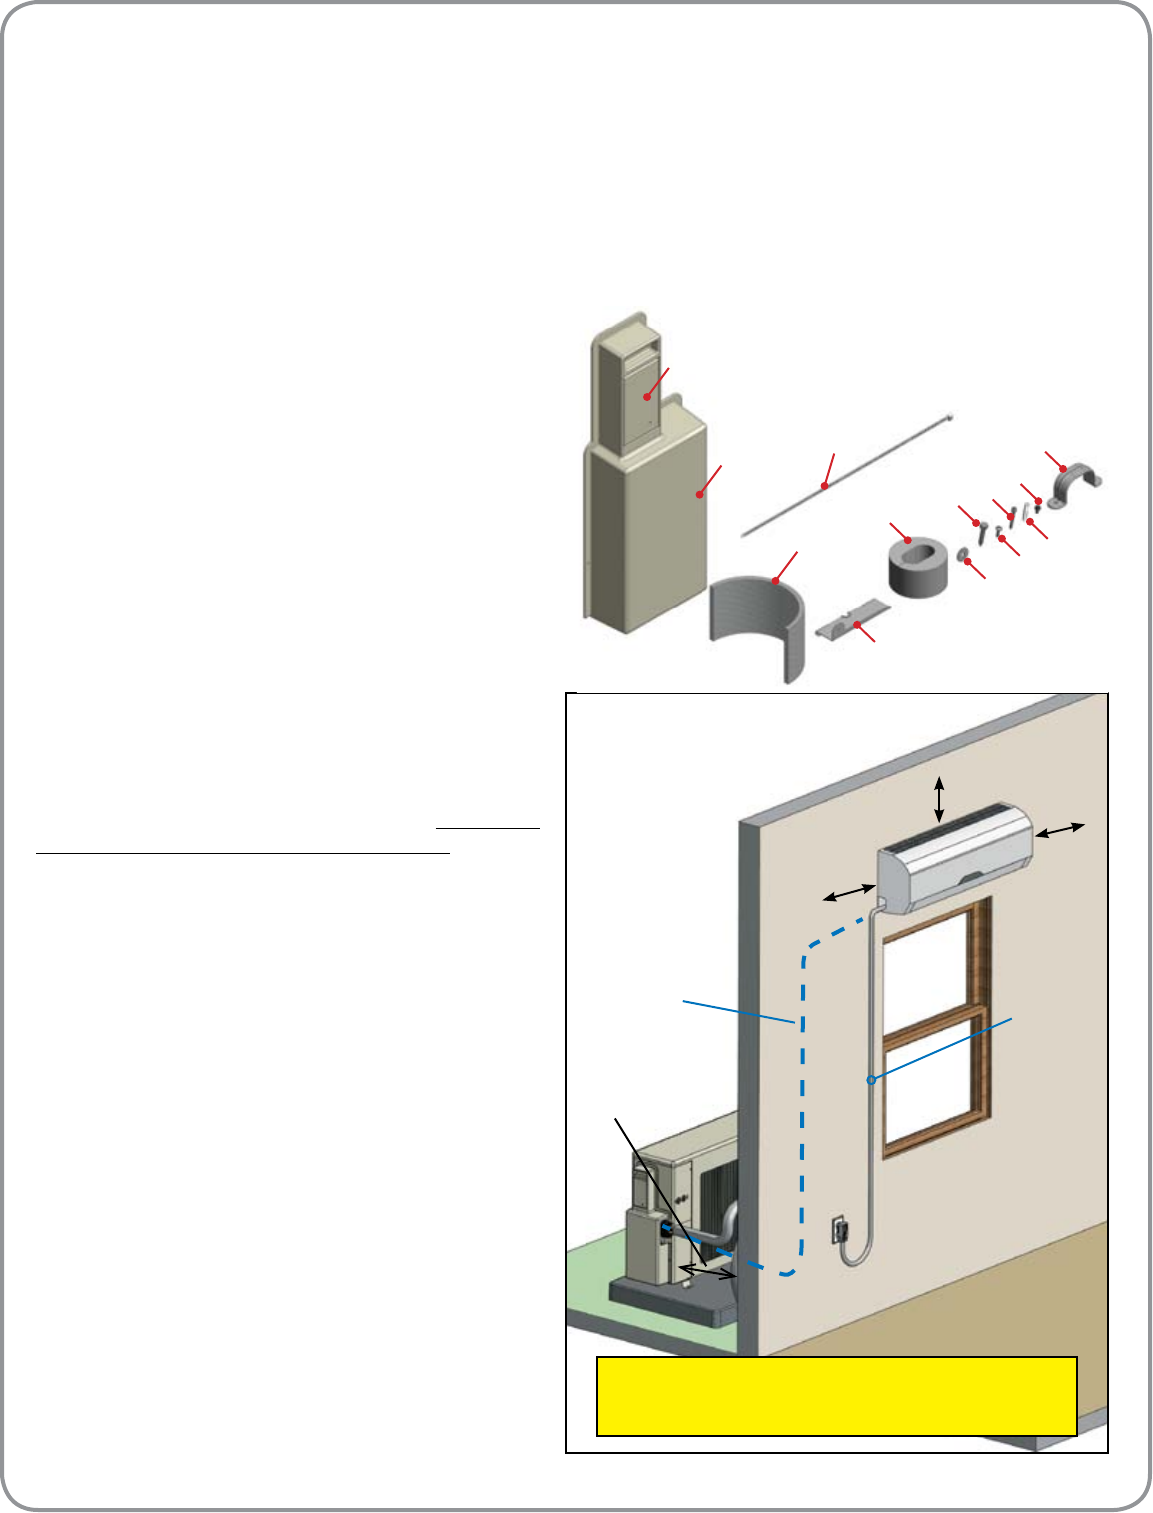
Identify the locations where you will mount the indoor
module and place the outdoor module. Keep in mind,
there is 25’ of connection line for connecting indoor and
outdoor pieces, so locate them accordingly. You cannot
add additional length if they are too far apart.
Placing the indoor unit
It is recommended that you install the indoor module on
an exterior wall within 6 feet of a properly rated outlet
for the system you are installing. The BR0412W1A plugs
into a 115V 15A outlet. The system should be plugged
into a single circuit outlet only. Typically, hanging the
indoor module above or adjacent to a window will
provide a great location. NOTE: You should not drill
through the window header (part of the rough framing)
located directly above the window opening.
Placing the outdoor unit
The outdoor module should be placed on a level surface
with adequate clearance from items like shrubbery,
solid fencing or other air conditioning equipment that
can impede airow to the module.
The outdoor module must be at least 12” from the wall
for proper airow. The mounting pad provided with the
system will raise the module off of the ground 3”. The
fan should face away from the building.
25 ft. max.
6 ft.
power
cord
NOTE:
Be sure to place your
equipment with these
limitations in mind.
25 ft.
connecting
line
6 ft. power
cord
DO NOT PLUG IN INDOOR UNIT until you have
completed the entire installation process.
12" minimum
clearance
6" minimum
clearance
6" min.
6" min.
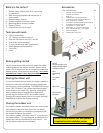
What’s in the carton?
1. Breeze indoor module with 25 ft. connecting
line attached
2. Wall mounting template and bracket for in-
door module
3. Breeze outdoor module
4. Outdoor module connection covers
5. Mounting pad for outdoor module
6. Remote control
7. Accessories (see list at right)
Tools you will need:
• Phillips screwdriver
• 1/2” wrench or crescent wrench
• Drill with Phillips bit and 3/16” drill bit
• Stud nder (recommended)
• 3” hole saw (through wall installations)
• Safety glasses (recommended)
• Trim knife
• Level
1.
2.
3.
4.
5.
7.
9.
11.
6.
8.
10.
13.
Accessories
ITEM DESCRIPTION QTY
1. CONTROL BOX COVER DOOR 1
2. CONTROL BOX COVER 1
3. WIRE TIE 2
4. CONNECTING LINE BENDING GUIDE 1
5. ELECTRICAL CORD RETENTION BRACKET 1
6. WALL OPENING FILL GASKET 1
7. OUTDOOR UNIT WASHER FOR ANCHOR SCREW 4
8. OUTDOOR UNIT ANCHOR SCREW 4
9. SCREW #8 X 3/4” TRUSS HEAD 6
10. SCREW #8 X 1 1/2” PHILLIPS PAN HEAD 15
11. WALL ANCHOR FOR #8 X 1 1/2” SCREW 15
12. SECURITY SCREW 1
13. CONNECTING LINE CLIPS 5
12.


