


4
WEEKLY TESTING
REGULAR MAINTENANCE
This unit has been designed to be as maintenance free as possible, but there
ar
e a few simple things you must do to keep it working properly.
Use only the replacement batteries listed below. The unit may not
operate pr
operly with other batteries. Never use rechargeable batteries
since they may not pr
ovide a constant charge.
•
Test it at least once a week.
•
Clean the Smoke Alarm at least once a month; gently vacuum off any
dust using your household vacuum’
s soft brush attachment, and test the
Smoke Alarm after cleaning. Never use water, cleaners or solvents since
they may damage the unit.
•
If the Smoke Alarm becomes contaminated by excessive dirt, dust and/or
grime, and cannot be cleaned to avoid unwanted alarms, replace the unit
immediately.
• Relocate the unit if it sounds frequent unwanted alarms. See “Locations to
Avoid For Smoke Alarms” for details.
•
When the battery becomes weak, the Smoke Alarm unit will “chirp”
appr
oximately once a minute (the low battery warning). This low battery
warning should last for up to 30 days, but you should replace the battery
immediately to continue your pr
otection.
Choosing a replacement battery:
Your Smoke Alarm requires 2 “AA” Energizer E91 batteries. These batteries
are available at many local retail stores.
Actual service life depends on the Smoke Alarm and the environment in which
it is installed. All the batteries specified above are acceptable replacement
batteries for this unit. Regar
dless of the manufacturer’s suggested battery life,
you MUST replace the battery immediately once the unit starts “chirping” (the
“low battery warning”).
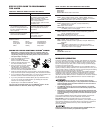
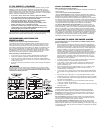
To replace the batteries (without removing Alarm from the ceiling
or wall):
1.
Open the battery compartment.
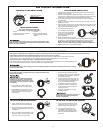
2. Press tabs A and B as shown in the
diagram and r
emove each battery.
3. Insert the new batteries, making sure
they snap completely into the battery
compartment. Match the terminals
on the ends of the batteries with the
terminals on the unit.
4. Close the battery compartment, and
then test the unit by pressing the
Test/Silence button.
•
NEVER use an open flame of any kind to test this unit. You might
accidentally damage or set fire to the unit or to your home. The
built-in test switch accurately tests the unit’
s operation as required
by Under
writers Laboratories, Inc. (UL).
•
If the Alarm ever fails to test properly, replace it immediately.
Pr
oducts under warranty may be returned to the manufacturer for
replacement. See “Limited Warranty” for details.
•
DO NOT stand close to the alarm when the horn is sounding.
Exposur
e at close range may be harmful to your hearing. When
testing, step away when horn starts sounding.
It is important to test this unit every week to make sure it is working
pr
operly.
Using the test button is the r
ecommended way to test this Smoke
Alarm. Pr
ess and hold the test button on the cover of the unit until the alarm
sounds (the unit may continue to alarm for a few seconds after you release
the button). If it does not alarm, make sur
e the unit is receiving power (LED
will flash appr
oximately once a minute indicating it has power); and test it
again. If it still does not alarm, replace it immediately. During testing you will
hear a loud, r
epeating horn pattern: 3 beeps, pause, 3 beeps, pause.
A
B
IF THIS SMOKE ALARM SOUNDS
RESPONDING TO AN ALARM
During an alarm, you will hear a loud, repeating horn pattern:
3 beeps, pause, 3 beeps, pause. The red LED will flash rapidly.
• If the unit alarms and you are not testing the unit, it is warning you
of a potentially dangerous situation that requires your immediate
attention. NEVER ignore any alarm. Ignoring the alarm may result in
injury or death.
• Never remove the batteries from a battery operated Smoke Alarm to
stop an unwanted alarm (caused by cooking smoke, etc.). Removing
batteries disables the alarm so it cannot sense smoke, and removes
your protection. Instead open a window or fan the smoke away from
the unit. The alarm will reset automatically.
• If the unit alarms get everyone out of the house immediately.
WHAT TO DO IN CASE OF FIRE
• Don’t panic; stay calm. Follow your family escape plan.
• Get out of the house as quickly as possible. Don’t stop to get dressed or
collect anything.
• Feel doors with the back of your hand before opening them. If a door is
cool, open it slowly
. Don’
t open a hot door. Keep doors and windows
closed, unless you must escape through them.
•
Cover your nose and mouth with a cloth (pr
eferably damp). T
ake short,
shallow breaths.
• Meet at your planned meeting place outside your home, and do a head
count to make sur
e everybody got out safely
.
• Call the Fire Department as soon as possible from outside. Give your
address, then your name.
•
Never go back inside a bur
ning building for any r
eason.
•
Contact your Fire Department for ideas on making your home safer.
Alar
ms have various limitations. See "Limitations of Smoke Alar
ms" for
details.
USING THE SILENCE FEATURE
The Silence Feature can temporarily quiet an unwanted alarm for up to
15 minutes. To use this feature, press the “Push to Test/Silence” button on the
cover. If the unit will not silence and no heavy smoke is present, or if it
stays in silence mode continuously, it should be replaced immediately.
The LED will continue to flash rapidly while in silence.
The Silence Feature does not disable the unit—it makes it temporarily
less sensitive to smoke. For your safety, if smoke around the unit is
dense enough to suggest a potentially dangerous situation, the unit will
stay in alarm or may re-alarm quickly. If you do not know the source of
the smoke, do not assume it is an unwanted alarm. Not responding to
an alarm can result in property loss, injury, or death.
SILENCING THE LOW BATTERY WARNING
This silence feature can temporarily quiet the low battery warning “chirp” for
up to 8 hours. You can silence the low battery warning “chirp” by pressing the
Test/Silence button on the alarm cover.
Once the low battery warning “chirp” silence feature is activated, the unit
continues to flash the Green light twice a minute for 8 hours. After 8 hours, the
low battery “chirp” will r
esume.
Replace the batteries as soon as possible;
this unit will not operate without battery power!
T
o deactivate this feature:
Pr
ess the Test/Silence button again. The unit will
go into Test Mode and the low battery warning will resume (LED flashes and
unit sounds “chirp” once a minute).
LATCHING FEATURES
Alarm Latch is activated after an Alarm is exposed to alarm levels of smoke.
After smoke levels drop below alarm levels, the “Smoke” Red LED will begin to
flash On for 2 seconds/Of
f for 2 seconds. It will continue to flash or “latch” for
about 15 minutes, to give you time to determine which unit initiated the alarm.
Low Batter
y Latch
is activated when the Alarm is in the "low battery condition".
When this occurs, the Power LED flashes Green On for 2 seconds/Off for 2
seconds for about 15 minutes. This feature is designed to help you identify
which Alarm needs to have the battery r
eplaced. Although, the Alarm will
sound the low battery chirp approximately once every minute, sometimes
during the initial stages of "low battery", the Alarm will chirp in greater intervals
than one minute, sometimes up to several hours, until the battery reaches a
steady low battery level. This innovative feature eliminates the frustration of
waiting for and/or identifying which unit is chirping.