8
3.2. Fastening the Heater on a Wall
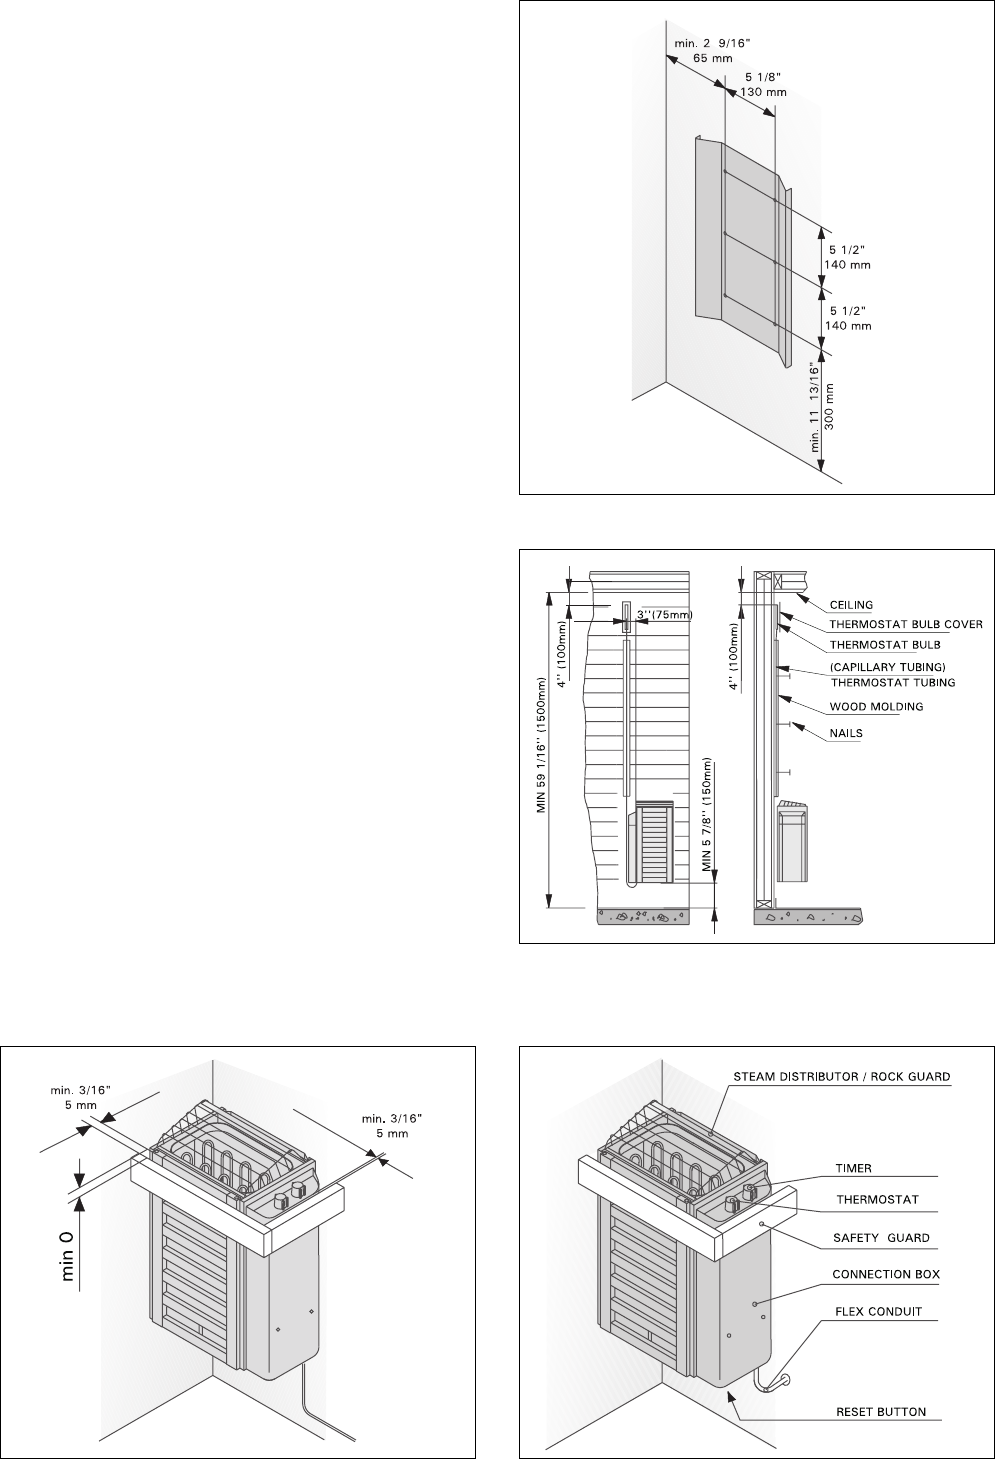
1. Fasten the wall-mounting rack on the wall byusing
the screws which come with the rack. Observe
the minimum safety distances given in table 1 and
fig. 5. The fastening of the mounting rack is shown
in figure 6.
NOTE! There should be a support, e.g. a board,
behind the panel, so that the fastening screws can
be screwed into a thicker wooden material than
the panel. If there are no boards behind the panel,
the boards can also be fastened on the panel. See
figure 4.
2. Lift the heater onto the rack on the wall so that the
connecting box switches are easily accessible.
3. The steam distributor / rock guard must always be
fastened on the wall side of the heater. To turn the
distributor / guard, loosen the fastening screw and
then turn it. See figure 9.
3.3. Installation capillary tubing and bulb
Before hooking up electrical wires to junction box of
heater, remove capillary tubing and bulb from
junction box and bring up wall to left or right side of
heater. Cover tubing with wooden molding provided,
coil up excess tubing, and place under heater close
to floor.
Be sure to cover thermostat bulb with protective
metal cover by threading bulb through holes in cover,
and fasten bulb cover to wall with screws provided.
Also, take care when nailing protective wood strips
over capillary tubing, so that nails do not puncture
tubing. If punctured, entire thermostat must be
replaced. See figure 7.
3.4. Safety Railing
If a safety railing is built around the heater, the
minimum distances given in fig. 8 must be observed.
Figure 6. Location of the mounting rack of
the heater
Figure 7. Installation of the thermostat sensor
Figure 9. Connections and parts of the heater
Figure 8. Safety railing of the heater


