


UK
- 2 -
Instructions for fitting pebbles
This model is provided with a pebble fuel effect, which is packed
separately in the carton. To fit follow the instructions given below.
The front panel will need to be removed in order to change the fuel bed.
Warning - The front panel should only be taken off once the
fire has been fully secured to the wall.
This should only be done when the appliance is switched off.
Warning - Take care handling the front panel as it can be easily
damaged.
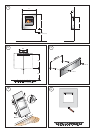
a. Remove the two screws which hold the front panel in place - see
Fig. 9.
b. While holding the front by its sides with both hands carefully tilt
forwards - see Fig. 9.
c. Then lift up and out - see Fig. 9
Place the front panel flat on a protective surface such as a matt with
the glass facing away from the floor.
Remove the (4) screws securing the log effect - see Fig. 10.
Lift the log effect up and out, taking care not to damage the logs as they
are fragile.
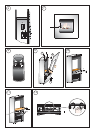
Fit the flat bed fuel effect ensuring that the bracket to the rear on the
fuel effect slots in between the fuel effect retaining bracket and the
rear glass - see ‘x’ in Fig. 11.
Remove the pebbles from the packaging and arrange on the fuel bed.
Refit the front panel ensuring that its base is held in place i.e. that it
slots into the channel on the frame, reversing the steps as outlined
previously.
Lamp Replacement
WARNING – ALWAYS DISCONNECT FROM THE POWER SUPPLY
BEFORE REMOVING LAMPS.
Warning - The lamps reach high temperatures during operation. For
this reason, allow the lamps to cool down after switching off the
appliance.
The front panel will need to be removed in order to change lamps.
Warning - Take care handling the front panel as it can be easily
damaged.
a. Remove the two screws which hold the front panel in place - see
Fig. 9.
b. While holding the front by its sides with both hands carefully tilt
forwards - see Fig. 9.
c. Then lift up and out - see Fig. 9
Place the front panel flat on a protective surface such as a matt with
the glass facing away from the floor.
Remove the (4) screws securing the log effect - see Fig. 10. Lift the
log effect up and out, taking care not to damage the logs as they are
fragile.
Remove the (2) screws securing the hinged cover - see Fig. 10. Tilt
the hinged cover (see ‘b’ in Fig. 11).
Remove the defective lamp by unscrewing it as shown in Fig. 12.
Replace with a 60W E14 SES Clear Candle bulb. Take care not to over-
tighten the lamp.
Steps for reassembling the heater
Refit the fuel effect ensuring that the bracket to the rear on the fuel
effect slots in between the fuel effect retaining bracket and the rear
glass - see ‘x’ in Fig. 11.
Refit the front panel ensuring that its base is held in place i.e. that it
slots into the channel on the frame, reversing the steps as outlined
previously.
Thermal Safety Cut-out
For your safety, this appliance has been fitted with thermal cut-out. In
the event that the product overheats, the cut-out switches the heat off
automatically.
To bring the heat back into operation, remove the cause of the
overheating, then unplug or turn off the electrical supply to the heater
for up to 10 minutes.
When the heater has cooled sufficiently, re-connect and switch on the
heater.
Caution: In order to avoid a hazard due to inadvertent resetting of the
thermal cut-out, this appliance must not be supplied through an external
switching device, such as a timer, or connected to a circuit that is
regularly switched on and off by the utility.
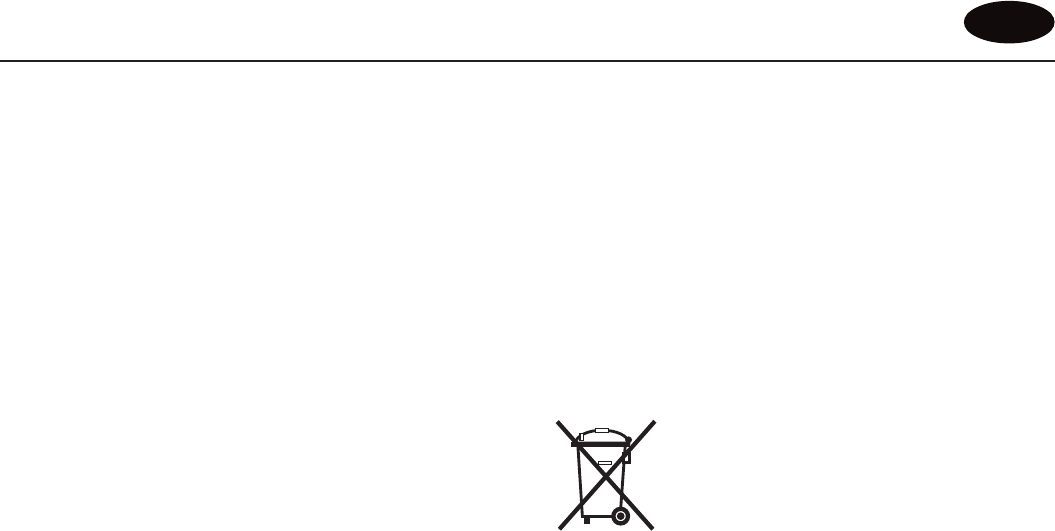
Recycling
For electrical products sold within the European
Community.
At the end of the electrical products useful life it should
not be disposed of with household waste. Please
recycle where facilities exist. Check with your Local
Authority or retailer for recycling advice in your country.
Cleaning
WARNING – ALWAYS DISCONNECT FROM THE POWER SUPPLY
BEFORE CLEANING THE HEATER.
For general cleaning use a soft clean duster – never use abrasive
cleaners. The glass viewing screen should be cleaned carefully with
a soft cloth. DO NOT use proprietary glass cleaners.
After Sales Service
Should you require after sales service or should you need to purchase
any spares, please contact the retailer from whom the appliance was
purchased or contact the service number relevant to your country on
the warranty card.
Please do not return a faulty product to us in the first instance as this
may result in loss or damage and delay in providing you with a
satisfactory service.
Please retain your receipt as proof of purchase.